.
October 6, 2023
- The OpenCV MatchSpaces is based on comparing Hu-moments. Hu-moments are explained here.
- Hu used a vector of 7 moments, which are moments relative to the center (to make them invariant). The 7 moments are combinations of the mean, variance and skew. The kurtosis (4th moment) is not even needed. For instance, Hu's 4th moment is the combination M4 = (μ30 + μ12)2 + (μ21 + μ03)2.
- Ming-Kuei Hu 's original paper is Visual pattern recognition by moment invariants (1962).
- Ming-Kuei Hu calls his first 6-moments absolute orthogonal invariants and the 7th-moment the skew orthogonal invariant. The 7th moment is useful for distinguishing mirror images. The first moment distinguishes the principal axes.
- Ming-Kuei demonstrated his discriminitive power on the capital letters from the alphabet.
-
- The last installation command in my PowerShell fails. In principal tflite-runtime should be installable, but probably I need a newer version of Python. Checking which version is used (i.e. which) can be done in PowerShell with get-command python.
- According to this forum, I should install it from source or install the full package.
- Tried pip install tensorflow. That fails, but on the fact the permission of C:\Python39\Scripts. Changed the permission of the directory, but still had to create a copy of an executable and rename it to the *.exe it wanted to delete (with admin-permissions).
- Now import tensorflow as tf works. The example script fails on PiCamera2, but that is not strange on Windows.
- Replaced the PiCamera2-code with this example code.
- The code runs, but stays in an endless loop (not clear if that is due to the video-capture, or TensorFlow).
- Problem was the capture, forget to give the ID ('0') of the device. I get now a score from Tensorflow, but without an ID (no label-list is given as argument, but coco_labels.txt is available).
- With the argument --label .\coco_labels.txt I get a 'person score'
- Looking into this example code to display result.
- Followed the instructions from COCO API installation and installed pip install cython and pip install git+https://github.com/philferriere/cocoapi.git#subdirectory=PythonAPI.
- Yet, that doesn't help pip install object-detection does.
October 5, 2023
- The relation between FWHM and standard deviation is 2.35, according to wikipedia, which is a way to estimate sigma.
- The relation between FWTM and the standard deviation is 4.29, according to wikipedia, .
October 3, 2023
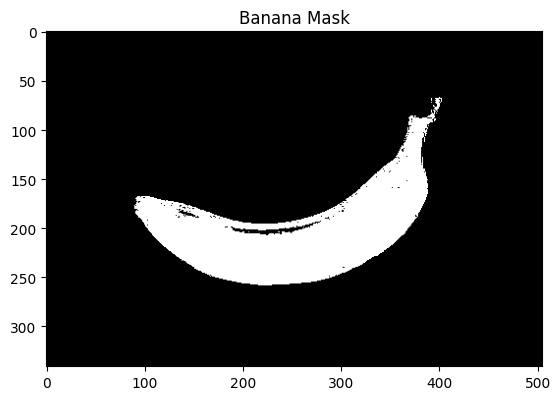
- Tested the banana notebook with mask_hist[ 200:250, 175:225] = 255 # banana
- Also the following code works to my supprise very good:
banana_max = 19
banana_dev = 1
banana_lb = np.array([banana_max - banana_dev ,30, 100], np.uint8)
banana_ub = np.array([banana_max + banana_dev, 255, 255], np.uint8)
- This is the result of such narrow band:
October 2, 2023
- For testing I used Powershell with the anaconda 2022.10 version installed for Behavior-Based Robotics. This environment is Python3.9 based, which corresponds with the python-version of the Raspberry Pi 3.
- The Anaconda download page points to 2023.09 versions, which are Python3.11 based. That is not the best choice.
- In the Anaconda archive the 2022.10 version for Windows, Linux, Mac are still available.
- Looked at Package list, seems that the 2023 versions also supports python3.9.
September 29, 2023
- Tried to make a 2d array with the hint from this blog, but np.array([[i, val] for i, val in enumerate(hist1_hue)]) gave array([[20, array([1911.], dtype=float32)]
- Yet, I don't like the object, I like the have the value. So arr_2d = np.array([[i, val[0]] for i, val in enumerate(hist1_hue)]) this gives what I want.
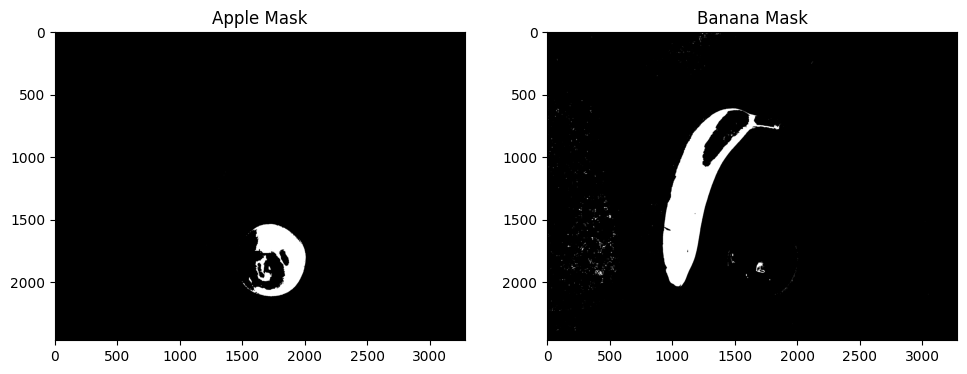
- Did a Gaussain fit on range [35:50], which gave H=42 +/- 4. The result is less, showing some false negatives on the apple highlights:
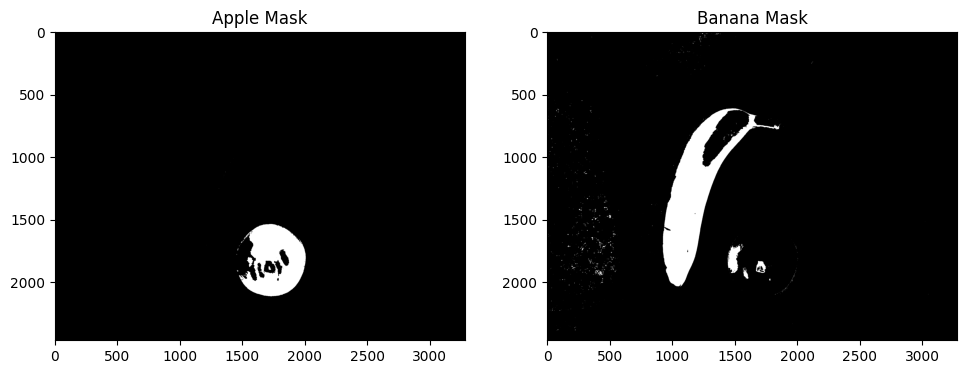
- Choosing the banana_ub (34) and the apple_lb (36) as close as possible to each other improved the result:
- Aggressive morphology (closing kernel of 66) gave usefull masks:
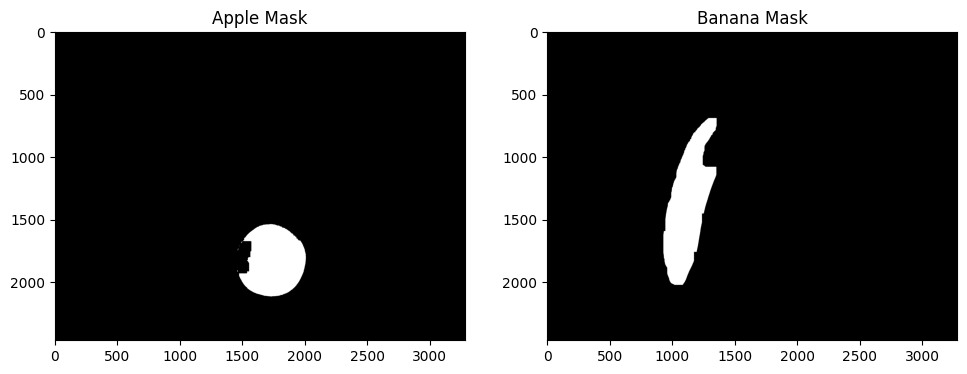
- Used this masks to look at the histograms. With np.where(hist1_hue == hist1_hue.max())[0][0] I see maxima at respectively H=28 and H=37.
September 28, 2023
- Bought a green apple, and made a new recording with the Raspberry Pi (on a slighlty lower altitude):
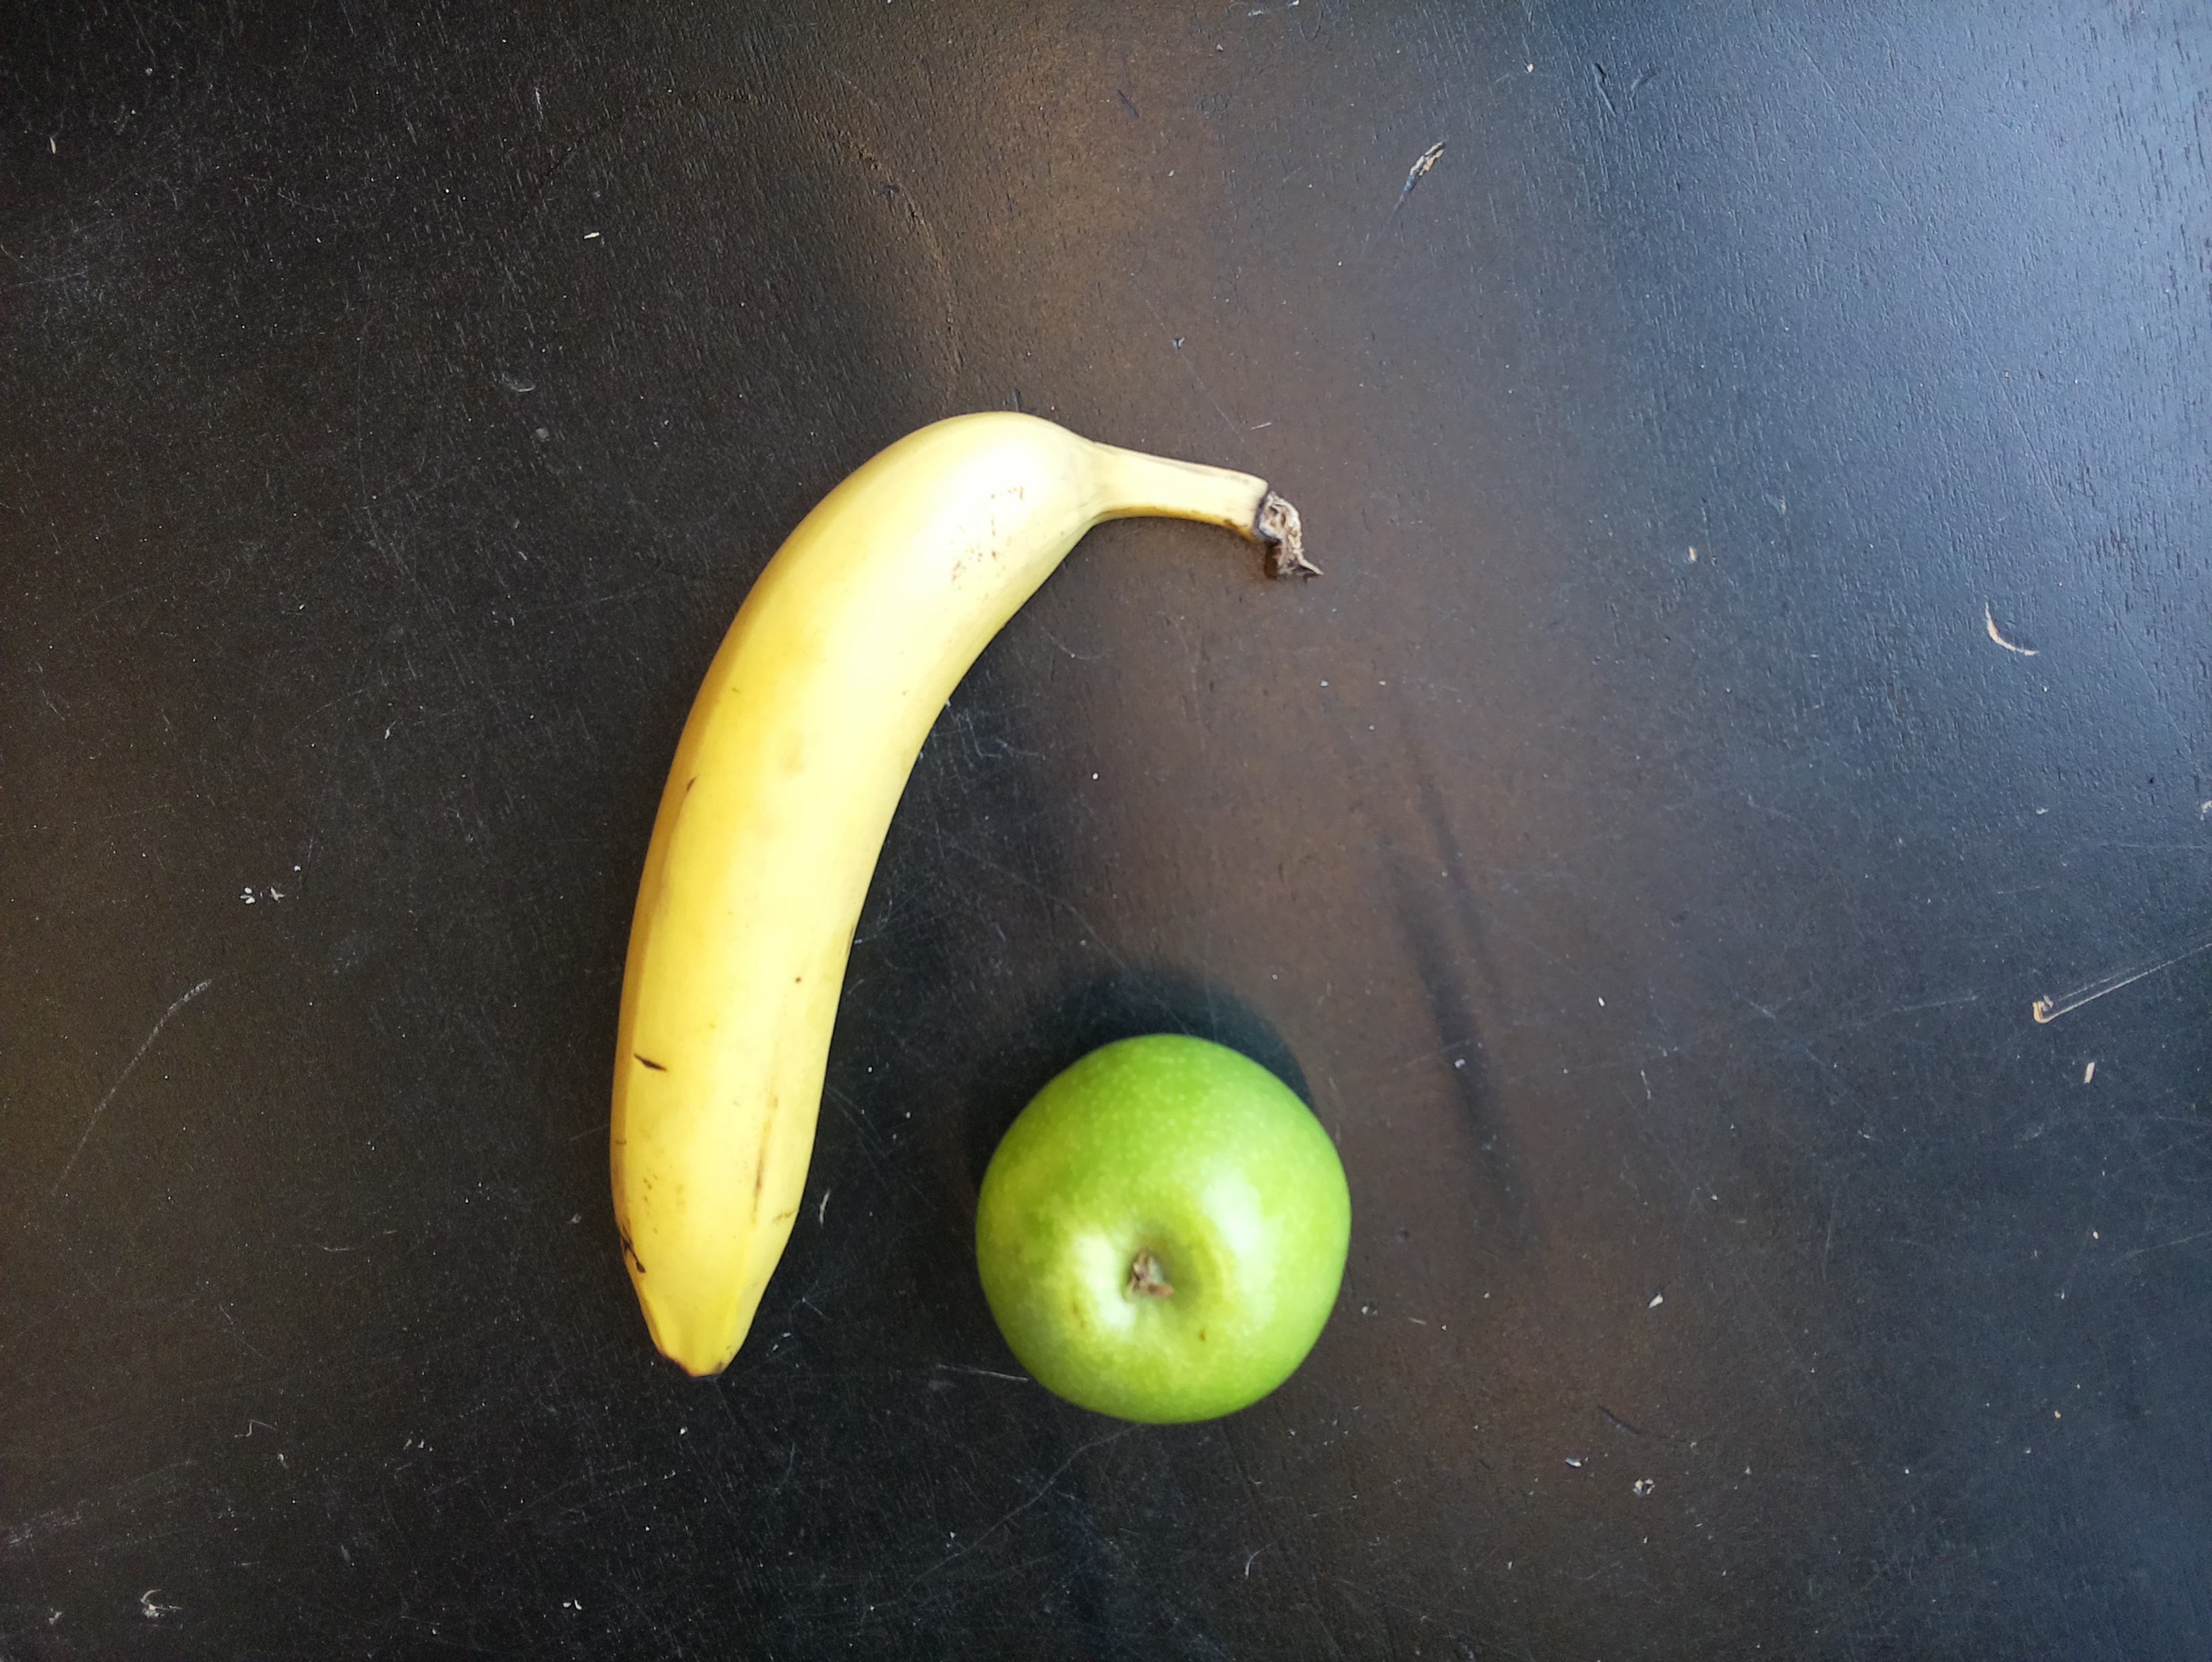
- Made three large blobs with thresholding the gray image.
- Tree clear peaks are visible. Looking if I could fit a Gaussian through it.
- The banana seems to have a peak around H=27 +/- 7.
- Sklearn could be installed by pip install scikit-learn.
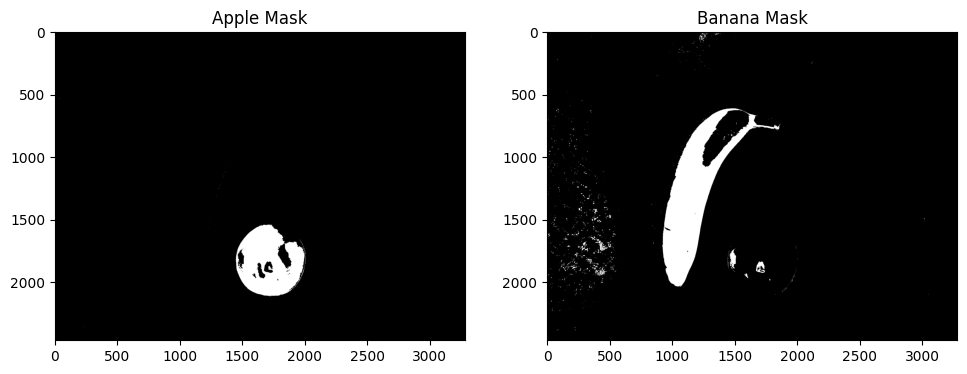
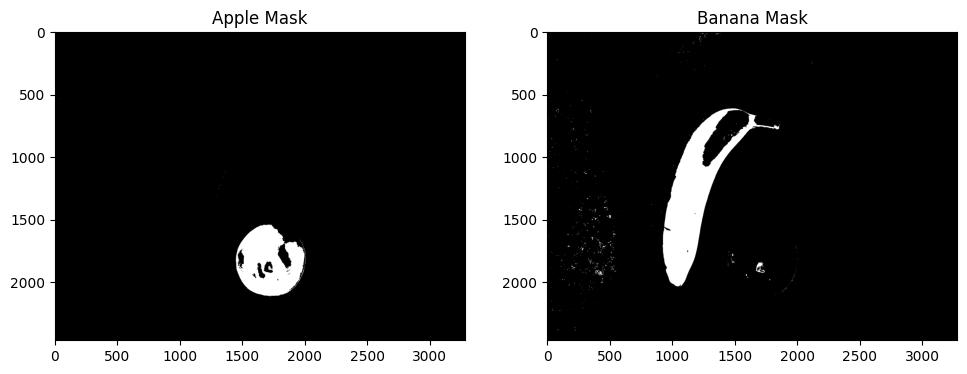
- Gaussian-fit gives a peak at 27.5, with a standard deviation of 4.6. With floor / ceiling this gives the following banana mask (hue-range 22:33):
- Gaussian-fit gives a peak at 27.5, with a standard deviation of 4.6. With rounding this gives the following banana mask (hue-range 23:32):
September 27, 2023
- Looked at the external contours that can be found in the fruit-mask. 794 contours have been found.
- There are only two contours larger than 10.000:
Contour #571 has area = 215207.0 and perimeter = 3361.433881521225
Contour #714 has area = 361643.5 and perimeter = 3881.5730525255203
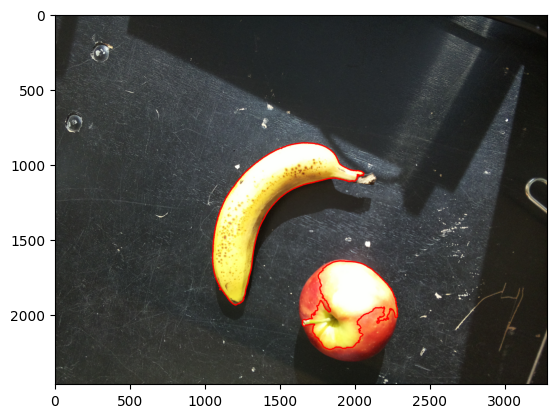
- The contour of the banana can be drawn with code cv2.drawContours(imageCopy3, contours[714-1], -1, (0,0,255), 8):
- The circle-fit is perfect for the apple, but in the contour tutorial no identification is given on the confidence of the fit.
- Best check is probably the distance between the center of the blob and the fit.
- Made the code, but the fit for the apple gives both a small distance between the blob-center and the fit, while for the banana the ellipse fit is an improvemet, but still far from perfect:
#apple
distance center blob vs circle 39.49011224450192
distance center blob vs ellipse 16.742538087122835
#banana
distance center blob vs circle 263.75742853045824
distance center blob vs ellipse 136.21935993155606
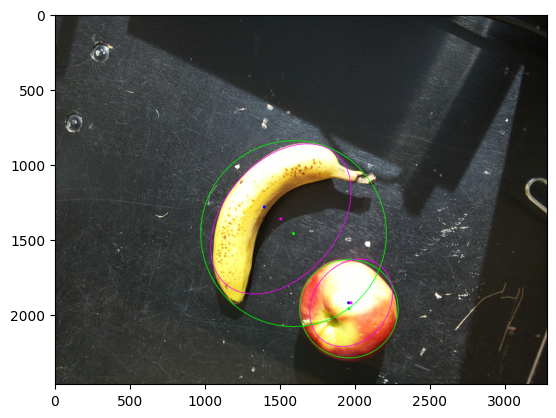
- Yet, opencv has two alternative fit methods.
- Both alternatives give the same answer.
- Looking at this shape matching tutorial.
- The convexity defects seem not very informative:
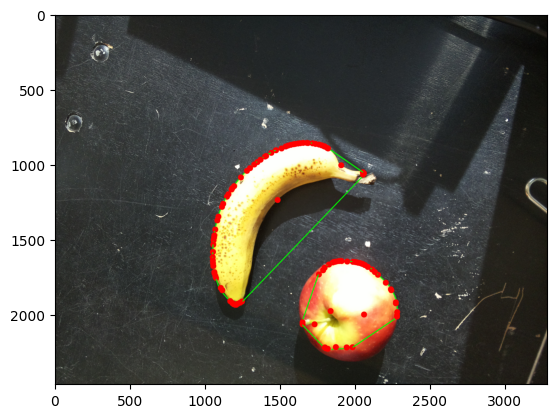
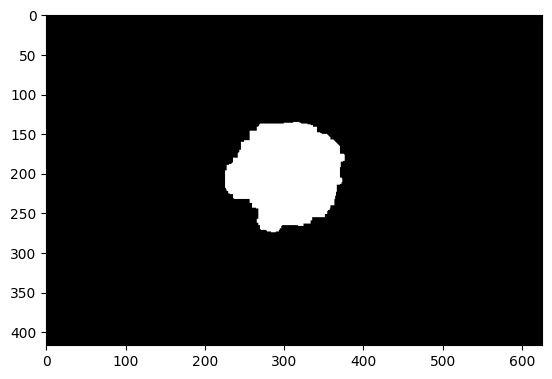
- Yet, the shape looks good. Looked up for a good picture of an apple on a black background. Selected this example.
- Did a opening/closing on the black apple (gray-threshold 66). Used a larger kernel (13x13) for the closing compared to the opening (5x5):
The fit with the apple is better than with the banana (although still quite high). No idea what scale does:
#apple
0.35512104517558396
#banana
2.0375153842372904
- Same code works fine for this example of a banana:
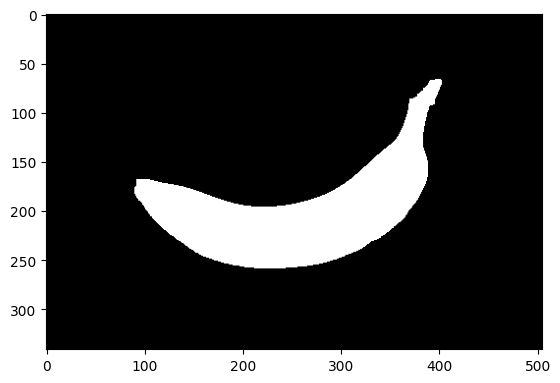
#apple
2.47650659962745
#banana
0.7116053046214532
- Used another green apple example. Actually, used here also an opening of 13x13. With a 5x5 kernel the stem is still visible:
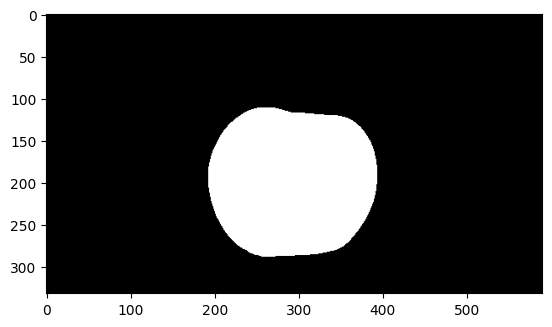
#apple
0.32177146757247227
#banana
2.0041658066341785
The values are nearly the same as before. Scale is also nearly the same.
- Also tried it with the example without opening/closing. Gives also good results:
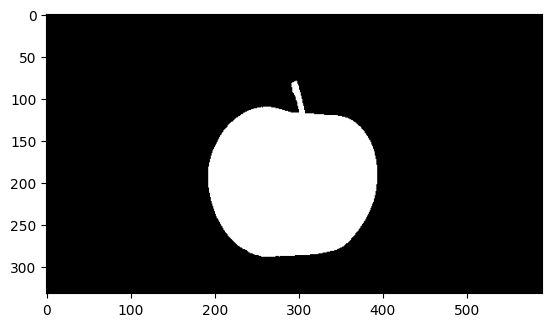
#apple
0.34965333443070906
#banana
2.0320476734924156
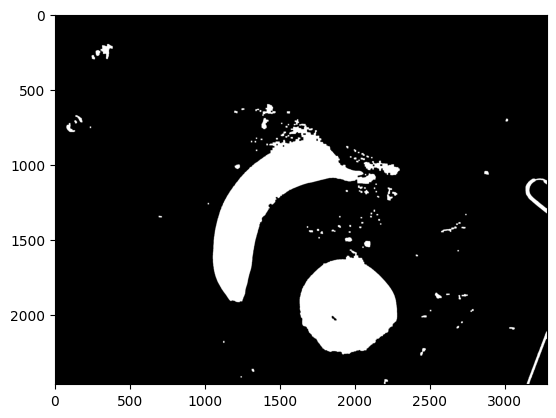
- Tried the gray-scale threshold (85) also on the original fruit recording. Did an opening with kernel 9x9, closing 13x13:
- Did a match on two examples. Difference is match is large enough to qualify:
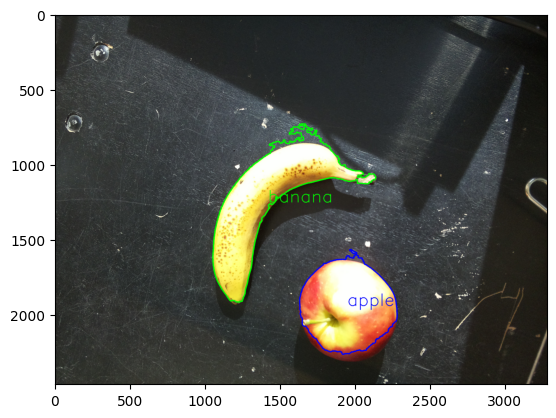
apple match: 0.09424952839824816 vs
banana match: 2.7129401394040364
apple match: 2.0918873995404463 vs
banana match: 0.6544336485543278
- Looked at RGB-spectra of the apple and banana:


- Also looked at HSV-spectra of the apple and banana:


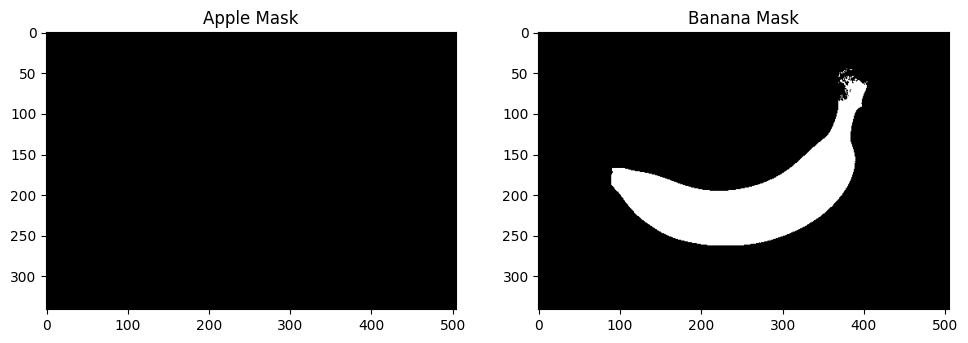
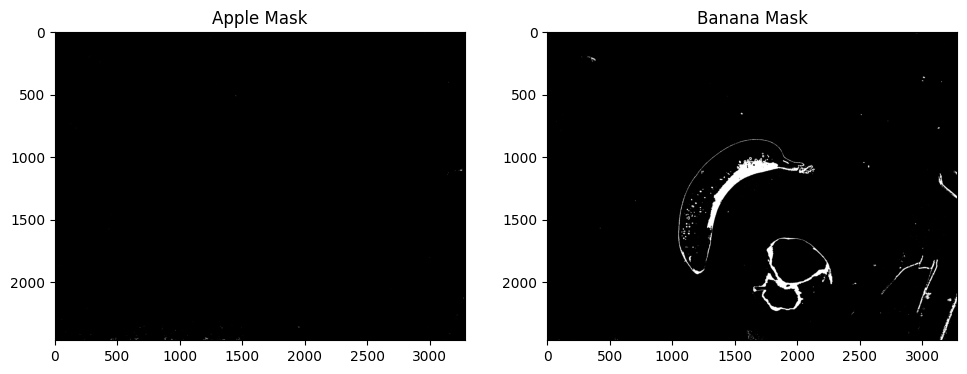
- This gives two clear peaks: at hue=19 +/- 4 and hue=38 +/- 4.
- Made a mask from both hue-ranges. That works perfect for the banana. The apple shows some false negatives at the highlights and a false positive on the stem. Yet, applied to the real fruit it fails (although I should record a green apple to be fair):

September 26, 2023
- Looked at the Hue spectrum. It will still be quite hard to distinguish the banana from the apple in this color-space:


- In principal the I expect to Hue to peek the banana around value 60 and the apple around value 40:

- So, the red channel above shows two clear small peaks, with maxima around 30 and 40. Yet, this is V-channel, not the Hue.
- Inspected the apple histogram, the peak is exact at V=30, with the next minimum at V=38.
- Inspected the banana histogram, the peak is exact at V=41, with the next minimum at V=49.
- The bulk of the peak for the banana is between 36 and 45, for the apple between 26 and 38.
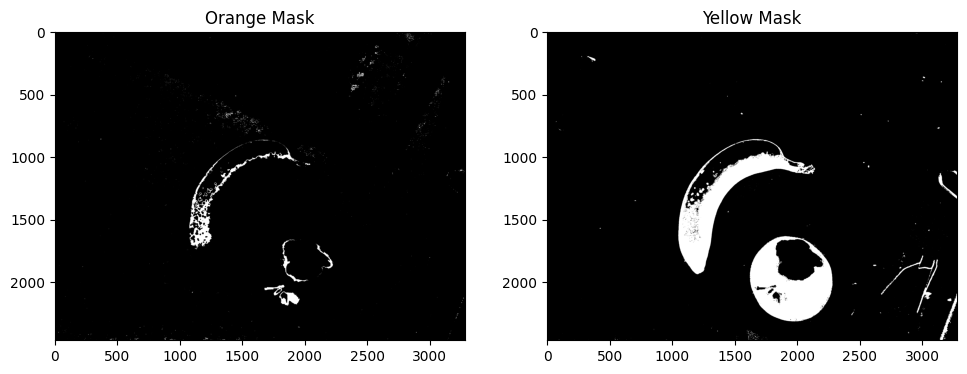
- Yet, when creating a mask on the V-channel this doesn't work. Instead when I set the threshold for the Hue (green channel above), to the range 0-30~40):
- The V-channel could be used, but to select shadows (V in range 0-49):
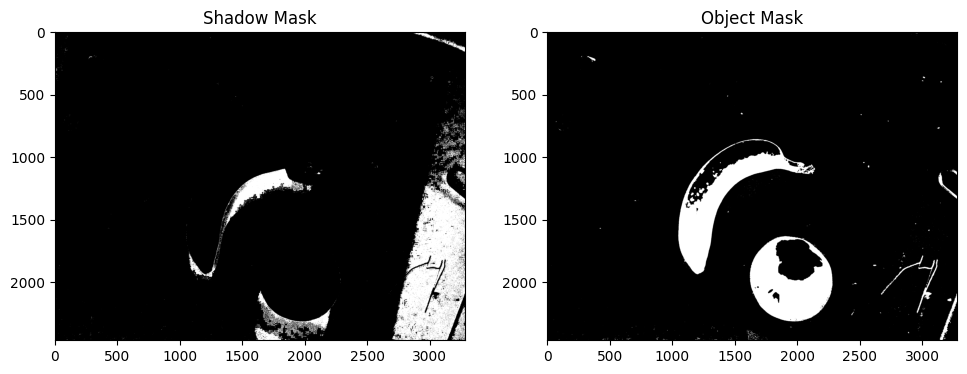
- In principal this should be good enough to be post-processed with opening and closing, followed by an analysis on shape.
- But before that, I will see if I can still make the distinction in the Hue domain, and also look if it is easier to create a mask in the RGB domain.
-
- Made a low- and high-mask. With the threshold set on 12 only the apple is visible in the Low Mask, while the banana is the biggest object in the High Mask:
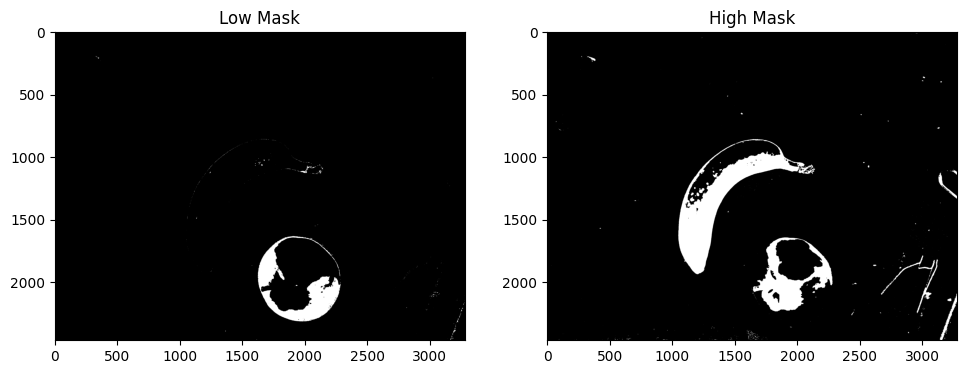
Hue threshold: 0 - 12 - 36
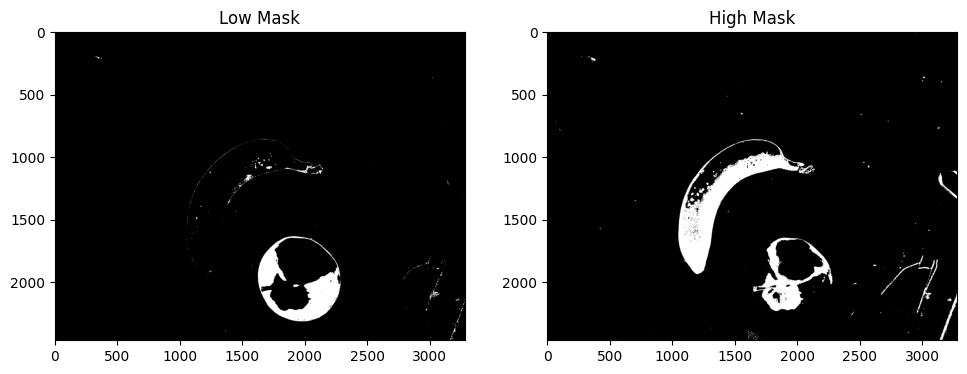
Hue threshold: 0 - 15 - 30
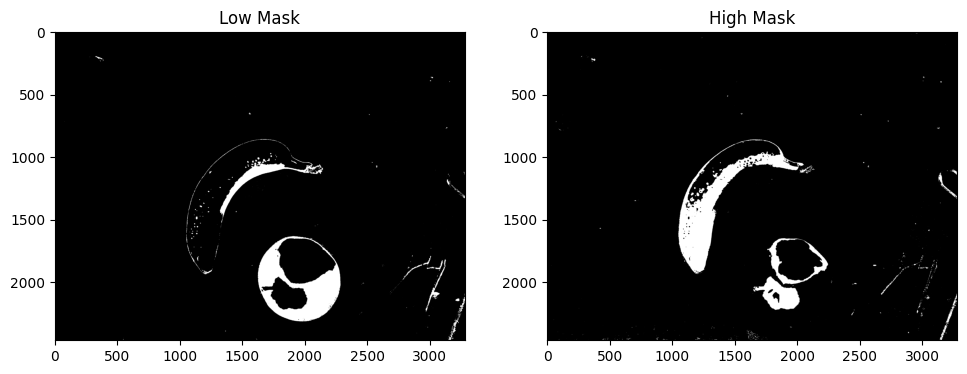
Hue threshold: 0 - 20 - 40
-
- For RGB, I could look at the combined red-green peek around 180, 210 in the equalized spectrum for the banana in the green-blue spectrum. Both a strong peak around 240 in the red channel. Other way to look is that the apple has broad peaks between 150-200 for all three channels, while the banana has three distinctive peaks around 180, 210 and 230.
- Actually, the broad pack between 150-200 is the table in the background. The distinctive peak is the shadow of the stem of the banana.
- Better works a low threshold on red and green, and a high threshold on blue:
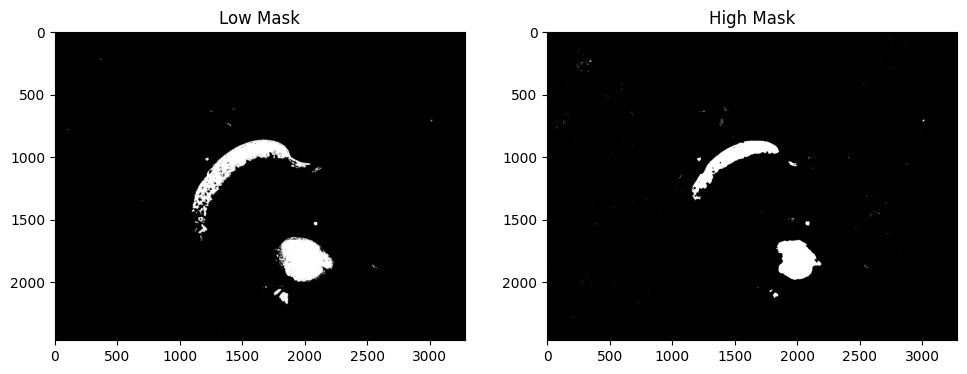
RGB lower-threshold resp. ([150, 150, 252] and [230, 230, 230] on equalized image
- It is not even necessary to equalize, same range works as good directly on the RGB image:
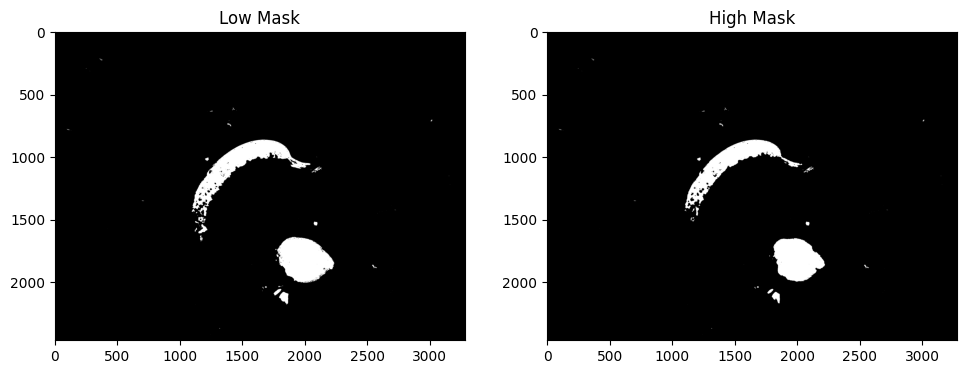
RGB lower-threshold resp. ([150, 150, 252] and [180, 180, 252] on NON-equalized image
-
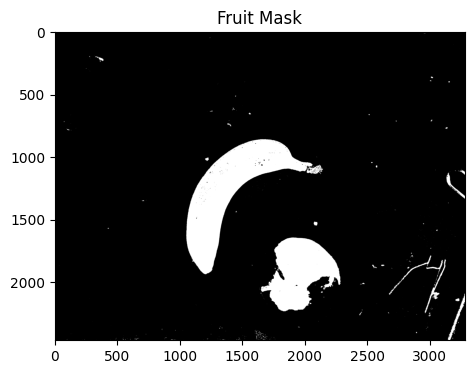
- Maybe I should add both mask, together they should perfectly define the two objects.
- The two masks combined at least gives a perfect banana, and the apple starts to be round:
September 22, 2023
- Continued with finding the fruit.
- Was working in C:\onderwijs\Biomimicry\workshop, but with python3.9 directly. jupyter notebook not
- That was also the case on November 23, 2022, which I solved with copying the jupyter.exe into the working directory.
- Used $env:path -split ";" to inspect my Path in PowerShell.
- I tried to install jupyter with , but it was already installed.
- I updated pip, but got the warning that C:\Users\XXX\AppData\Roaming\Python\Python39\Scripts was not in my path. Strange enough, when I inspected 'omgevingsvariables' it was in the path of the user. Seems that PowerShell is using the system path. Added this path with $env:path += "C:\Users\XXX\AppData\Roaming\Python\Python39\Scripts" and now jupyter notebook works. The error was that there was in my user-path there was a quote in front of the path (and not at the end). Corrected this.
- Start looking at 01_04_Annotating_Images.ipynb. Loading the packages works, reading fruit.jpg also works, but the image has the wrong colors. Adding a line image = cv2.cvtColor(image, cv2.COLOR_BGR2RGB) solves this.
- The later cells had an additional [:, :, ::-1] added to imshow(), so the rectangle cell had the false colors again. Still, it is a good exercise to drawn a rectange around the apple (or banana), before going to analyse its histogram.
- The coordinates (1590, 1610), (2300, 2350) work quite well, although a bit symmetrical (doesn't help to get a feeling for (x,y)).
- Continue with 03_01_Histograms.ipynb. This script starts with a test on the matplotlib.__version__
- The histogram of the whole image nicely shows the black background, plus three Gaussians from the fruit:

- The spectrum of the apple is clear, but have to see how distinctive it is:

- Converted the upper-left and lower-right corners (1200, 825), (2000,1200) to ROI [ 825:1200, 1200:2000] for the banana:

- Tried the equalizing trick, but that not really helps:


September 7, 2023
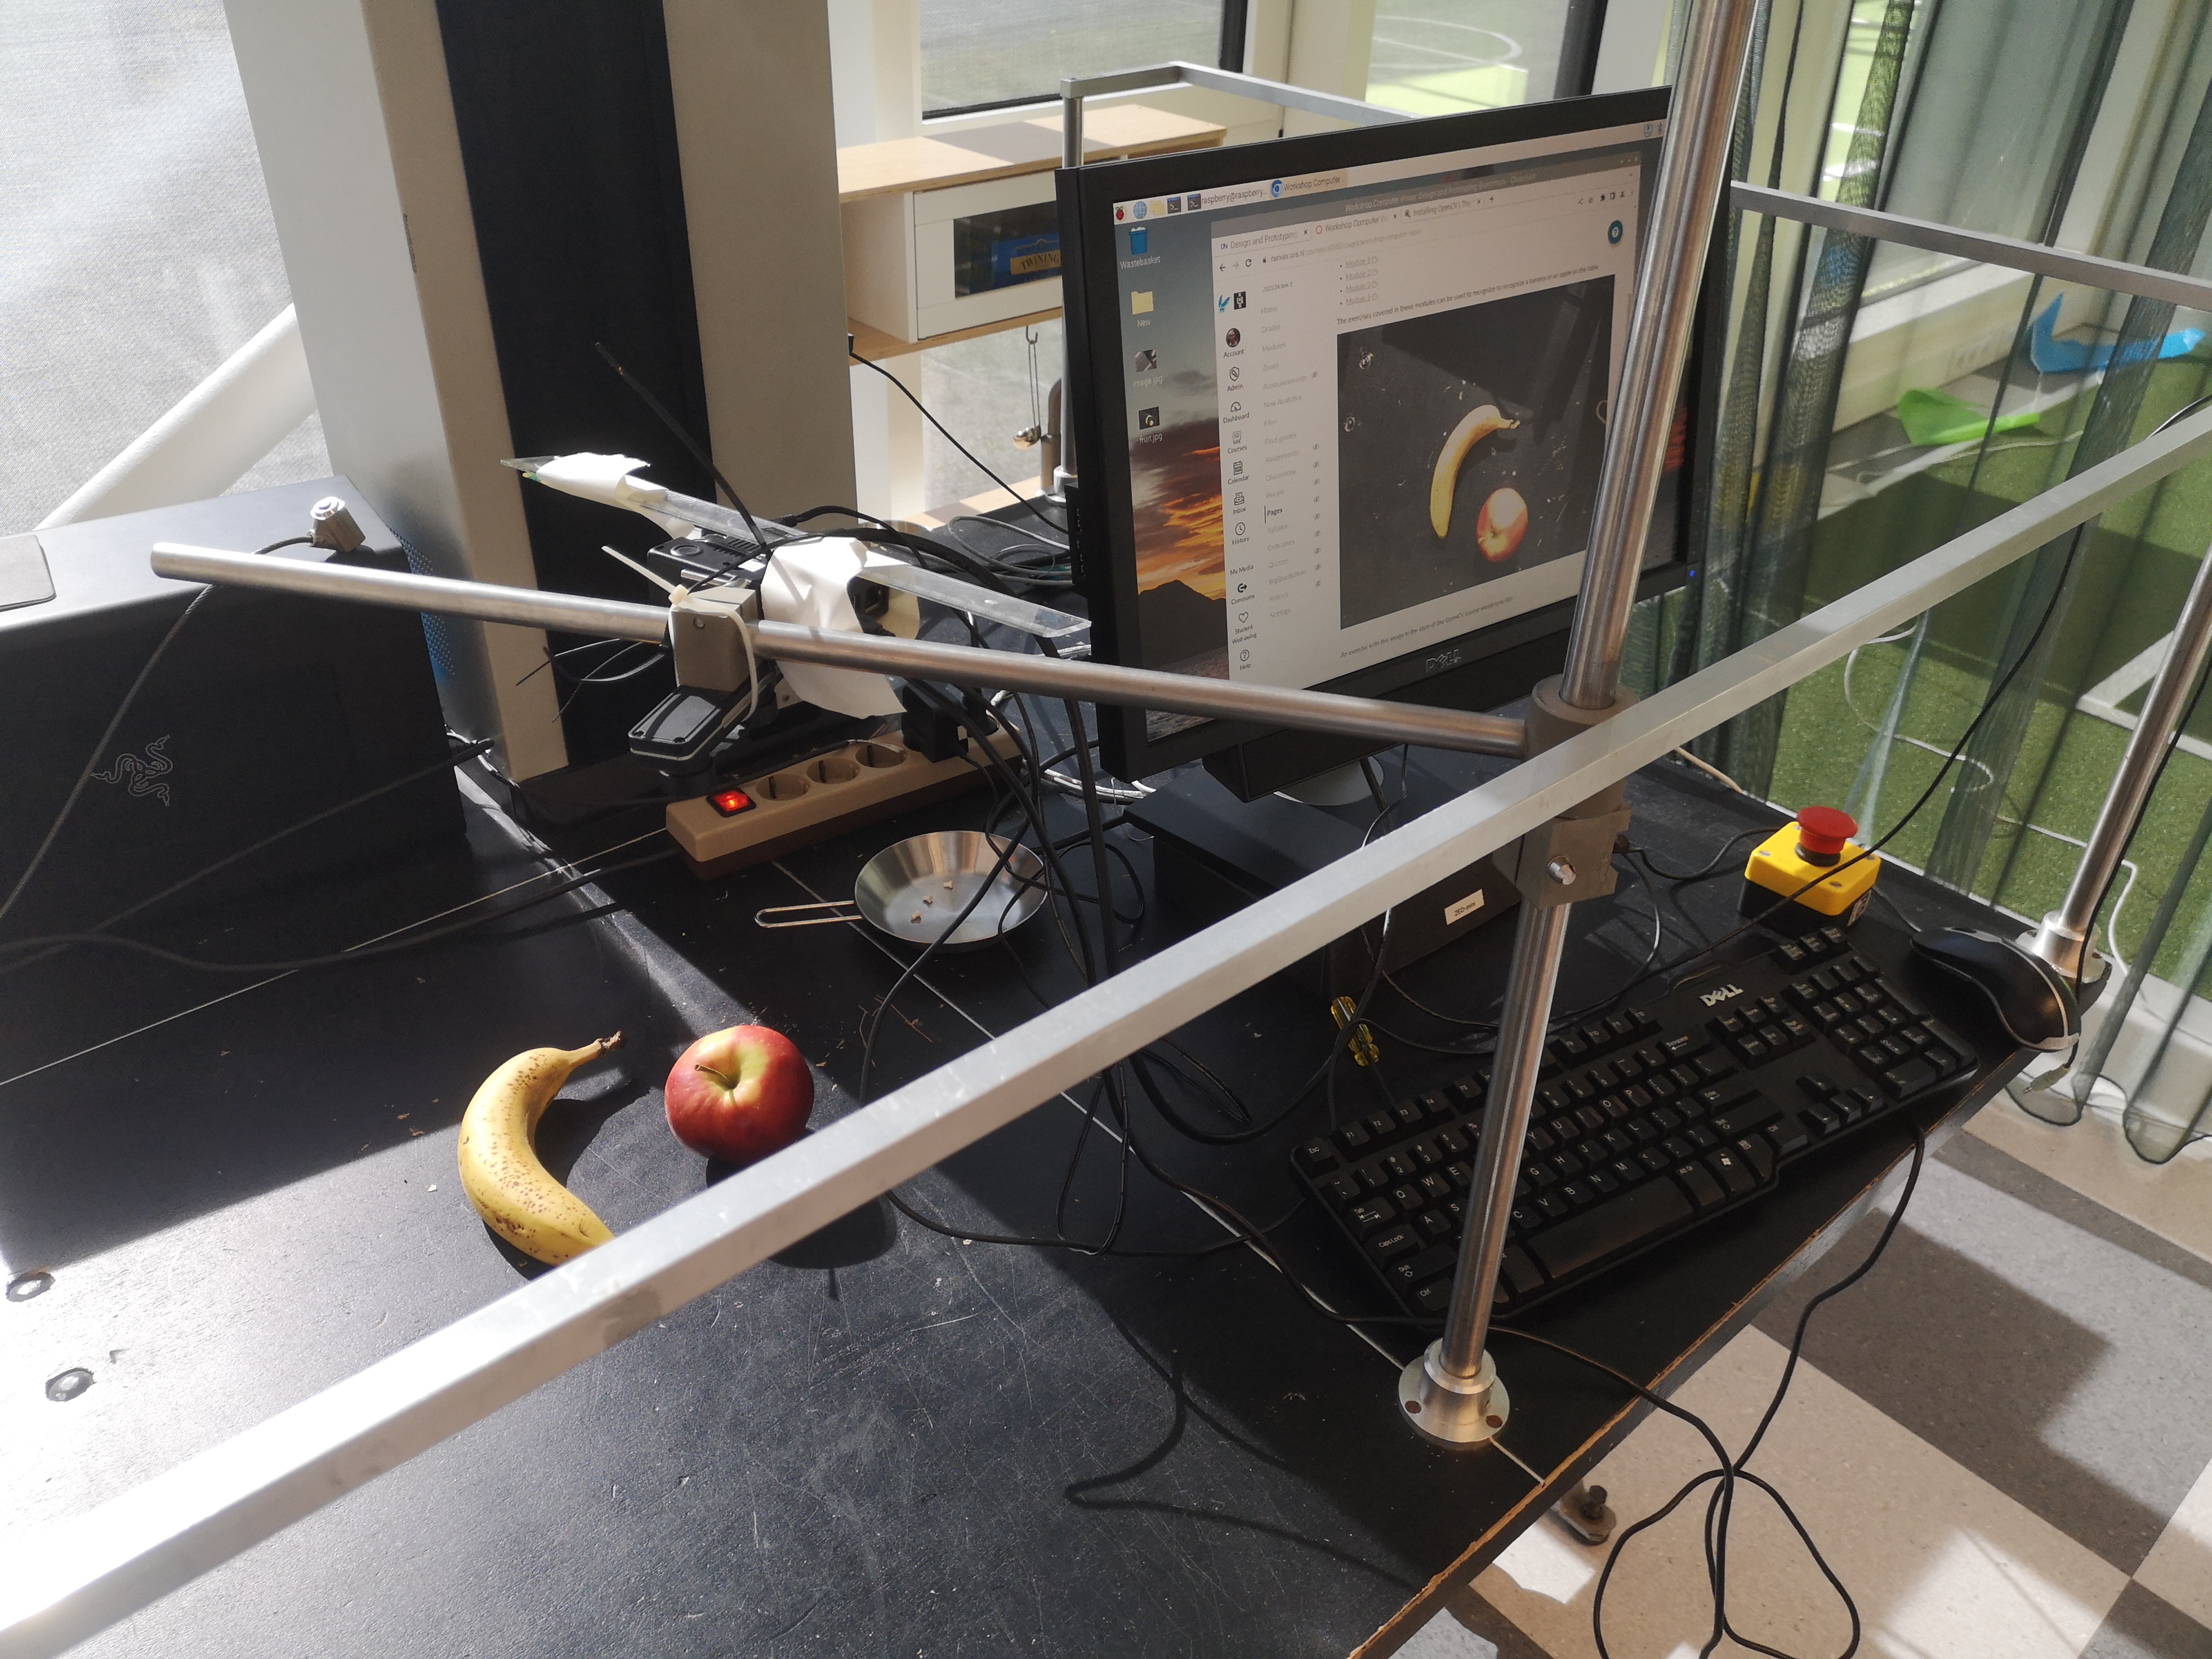
- Bought an apple and made a setup to detect the apple.
- Mounted the Raspberry PI on the metal arm that was also used for the Zed-mini. Fixated the Raspberry Camera V2 with tape to a ruler:
- Created a workshop page in Canvas based on the workshop used for BehaviorBasedRobotics.
- On November 23, 2022 I used Anaconda on my Windows installation.
- Looking if conda activate opencv-env-python39 still works. This doesn't work in my WSL (Ubuntu 22.04), but works fine in PowerShell. Could do import cv2 in my python3.9 prompt.
- Looks like I worked in C:\onderwijs\BehaviorBasedRobotics.
- Could execute python color_segmentation_exercise.py in module3.
- In module5 I found the code contour_turn_around_exercise.py which I created on November 28, 2022.
- The image is much larger than before (2462,3280). Selected a new ROI for the apple on with corners (1560.1580) till (2230, 2240). Still the mask is plotted totally black. Continue tomorrow.
September 6, 2023
- Used another USB-camera. The Logitech QuickCam Pro 4000 is visible with lsusb.
- Now also the tool fswebcam works.
- Yet, Picamera2.global_camera_info() still only shows the Raspberry Pi camera.
- This post suggested the pick mode example, but that showed only the video modes of the Raspberry Pi camera.
- Yet, the VideoCapture with OpenCV itself works fine (was hanging without waitkey).
September 5, 2023
- Yesterdays build still failed after hours.
- Installed pip install scikit-build, which installed v0.17.6.
- Build still fails on scikit-build.
- Instead, tried pip install --upgrade opencv-python==4.3.0.38. That succesfully uninstalled v4.5.3.56
- Yet, import cv2 still fails on numpy.core.multiarray failed to import.
- Loading import numpy.core.multiarray didn't solve the issue.
- Upgrading with pip install --upgrade numpy==1.21.6 solved it!
-
- Tried the first script from module1. After correcting the file-name (use Apollo-8-Launch.jpg instead of Apollo-8-launch.jpg) the scripts is correctly executed.
-
- Next step is to get the camera working. Following this getting started, I mounted a V2 camera.
- Yet, the option to enable the camera in Raspberry Pi's Interface tab was not present.
- According to Tech Overflow recent versions of raspbian use libcamera instead of the legacy API. The other solution (configure from the commandline with sudo raspi-config) showed the option I1 'Enable Legacy camera support'.
- Yet, solution 1 (use libcamera) worked, and libcamera-still -o Desktop/image.jpg produced an image from the ceiling. For more documentation: see this guide.
- So, also using PiCamera fails, because it depends on the legacy API.
- Yet, picamera2 is standard installed. Checked this example, which worked.
- Simply using cv2.VideoCapture() doesn't work for a RaspberryPi camera.
- Seems that I have to do the capture with picamera2 and convert with image = rawCapture.array.
- Should look for this example to use full resolution configuration for the still.
- Yet, capture_image() also works, only the conversion to opencv format not (yet).
- Found the right function: capture_array(), from this example.
- Found a Picamera2 manual (74 pages). The manual is for v0.3.6, while the github code is already v0.3.12. Command pip install picamera2== showed range 0.1.1 to 0.3.12.
- Should look at the USB camera support, described on page 25.
- Run libcamera-hello which shows that we have unicam format 1640xpBAA. Got one warning on mismatch between Unicam and CamHelper.
- Note that also TensorFlow Lite can be installed on the raspberry pi.
- Also note that the PI 3 cannot display images with a height or width larger than 2048 pixels.
- When no preview display is selected, a picam2.start() will start a Preview.NULL in the background.
- Camera V2 doesn't support autofocus, only Camera Module 3 does that.
- Picamera2 supports asynchronous capture: you can provide a signal_function to operate once a captured image is ready.
-
- The default keyboard is set to English UK. Switched it to English US to get the quotes working.
- I am using a DELL SK-8115, but used the nearly equal DELL SK-8125 configuration.
- Connected a Logitech webcam, but doesn't show up in PiCamera2.global_camera_info().
- Although the camera-led lights up, I don't see the camera with lsusb.
- Looked with dmesg | tail, which gives unicam: failed to start media pipeline.
- Closed Thonny's python environment and connected again. The camera is still not visible with lsusb.
- Also tested with with fswebcam, to no avail.
-
- It would be interesting to see how tensorflow-lite example works. It can recognize banana and apples.
- This example can be found at github.
- Installed pip3 install tflite-runtime (v2.13.0). Pillow was already installed (v8.1.2).
- Tried to run python3 real_time_with_labels.py which requested a --model. Provided the mobilenet_v2.tflite which was provided, which gave scores as high as 91% on my banana basket (but didn't see labels, only bounding boxes. The model deeplabv3 gave an error in interpreter.get_tensor()
-
- There also exists a toy detector for tensorflow, but this detector still has to be trained with examples.
September 4, 2023
- Thought that I recorded my progress in Autonomous Mobile Robots labbook.
- Checked for available versions with pip3 install numpy==, but packages can be found in the indexes https://pypi.org/simple and https://www.piwheels.org.
- That is strange, because piwheels.org is especially made for rasberry pi. The example with scipy in the virtualenv at least seems to work (failed on disconnected wifi).
- Continue with the troubleshoot section of install guide.
- With an update wheel, I could do a check pip install --upgrade numpy==. Quite a number of versions are available, ranging from v1.3.0 to 1.26.0b1.
- Also pip install --upgrade opencv-python== works. Versions ranging from v3.4.0 to 4.8.0.76. Installing the latest (instead of v4.5.3.56).
- Build of the wheel started around 11:00, have to see how long it takes.
- wifi is quite unstable, connecting with a wire.
- The numpy requirement is >=1.17.0, which is satisfied with the current 1.19.5.
- Checked the constraints at package page. The full package becomes available with pip install opencv-contrib-python.
- Building of the wheel failed on skbuild. Tried again to see if it was a temporary error, otherwise I have to try to install skbuild first or to install another version.
- For Behavior-Based Robotics I mentioned on January 9 that v4.14 and v4.16 work much better than v4.7.12. I used v4.3 (January 5, 2023) and v4.7.0.68 (January 24, 2023) for opencv-contrib-python (which failed on missing openjpeg).
- Could try to install the latest version of scikit first with pip install scikit-build. Available versions range from v0.1.0 to 0.17.6.
September 1, 2023
- Started the VISLIB Rasberry PI. It runs Raspbian Release 11, with python v3.9.2.
- Checked the first OpenCV workshop code. import cv2 fails, import numpy as np works.
- Looking if this install guide works.
- First did a sudo apt-get update; upgrade to get 91 new packages, including python3-libcamera.
- Seems to work. Actually, the wheel failed to be build, due to PEP incompatiblities. Installing explicitly opencv-python==4.5.3.56 works, but gives conflicts with the numpy version.
- Next step would be to download Module 1. Note that with wget the download have to renamed to module1.zip, and that first a directory has to be made before you do the extract.


