Wishlist
- Recreate experiment of April 11 (connect with monitor to Webots and send images over).
- Flash main controller and look if the real ePuck2 supports protocol v2.
- Connect omnidirectional camera and see if I can grap images (extended commands supported by ePic2, not clear how to do it v2).
- Connect with Josies Webots world and try to control two robots.
- Improve RoboCup 2019 wiki.
- Improve Josies SimPlus.
- Step 1: Download ePuck2 world with balls from Josie.
- Step 2: Control robot with Python.
- Step 3: Avoid obstacles robot with Python.
- Step 4: Recognize balls with camera.
-
- Step 5: Do the same with Python.
- Step 6: Do the same with ROS.
Started
Labbook 2020.
December 23, 2019
- To save some space at nb-udk, I moved two UDK version to my dual-USB. UDK-2012-07 was quite small (although although on 8 November, 2012 I said it worked. On June 13, 2013 I was positive about UDK-2013-02, so I moved UDK-2013-03. That is a big directory (4.47 Gb) which should give me some space. That means that there are three UDK version left on nb-udk, one for each year (2012, 2013, 2014).
December 18, 2019
December 5, 2019
- The Rescue Robot of the MARS Lab seems a nice standard platform for rescue.
- Installed v15 of the sweep-visualizer from amazonaws on my nb-dual. Started the SweepVisualizer from Ubuntu search, as instructed. Couldn't test, because the 3D-Sweep isn't fully assembled.
October 30, 2019
- The new Misty II is a educational platform based on behaviors, which has as API three levels to interact with the robot. The Explore level is an Android or Apple app, the Build level is based on JavaScript and a Visual Studio extension. Could be a potential platform for the Coach league.
October 29, 2019
- The article of Wolfram Burgard on an analytical Lidar Sensor Model could be of relevance for Paul Lagerweij's project (creating a 3D laser scanner in Gazebo).
- Looking for the contents of the Sweep 3D scanner DIY Kit. Didn't find the information on Scanse.io about the DIY Kit, only the theory behind it, but still found the documentation at hackster.io.
- I connected the Sweep v1.0 to my nb-ros laptop on June 19, 2017.
- The Scanse download instructions are still there, although for Ubuntu 14.04. Yet, the download itself seems to be gone.
- According to my budget, I bought the full DIY Kit (3DS-KIT) in 2017 (payment on May 18).
- Couldn't found the download at nb-ros. Checked my mail of June 2017, but that link redirects to the Scance download page. The software for the Arduino is still exist on github. There is also a sweep-sdk page (updated a few month ago).
- Found the program sweep_visualizer in /opt/Sweep Visualizer BETA.
October 1, 2019
September 30, 2019
- Read a paper on IcePop. Should be nice to combine the AutoMoDe code with CoSpace (collecting victims).
July 8, 2019
- DuckiTown ProjectTBD uses resnet101. This netwerk is also available in Matlab (as add-on). Simply call net = resnet101();. Classification of an image can be done (after adjusting the input layers (I = imread('duckie_on_keyboard.png'); sz = net.Layers(1).InputSize; I = I(1:sz(1),1:sz(2),1:sz(3)); followed by [label,scores] = classify(net,I);.
July 7, 2019
- Started with Github page. Editing can be done from github directory. Should check if I can activate the settings of Joint Rescue Forces. Created JRF SimPlus page.
-
- Received the ePuck2 worlds from Josie. When Starting, I get the following warnings:
WARNING: Solid > Physics: Both 'density' and 'mass' specified: the 'density' will be ignored.
INFO: e-puck_avoid_obstacles: Starting controller: "C:\Programs\Webots\projects\robots\gctronic\e-puck\controllers\e-puck_avoid_obstacles\e-puck_avoid_obstacles.exe"
WARNING: The current physics step could not be computed correctly. Your world may be too complex. If this problem persists, try simplifying your bounding object(s), reducing the number of joints, or reducing WorldInfo.basicTimeStep.
- new_space5 seems to give the most reliable performance. Look if I can change the behavior from obstacle avoidance to server.
- Seems that I can leave the controller field empty, and start externally a controller.
- Trick was in the simulation view, to use the left button (show Scene Tree). There you could edit the controller. Selected the e-puck2_server.exe I have build the previous days.
- Reloading the world was not enough, I had to restart whole Webots to get my_remote as controller. Now I have one ePuck running autonomously and one under remote control:
INFO: e-puck_avoid_obstacles: Starting controller: "C:\Users\arnoud\Documents\e-puck2\controllers\e-puck_avoid_obstacles\e-puck_avoid_obstacles.exe"
INFO: my_remote_controller: Starting controller: "C:\Users\arnoud\Documents\e-puck2\controllers\my_remote_controller\my_remote_controller.exe"
- Now I could do [ePic result] = connect_tcpip(ePic, '127.0.0.1', 1000); (Still warnings about unable to read data, so maybe I shouldn't sent the initial 'P,0,0' string.
- I hope that I haven't overwritten my version of the epuck2_server, because I see that I receive 21 bits, but I don't see the streaming with ....
- Calling the ePuck2 with following commands:
ePic = ePicKernel();
[ePic result] = connect_tcpip(ePic, '127.0.0.1', 1000);
message = uint8([128 1 0 0 0 0 0 0 0 0 0 0 0 0 0 0 0 0 0 0 0]);
writeBin(ePic,message);writeUsignedBin(ePic,message);
size_to_receive=38401;
imgtmp=readBinSized(ePic,size_to_receive);
myimg = convertImageEpuck2(imgtmp);
image(imgtmp);
[ePic result] = disconnect(ePic);
- The server seems to be sending images, but the img received is still empty.
- Sending message uint8([128 0 0 100 0 100 0 0 0 0 0 0 0 0 0 0 0 0 0 0 0]); let the robot drive forwards.
- The camera in the CoSpace are much smaller. Now checking height and width with API functions.
- That solved the issue, althought the resulting is really so low in resolution that images processing will be difficult:
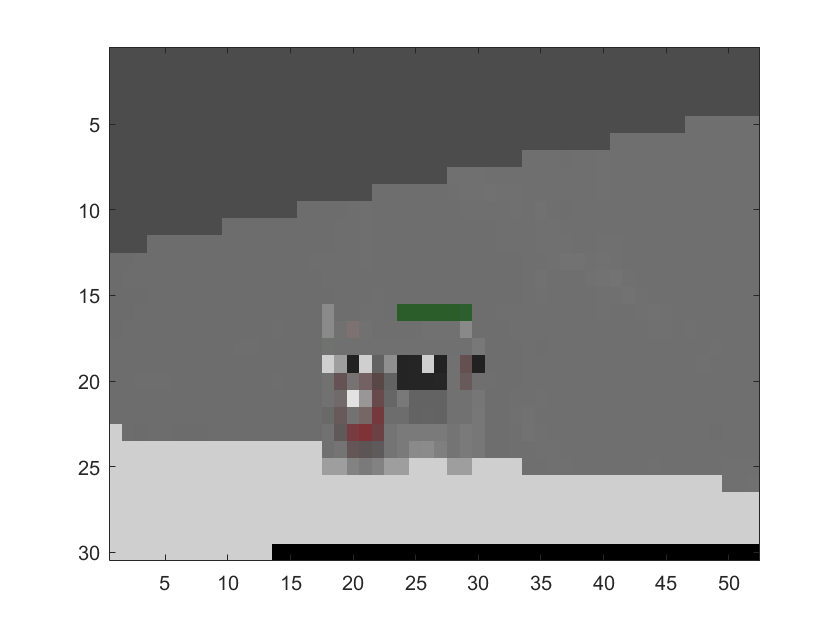
- This time, I uploaded all files that I created.
- Created cospace14 with a ePuck version "2". Main difference is the camera resolution (160x120).
- The controller fails to bind to port 1000 (also after restart Webots). Try a reboot.
- Didn't help. Solved it by using another port (1001 instead of 1000).
- I was missing the lower 1/4 of the image. Changed the Convert, but now the image is non-readable again.
July 6, 2019
- Looking if there is a tutorial to recognize balls / duckes at Webots / Matlab / Duckietown.
- Started with duckietown.
- Found the Unit E-10 To Be Detected project, which uses deep learning to detect duckies, traffic lights and traffic signs. The code could be found on github.
- Read the documentation, and once I have a ros-node publishing the camera images, the duckie-detector should also work for the ePuck.
- Doing pip3 install -r requirements.txt in my Ubuntu for Windows terminal. Needs to install quite some packages :-).
- Installation failed on psutil, but that seems to be solvable with sudo apt-get install python3-dev.
- Had to replace the PGP key also on my Ubuntu for Windows system.
- Running rosrun cv_camera cv_camera_node failed, because accessing the webcam from WSL seems to be fundamental impossible. See also Microsoft's WSL github page. Support seems still not available in WSL2.
- Solution is to run the camera node from the pi-puck.
-
- Matlab have several object detections:
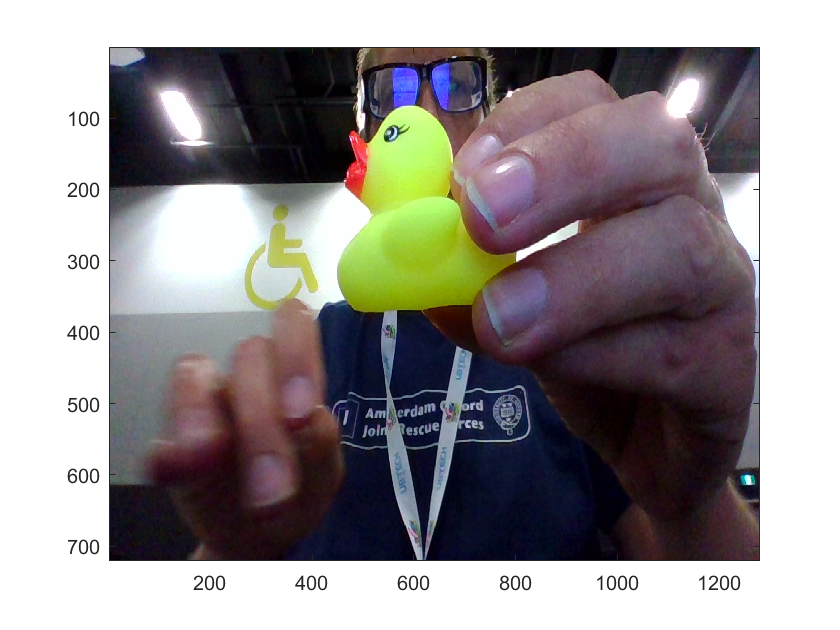
- Performed imaqInfo = imaqhwinfo, but no adapters installed. They should be downloaded via the addon explorer. Able to get a preview with imaqtool. Selected YUV2_160x120 as format.
- Grabbed a single image by the sequence vidobj = videoinput('winvideo');
imagesc(snapshot);
stop(vidobj);
delete(vidobj);
- Read the distance with d = imdistline;, from top to bottom 274 pixels.
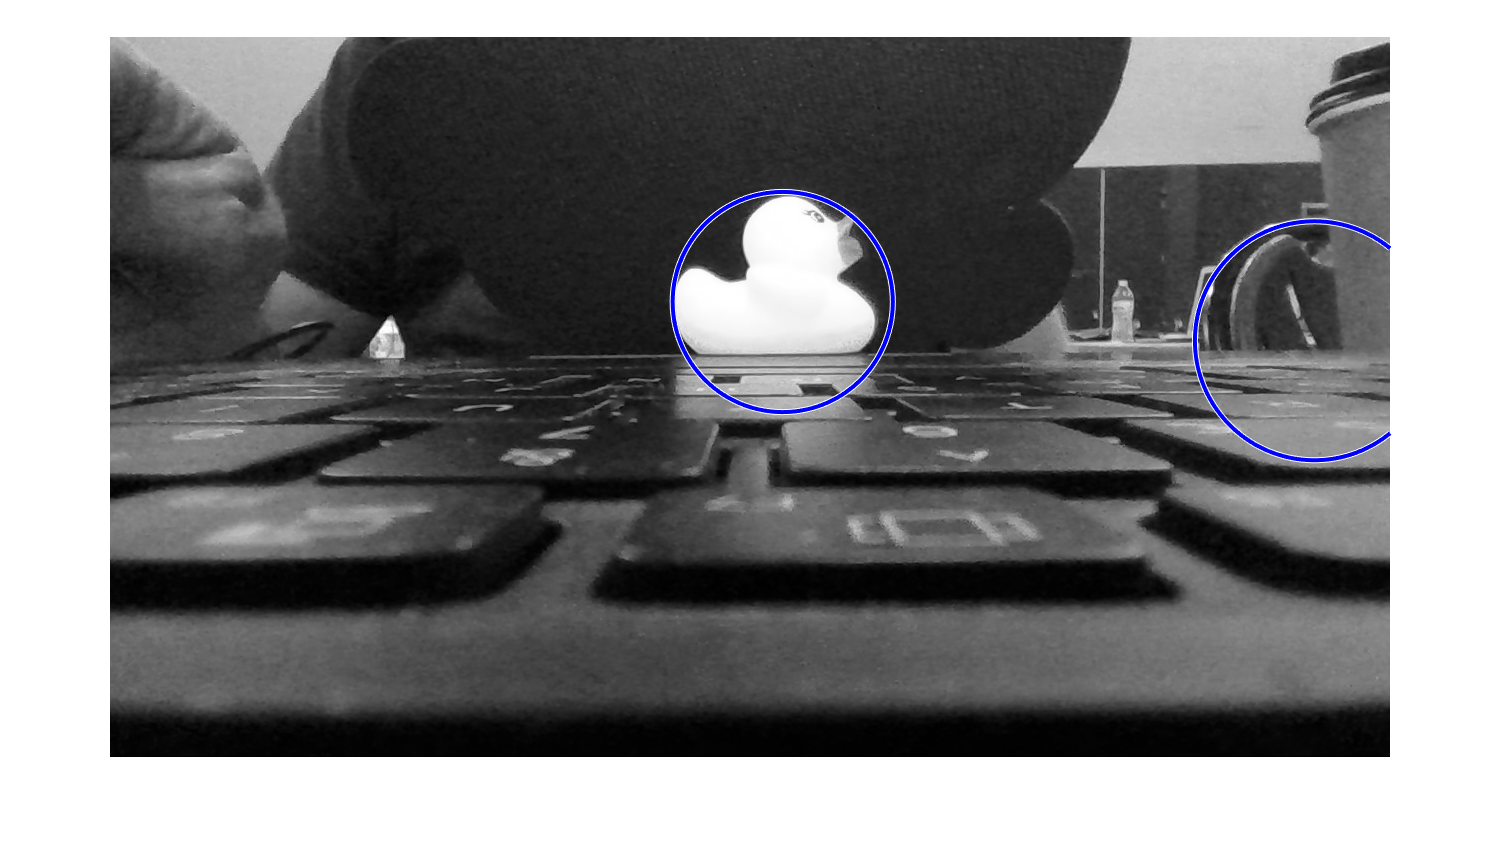
- Call to imfindcircles said that it prefers circles smaller than 100 pixels. Made a recording a bit further on my keyboard. Duckie is now smaller than 190 pixels. So, I made the call [centers,radii] = imfindcircles(snapshot,[100 200]);. No circels are found, increased the sensitivity, the duckie is only detected when I specify a sensitivity > 0.97. At 0.98 two circles are found, at 0.99 26 circles. Luckely, the duckie has the highest mesure:
 .
.
- The Two Stage Hough transform finds two circles at sensitivity=0.97, and seven cirlces at sensitivity=0.98. Setting the EdgeThreshold from 0.5 to 0.6 gives one circle for both methods (with Sensitivity on 0.99).
- Next to shape, it is interesting to see if we could detect based on color. I should check color threshold example.
- Made a mask to select yellow color. Combining both filters give [BW,maskedRGBImage] = yellowDuckieMask(snapshot);[BW_out,properties] = filterLargestRegions(BW); gives the properties of the largest region, which includes the area, but not the location of the center.
- The location of the center can be calculated with s = regionprops(BW_out,'centroid'), the circle can than be drawn with viscircles(s.Centroid, properties.EquivDiameter,'Color','b');.
- Tried to get image from ePuck, but got Error, Could not open serial port.
July 5, 2019
July 4, 2019
- Recreated the experiment from April 11. Response from the Server side is OK:
[e-puck2_server] Received 21 bytes (command buffer):
[e-puck2_server] 0x80 0x03 0x00 0x00 0x00 0x00 0x00 0x00 0x00 0x00 0x00 0x00 0x00 0x00 0x00 0x00 0x00 0x00 0x00 0x00 0x00
[e-puck2_server] activate camera streaming
[e-puck2_server] activate sensor streaming
[e-puck2_server] ..............................
Still, no images in the Monitor. Setting parameters buttons (ASCII mode) are gray, but the old values (40x40) are still displayed. Should add some debug code at the Monitor side.
- The code at the Monitor side is easy to find: line 114 of EpuckMonitor.cpp. It doesn't use the old mode anymore, but the images are still read as double bytes (instead of four bytes):
void EpuckMonitor::cameraUpdate() {
commThread->getImg(imgBuffer);
img = QImage(160, 120, QImage::Format_RGB32);
int i=0;
for(int y=0; y<120; y++) {
for(int x=0; x<160; x++) {
//qDebug() << input_buffer[i];
//qDebug() << input_buffer[i+1];
int r = (int)(imgBuffer[i]&0xF8);
int g = (int)((imgBuffer[i]&0x07)<<5 | (imgBuffer[i+1]&0xE0)>>3);
int b = (int)(imgBuffer[i+1]&0x1F)<<3;
img.setPixel(x, y, qRgb (r, g, b));
i+=2;
}
}
//the size of the label is 200*200, the maximum size of the image is 45*45
//lblCamera->setFixedSize(width*200/45, height*200/45);
lblCamera->setFixedSize(160, 120);
lblCamera->setScaledContents(true);
lblCamera->setPixmap(QPixmap::fromImage(img));
ui.scrollCamera->setWidget(lblCamera);
- Replaced this code with the convertImage code I made yesterday (in Matlab):
int b = (int)(imgBuffer[i]);
int g = (int)(imgBuffer[i+1]);
int r = (int)(imgBuffer[i+2]);
img.setPixel(x, y, qRgb (r, g, b));
i+=4;
- Linking this code fails on 64bits vs 32bits. Thought that I solved that in April 9. nmake -f Makefile.Release:
MSVCRT.lib(chkstk.obj) : fatal error LNK1112: module machine type 'x86' conflicts with target machine type 'x64'.
- The Makefile.Release was OK, but I should call it from a 64bits console (not a x86 console).
- Still, no images. Put a printf in the cameraUpdate function, but seems that this function is not called.
- Seems that no information is printed (also not qDebug() and std:cout), even when requested when connecting (which works) or at the sensor update.
- Leave this monitor for the moment.
-
- Looking at Omnivision module. Suggestion is to use raspistill to grab an image, but that seems to suggest to do this from the pi-puck (instead of remote).
- The pi-puck documentation can be found here.
- The position of the ePuck2 selector has to be in position 10 (and the main controller needs a firmware update. The omniversion manual mentions v07.06.19, while the ePuck page mentions v18.04.19.
- There is a ROS Kinetic is integrated in the Pi-puck system, including an epuck ros-driver. Also OpenCV 3.4.1 is integrated in the pi-puck system.
-
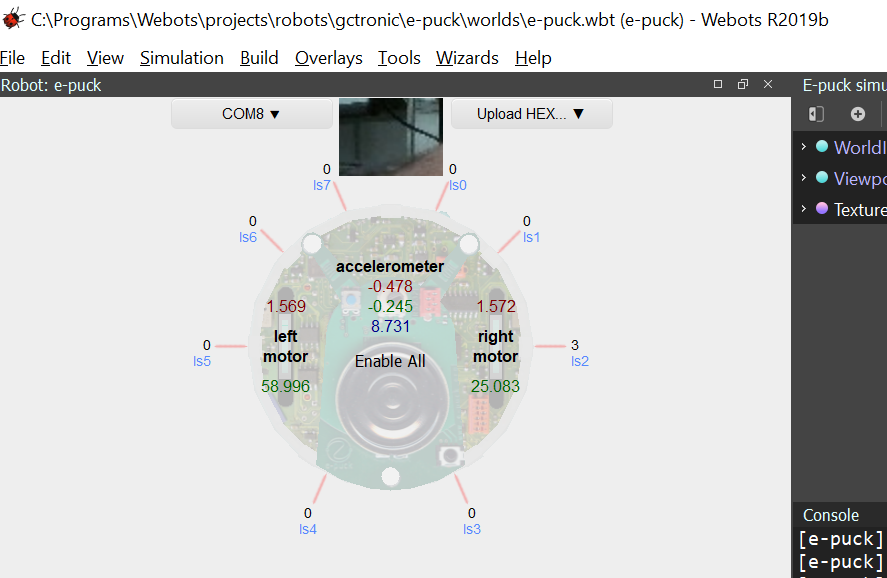
- Used the webots ePuck2 world, click on the ePuck, select COM8, have the selector on 3, and we have an image in Webots:
- The e-puck2 world has collision avoidance, based on the following braitenberg coefficients:
double braitenberg_coefficients[8][2] = {{0.942, -0.22}, {0.63, -0.1}, {0.5, -0.06}, {-0.06, -0.06},
{-0.06, -0.06}, {-0.06, 0.5}, {-0.19, 0.63}, {-0.13, 0.942}};
Those values are used in concert with the sensorvalues:
for (i = 0; i < 2; i++) {
speed[i] = 0.0;
for (j = 0; j < 8; j++)
speed[i] += braitenberg_coefficients[j][i] * (1.0 - (sensors_value[j] / RANGE));
}
I could also use the equivalent of obstacle avoidance tutorial.
- In Webots\projects\default\controllers\braitenberg code for different type of robots can be found. For the ePuck they use:
const double e_puck_matrix[8][2] = {{150, -35}, {100, -15}, {80, -10}, {-10, -10},
{-10, -10}, {-10, 80}, {-30, 100}, {-20, 150}};
which are used equivalently:
for (i = 0; i < 2; i++) {
speed[i] = 0.0;
for (j = 0; j < num_sensors; j++) {
/*
* We need to recenter the value of the sensor to be able to get
* negative values too. This will allow the wheels to go
* backward too.
*/
speed[i] += speed_unit * matrix[j][i] * (1.0 - (sensors_value[j] / range));
}
speed[i] = BOUND(speed[i], -max_speed, max_speed);
}
- No further tutorials for Braitenberg vehicles, only student project.
- Was able to let the ePuck2 drive straight with commands:
ePic=set(ePic,'speed', [1000 1000]);
ePic = update(ePic);
- Also got a sensorreading with command sensors_value, up] = get(ePic, 'proxi');
sensors_value =
0 0 0 0 0 6 0 0
- Only the obstacle avoidance didn't work.
July 3, 2019
- The R2019b doesn't have an activate camera, so no response when I ask for the image:
>> ePic = updateImage(ePic);
Warning: Unsuccessful read: A timeout occurred before the Terminator was reached.
'tcpip' unable to read any data. For more information on possible reasons, see TCPIP Read Warnings.
- Modified the code, quite equivalent with before (although I know activated stream_image=true).
- Made camera image visible in Webots menu via Overlays->CameraDevices, as suggested in tutorial.
- The image I receive is not completely black, but there is something wrong. The imagebuffer is allocated 38401, which is 160x120 times 2 bytes. The camera_width is set in the world as 160, height as 120. Imagedata in Matlab is received as structure of 40x40x3 doubles.
- Activating the stream_image was an error, because that is a flag in the command-buffer. Yet, it is not clear if a commandbuffer is sent. The buffer is sent with function write(ePic, data), but that is just ASCI-data.
- The buffer is sent with functions update(ePic) and updateImage(ePic), yet those messages are not understood. update(ePic) is 21 bytes, but the first is not 0x80, so ignored (first time 0xb2, second time 0x03). . updateImage(ePic) is a command of 12 bytes.
- Looked at updateImage.m and found out that for setting the camera parameters they fall back to ASCII mode (sprintf('J,%d,%d,%d,%d', perImgMode, perImgSize(1), perImgSize(2), perImgZoom). The ASCII mode is not supported at the Webots side. ImgMode is not only set, but also read from the response. mode=0 is grayscale, otherwise color is assumed.
- Could find the definition of the ASCI-mode, but I found ePuck1 to ROS demonstrations!
- Found Python example code which used the ASCI-mode to communicate with ePuck1.
- Found the ASCI-mode documentation of Advanced sercom protocol.
- Found GCtronicDemo for the ePuck1, with both Binary and ASCII usage of the protocol. They used a switch if (c < 0) { // binary mode (big endian) vs if (c > 0) { // ascii mode to distinguish between binary and ascii. Yet, the v2 of the protocol (commands > 0x80) are not in this example.
- Maybe I should use message = uint8([message 0]); for my command.
- Was able to send an activate and deactivate camera streaming command. Trick was in writeBin (had to change int8 to uint8). Now I can create a command with message = uint8([128 1 0 0 0 0 0 0 0 0 0 0 0 0 0 0 0 0 0 0 0]) followed by writeBin(ePic,message);
- I should be able to read an image with the commmand imgtmp=readBinSized(ePic,size_to_receive); (with size_to_receive=38401). Yet, both readBinSized and readBin return output=0.
- The command message = uint8([128 0 0 10 0 10 0 0 0 0 0 0 0 0 0 0 0 0 0 0 0]); lets the robot drive forward slowly. The sensors_buffer has size 105.
- Removed the catch in readBinSized and received the error:
Error using icinterface/fread (line 237)
SIZE * PRECISION must be less than or equal to
InputBufferSize.
- The InputBufferSize is set in connect_tcpip.m (to 30.000). Increasing the InputBufferSize ot 38401 helped, now imgtmp = 38400x1 doubles.
- Made a function that converts the RGB 565 values into RGB-pixels:
% Get RGB 565 value
Pix_1 = uint8(imgtmp(index));
Pix_2 = uint8(imgtmp(index+1));
% Get values for R, G and B
Red_pix = bitand(Pix_1,248);
Green_pix = bitshift(bitand(Pix_1,7),5)+ bitshift(bitand(Pix_2,224),-3);
Blue_pix = bitshift(bitand(Pix_2,31),3);
The result is a nice 160x120 image, but not with actual image. Should look at wb_camera_get_image function from Webots.
- Looked at the Webots example code, but the img is never copied to the image_buffer. According to the documentation, the format at is 4 bytes (rgba), so the buffer should also be twice as big.
- Saved the image from Webots and loaded it into matlab. The image is a 120x160x3 uint8 matrix, which is displayed correclty. A(1:4,1:4,1) had values in the range [99-100], channel 2 in range [117-119] and channel 3 in the range [161-162]. That corresponds with index 3, 2, 1 from imgtmp (skipping the fourth index (always 255).
- Created a convertImageEpuck2.m which creates the correct image (skipping the fourth index number).
- Tried the same with the real ePuck2 via USB. All worked fine, until >> imgtmp=readBinSized(ePic,size_to_receive);
Warning: The specified amount of data was not returned within the Timeout period.
'serial' unable to read any data. For more information on possible reasons, see Serial Read Warnings.
- Tried to drive forward, no response on binary message. Tried ASCII message ('B,1'), which works. Should check if v1 binary message works. If I could get image in that way, that is OK. Otherwise a firmware update of the microcontroller is an option.
- If I give the following command write(ePic, 'I') followed by raw_data = read(ePic) I receive:
raw_data = 'i,1,40,40,8,3200
The 40x40 is local, the 3200 = 40x40x2 also RGB565.
- Strange, also the sequence which worked yesterday failed. The difference is in WriteBin (signed vs unsigned). Made a new WriteUnsignedBin.
July 2, 2019
- Flashed the communication chip of the ePuck. The list_port executable failed, but I knew from yesterday that I had to use COM4 as port. Result:.\program.bat
"bootloader.bin"
"partitions_singleapp.bin"
"ESP32_E-Puck_2.bin"
Traceback (most recent call last):
File "list_com_ports.py", line 41, in
File "list_com_ports.py", line 37, in serial_ports
TypeError: argument of type 'NoneType' is not iterable
[6048] Failed to execute script list_com_ports
ECHO is off.
esptool.py v2.1
Connecting........_
Chip is ESP32D0WDQ6 (revision 0)
Uploading stub...
Running stub...
Stub running...
Changing baud rate to 230400
Changed.
Configuring flash size...
Auto-detected Flash size: 4MB
Flash params set to 0x0220
Compressed 19760 bytes to 11876...
Wrote 19760 bytes (11876 compressed) at 0x00001000 in 0.5 seconds (effective 296.0 kbit/s)...
Hash of data verified.
Compressed 450816 bytes to 257940...
Wrote 450816 bytes (257940 compressed) at 0x00010000 in 11.7 seconds (effective 309.1 kbit/s)...
Hash of data verified.
Compressed 3072 bytes to 103...
Wrote 3072 bytes (103 compressed) at 0x00008000 in 0.0 seconds (effective 2457.6 kbit/s)...
Hash of data verified.
Leaving...
Hard resetting...
- Now I could pair with ePuck via Bluetooth on my Windows computer:
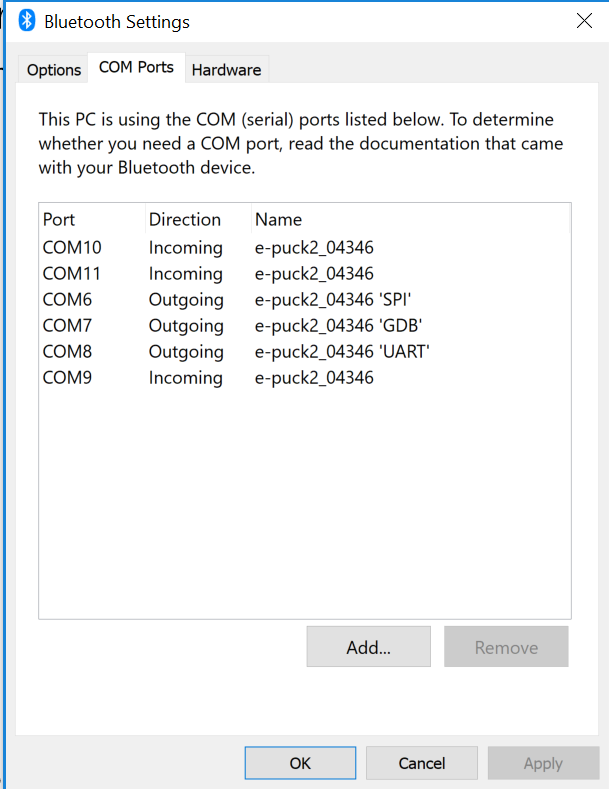
- With the serial monitor, I also could connect (now that I knew that it was the outgoing UART port was COM8).
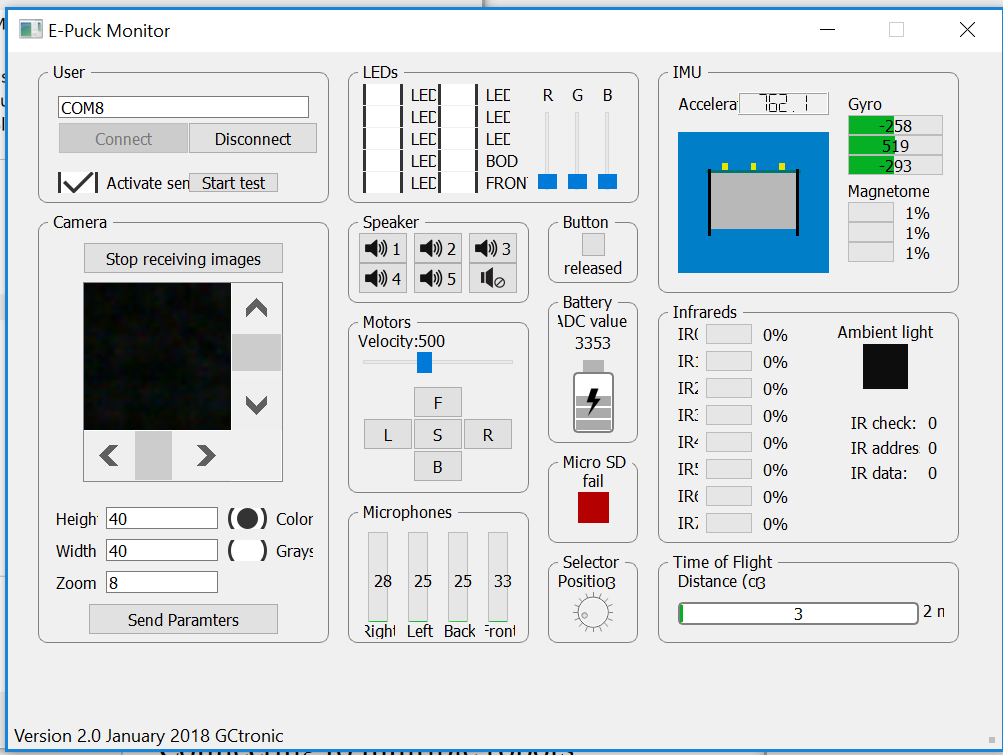
Although black in this screenshot, the camera received (you see my black shirt). Using the Wifi monitor with e_puck2_xxxxx-UART, as suggested in the documentation, didn't work.
- Continued with the old ePic2 Matlab package from e-puck.org (Dec 2010).
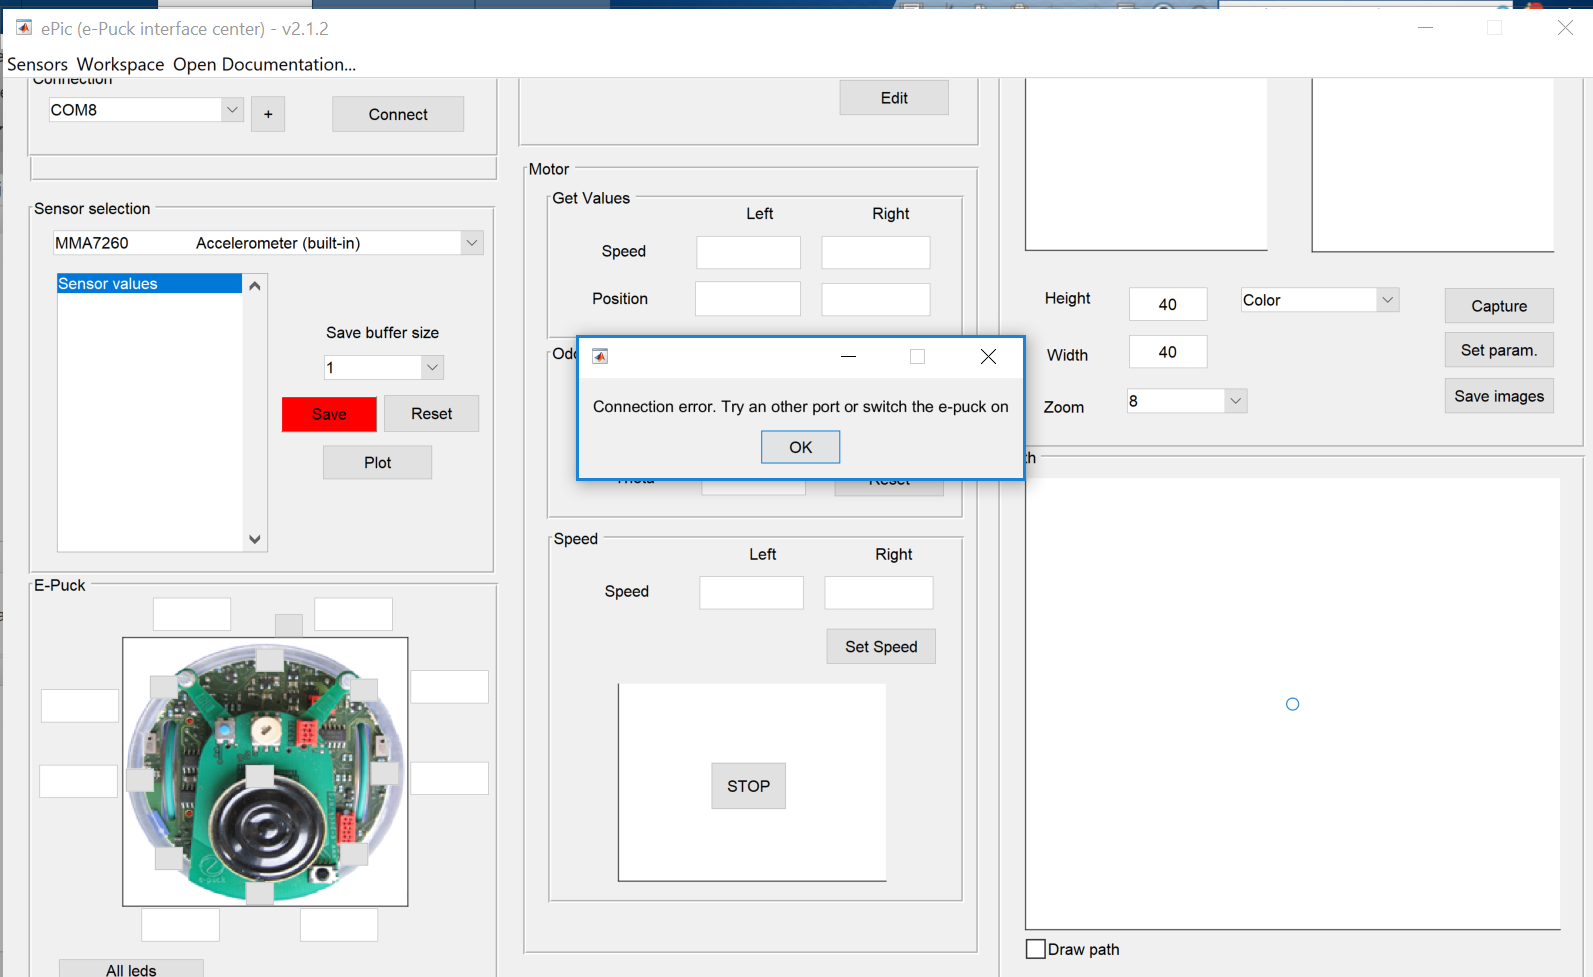
- Asked Sebastian Castro, and the layout of this gui is defined in main.fig, which could be edit with the tool guide. The connection frame does a detection of available COM-ports. Connecting to other ports works, but there not the expected data is returnded. Connecting to COM8 gives the error mesage"Connection error. Try an other port or switch the e-puck on:
- Should try the USB-interface on COM5, before I go debugging the matlab-code. That works:
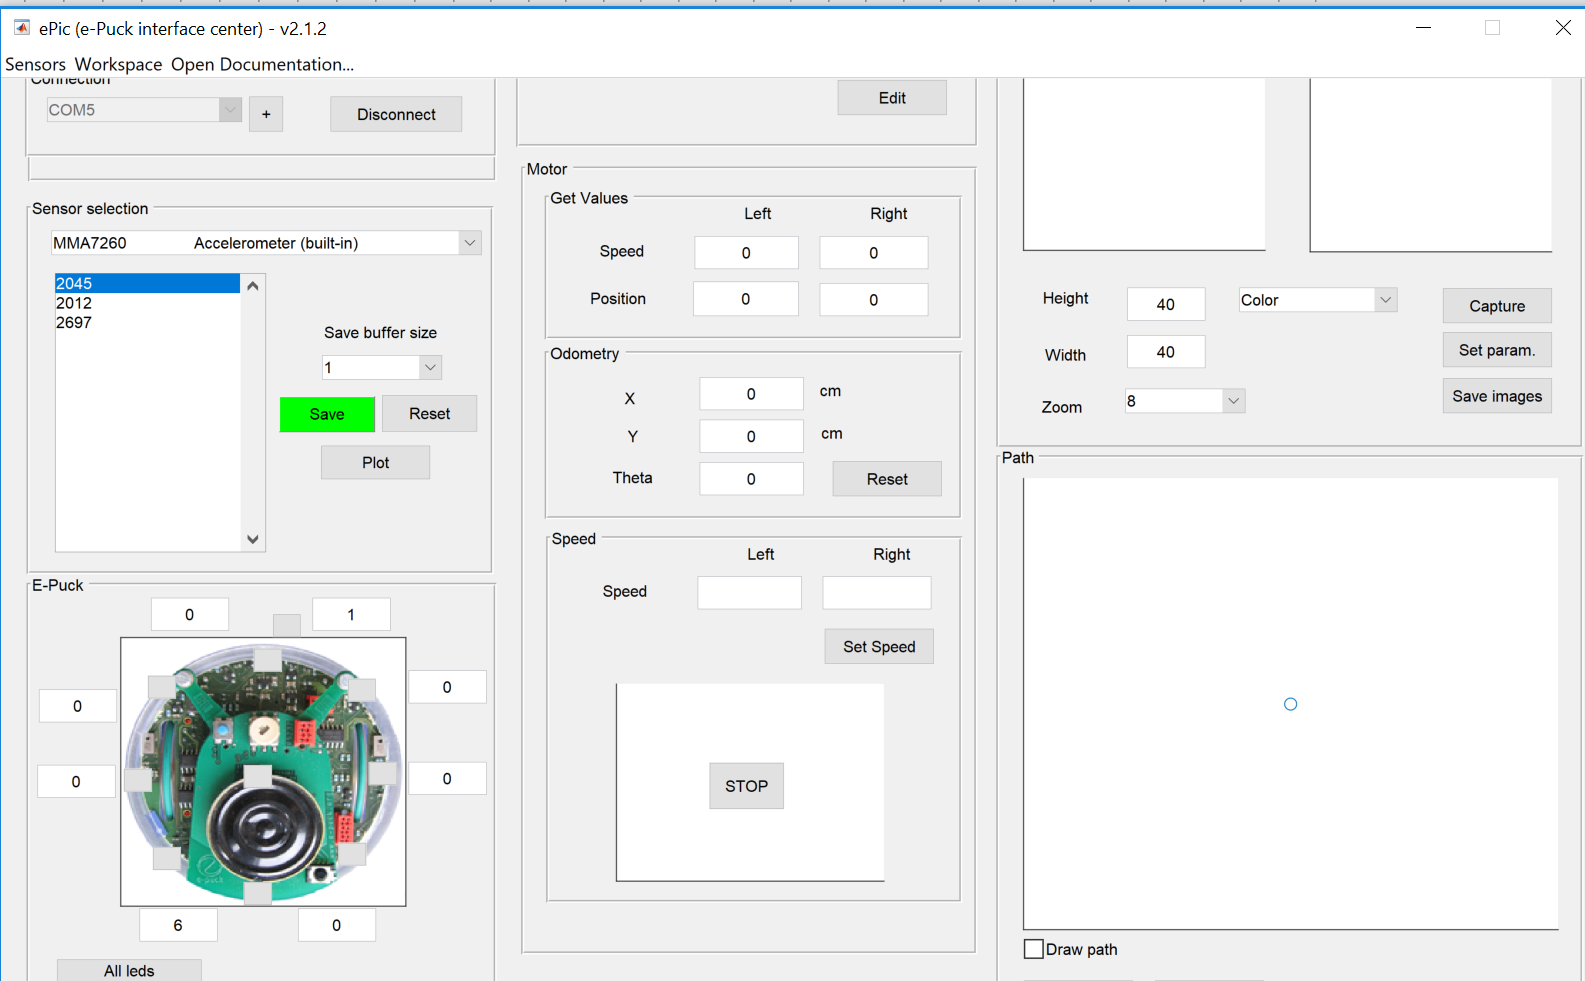 Sensors that return dynamic results are:
- MMA7260 Accelerometer
- TRCT1000 Proximity
- Micro
- TRCT1000 Light
More important, also the image capture seems to work.
- Made a small matlab script which was able to grab an image from the ePuck:
>> port = 'COM5';
>> [ePic result] = connect(ePic, port);
ePic successfully connected
>> ePic = activate(ePic,'image');
>> ePic = updateImage(ePic);
>> imagedata = get(ePic,'image');
>> image(imagedata);
>> [ePic result] = disconnect(ePic);
ePic successfully disconnected
- The code to connect to ePuck is actually quite simple:
ePic.param.comPort = serial(port,'BaudRate', 115200,'inputBuffersize',65536,'OutputBufferSize',4096,'ByteOrder','littleendian');
fopen(ePic.param.comPort);
flush(ePic);
write(ePic,'P,0,0');
read(ePic);
write(ePic,'P,0,0');
read(ePic);
disp 'ePic successfully connected'
- This could be easily modified to connect to webots robot by replacing the first line with:
% Create TCP/IP object 't'. Specify server machine and port number.
t = tcpip('127.0.0.1', 10020);
% Set size of receiving buffer, if needed.
set(t, 'InputBufferSize', 30000);
- Unfortunatelly, Webots has problems with creating a socket on port 1000 (as before). Tried a restart, but that didn't help.
- Removed QT_PLUGIN_PATH from my default environment variables, Dropbox works again.
- Webots has a 20 minutes tutorial how to control an ePuck from matlab.
- According to this page, there is also a tutorial to control a ePuck via Bluetooth from Webots (but we want it visa-versa).
- The argument for the servers is in the world-file, E-puck->controllerArgs. Couldn't change the value, but resetting it to default "" and modifying the code showed that the servers also fails with socket 1001. Same for port 8000 or 8080.
- Still, the original e-puck2_server still works (although with camera not activated). Running the following code in Matlab gives:
>>ePic = ePicKernel();
>> [ePic result] = connect_tcpip(ePic, '127.0.0.1', 1000);
Warning: Unsuccessful read: A timeout occurred before the Terminator was reached.
'tcpip' unable to read any data. For more information on possible reasons, see TCPIP Read Warnings.
Warning: Unsuccessful read: A timeout occurred before the Terminator was reached.
'tcpip' unable to read any data. For more information on possible reasons, see TCPIP Read Warnings.
ePic successfully connected
On the server side this gives:
[e-puck2_server] Accepted connection from: 127.0.0.1.
[e-puck2_server] Received 6 bytes:
[e-puck2_server] 0x50 0x2c 0x30 0x2c 0x30 0x0a
[e-puck2_server] Received 6 bytes:
[e-puck2_server] 0x50 0x2c 0x30 0x2c 0x30 0x0a
- The matlab command ePic = updateImage(ePic); gave on the server side:
[e-puck2_server] Received 12 bytes:
[e-puck2_server] 0x4a 0x2c 0x31 0x2c 0x34 0x30 0x2c 0x34 0x30 0x2c 0x38 0x0a
[e-puck2_server] Received 2 bytes:
[e-puck2_server] 0xb7 0x00
- The matlab command imagedata = get(ePic,'image'); read the buffer (no visible activity at server side).
The imagedata was black (because the camera was not activated ?!). The matlab command ePic result] = disconnect(ePic); gave the response:
[e-puck2_server] Connection closed, waiting for new connection on port 1000...
- This is the same problem I encountered at April 24, I will look if this is solved in the new version of Webots (R2019b).
July 1, 2019
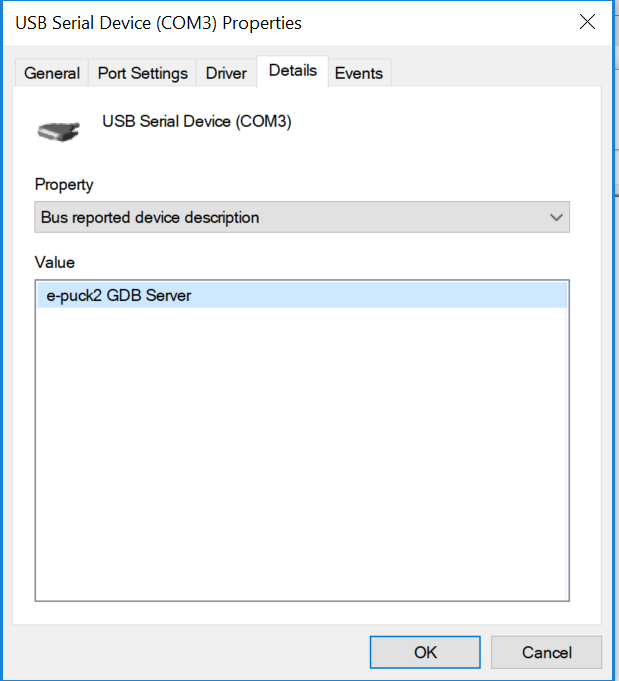
- Following the instructions, I connected the ePuck2 for the first time. The selector was in demo position 0, which is called Aseba. In this position the device manager of Windows10 showed two serial ports (gdb servers and serial monitor). In position 8 (called Asercom protocol v2 (USB)) also provided a third serial port (called e-puck2 STM32F407). In my case this is COM5.
- Just typing in COM5 doesn't work for the E-Puck Monitor to connect. In 2008 manual one gives an example of /dev/tty.e-puck_1594-COM1-1, but that seems a Linux example.
- If I look at the source-code of the wifi-monitor, this version can only connect to an ip-adress, I need another version to connect to a COM-port.
- Same gitbub repository, only the master branch.
- Tried to run the binary which was available on Google drive, but that version conflicted with my Qt settings (seems to be build with Qt_5_10).
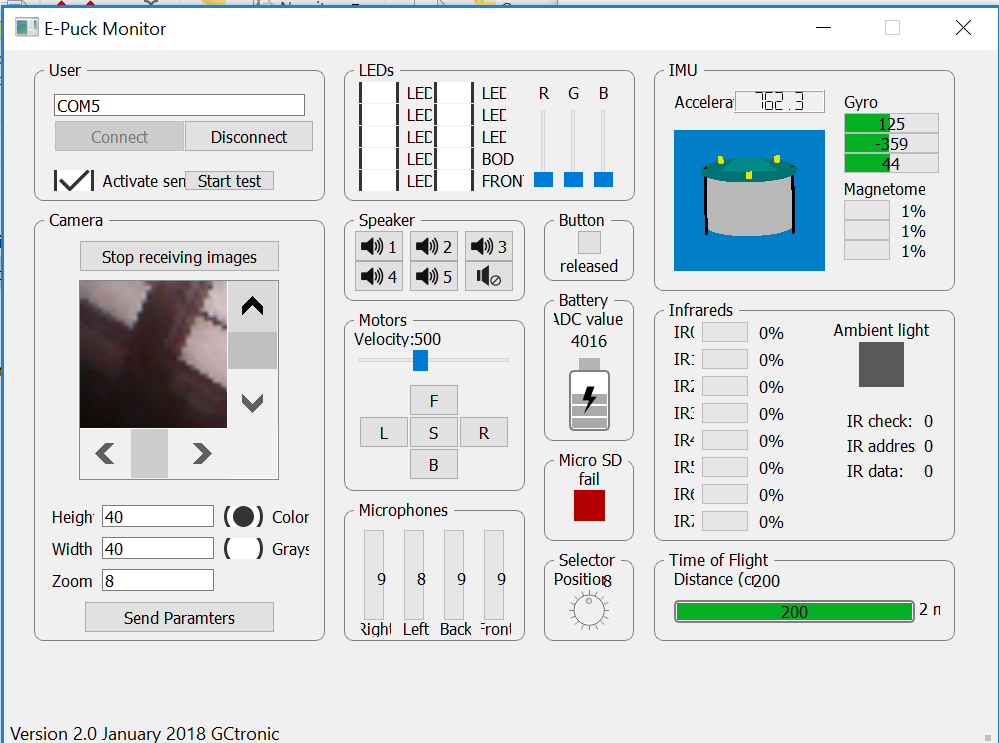
- First running SET QT_PLUGIN_PATH=%cd%\plugins and then EPuckMonitor.exe solves this issue. Finally I have connection (and images) from the real ePuck2:
- Looking to make a connection via Bluetooth or wifi following the instructions of PC side development. Yet, I don't see the access point or the Bluetooth channels when started in position 15 or 3 (holding the USER button), so it seems that I need to do a firmware update.
- The same page has an interesting section called Finding the ip-address, but they are not specific how they connect to the port (telnet?). The figure seems to indicated that they use the python script multi-robot.py.
- Was looking if I could use the shell of the ePuck2 (selector2). Have not find clear documentation for this shell, although the firmware seems to be based on , which has user anual.
- Installing Python for Windows 3.7.3 in C:\Programs\, so that I can do pip3 install pyserial.
- Modified the multi-robot.py to single-robot.py, which actually seems to work (with the selector in position 8):
C:\src\epuck2>python single-robot.py
rob1
acc0: 2060
prox0: 0
gyro0: 2103
micro0: 17
rob1
acc0: 2057
prox0: 0
gyro0: 2079
micro0: 20
- Following step 1 and 2 of Firmware update. Seems that I have to modify the program.bat to use the right com-port (COM5 in my case, instead of the COM96 of the example). Curious if the esptool.exe could also check the current firmware version. The github page of esptool describes nicely all command-line options. The command esptool.py flash_id should do the trick. Tested it by first doing pip3 install esptool followed by esptool.py flash_id:
esptool.py v2.6
Found 3 serial ports
Serial port COM5
Connecting........_____....._____....._____....._____....._____....._____....._____
COM5 failed to connect: Failed to connect to Espressif device: Timed out waiting for packet header
Serial port COM4
Connecting....
Detecting chip type... ESP32
Chip is ESP32D0WDQ6 (revision 0)
Features: WiFi, BT, Dual Core, Coding Scheme None
MAC: 30:ae:a4:03:d6:68
Uploading stub...
Running stub...
Stub running...
Manufacturer: ef
Device: 4016
Detected flash size: 4MB
Hard resetting via RTS pin...
April 24, 2019
- That the images are black is not a bug from the ePuckMonitor, but from the epuck_server sample-code. As indicated in tutorial, the camera image is black as long as the controller doesn't enable it.
- Read camera documentation and added camera = wb_robot_get_device("camera") and wb_camera_enable(camera,33) to the server code. Now I see an image in the small window in the upper left corner.
- Yet, the server now complains that it cannot create a socket (not correctly closed?). The sample e-puck server was in the list of allowed apps in the firewall, but switching off the firewall didn't help (sample server still runs).
- Read Bridging ePuck and Webots article. For cross-compilation, the Webots/projects/robots/gctronic/e-puck contains a transfer directory. Yet, this article was the bluetooth variant, with additional linux-board for the WIFI.
- Strange enough, the newly created exe is smaller that the original one. Moving the new one to old location doesn't help. Strange, seems to be a different makefile (no, same makefile).
April 11, 2019
- Started the test to connect the ePuckMonitor to the Webots world.
- Webots no longer starts, because no qt windows plugin could be found. Webots has its own Qt.dlls in its msys64/mingw64/bin, including a plugin directory. Adding QT_PLUGIN_PATH to webots.bat solves this issue.
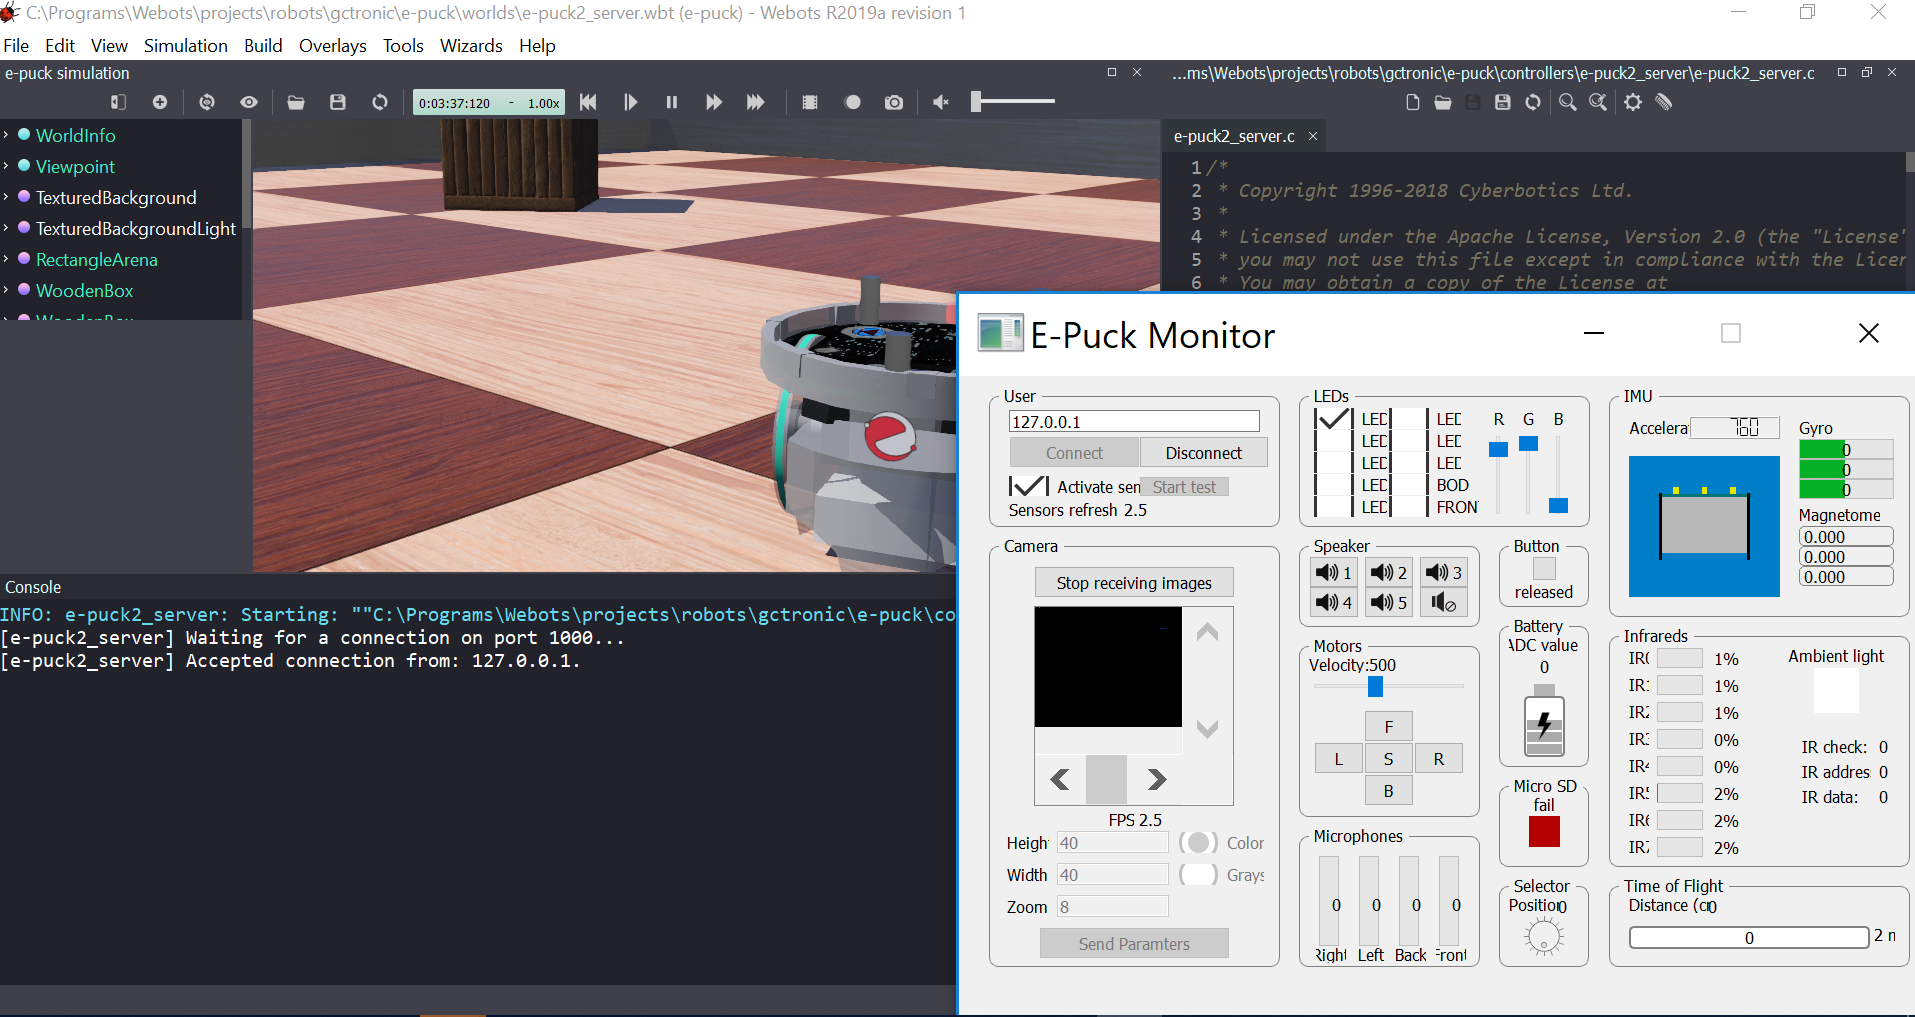
- Could connect and control the robot, the only thing that fails are the images (although selected start receiving images, and I see an FPS of 12):
April 9, 2019
- Tried to build epuck2-wifi-monitor with command nmake -f Makefile.Release. Still release\main.obj : fatal error LNK1112: module machine type 'x86' conflicts with target machine type 'x64'
- Removing all release\*.obj and creating them again with option /favor:INTEL64 instead of -m64 as CXXFLAGS solves this issue. Linking succeeded: I have an EPuckMonitor.exe.
- Running that executable still failed, because entry point QGLWidget@ could not be located in the dynamic library.
- In the Makefile.Release the following LIBPATH is specified: /LIBPATH:C:\Qt\5.7.0\x64\msvc2015\qt-opensource-windows-x86-msvc2015_64-5.7.0\lib C:\Qt\5.7.0\x64\msvc2015\qt-opensource-windows-x86-msvc2015_64-5.7.0\lib\qtmain.lib /LIBPATH:C:\utils\postgresql\pgsql\lib /LIBPATH:C:\utils\my_sql\my_sql\lib shell32.lib opengl32.lib C:\Qt\5.7.0\x64\msvc2015\qt-opensource-windows-x86-msvc2015_64-5.7.0\lib\Qt5OpenGL.lib C:\Qt\5.7.0\x64\msvc2015\qt-opensource-windows-x86-msvc2015_64-5.7.0\lib\Qt5Widgets.lib C:\Qt\5.7.0\x64\msvc2015\qt-opensource-windows-x86-msvc2015_64-5.7.0\lib\Qt5Gui.lib C:\Qt\5.7.0\x64\msvc2015\qt-opensource-windows-x86-msvc2015_64-5.7.0\lib\Qt5Network.lib C:\Qt\5.7.0\x64\msvc2015\qt-opensource-windows-x86-msvc2015_64-5.7.0\lib\Qt5Core.lib
- Copied a number of the Qt*.dll to the local directory (Core, Network, Widgets) solved the dynamic library problem. Remaining error is could not load the Qt platform plugin "windows". Added the dll both in the directory and copied plugins/platforms to no avail.
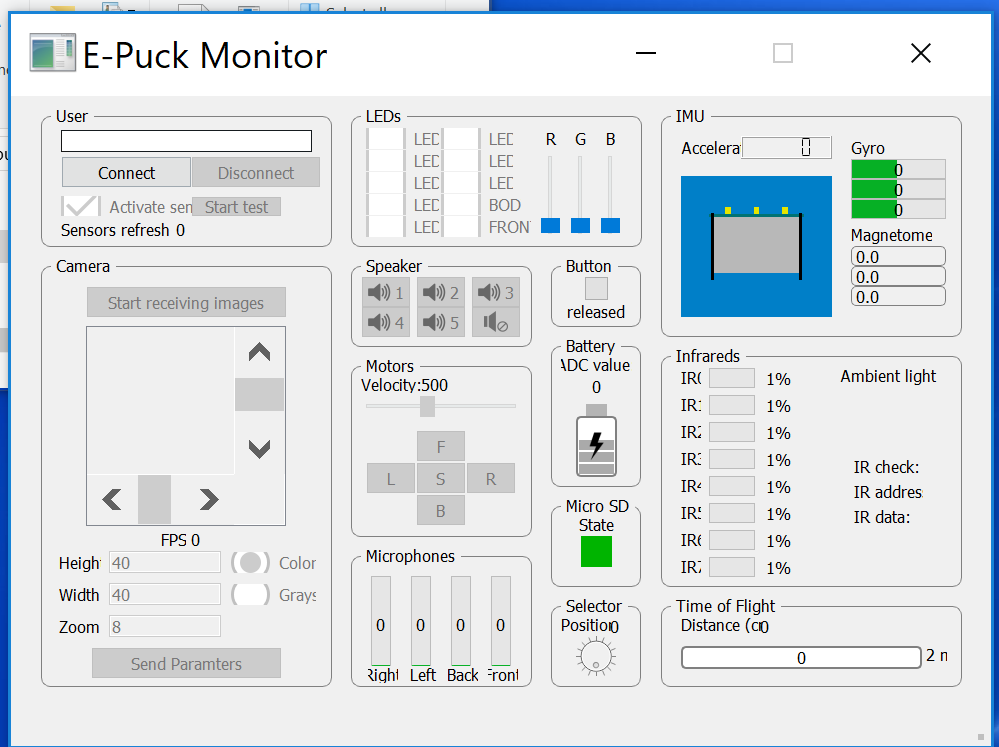
- Created an environment variable QT_PLUGIN_PATH which pointed to my installation C:\Qt\5.7.0\x64\msvc2015\qt-opensource-windows-x86-msvc2015_64-5.7.0\plugins and now I EPuckMonitor starts on a 64bits machine with Qt5.7. GUI only works with 1920x1080 resolution, doesn't scale to 4K:
 .
.
- Maybe nice to use ListDLLs to check all the libraries that have to go into the package.
- ListDLLs works fine (if you type in the application with .exe extension). Made epuck2-wifi-monitor.zip which contains all needed libraries (checked on my workstation). Only additional thing needed is a script to set the environment variable QT_PLUGIN_PATH to ./plugins.
- Created a run-epuck2-wifi-monitor.bat script and added it to the zip.
March 26, 2019
- Tried to build git clone -b wifi --recursive https://github.com/e-puck2/monitor.git with Qt 5.7.0. The new Makefile works, and the g++ of Webots also works. Program holds on CommThread.cpp:90, because skip is no longer part of QTcpSocket (although it is was introduced again as part of QIODevice in Qt 5.10). Looked at qtcpsocket-members and replaced skip() for flush().
- Compilation works, only the link to mingw32 library is missing. Removed it from the Makefile.Release, but I got many complains on missing references like:
release/main.o:main.cpp:(.text+0x39): undefined reference to `QApplication::QApplication(int&, char**, int)'
release/main.o:main.cpp:(.text+0x39): relocation truncated to fit: R_X86_64_PC32 against undefined symbol `QApplication::QApplication(int&, char**, int)'
- Downloaded qt-win-opensource-4.8.0-mingw.exe.
- Also installed mingw, followed by installing the gcc-g++ packages inside mingw. Kept it further quite basic.
- Qt requires also w32api-dev to be installed, but is quite specific on the version (3.13). Tried C:\MinGW\bin\mingw-get install "mingw32-w32api-dev<3.13"
mingw-get: *** ERROR *** there is no release matching mingw32-w32api-dev<3.13
mingw-get: *** ERROR *** available candidate releases are...
mingw-get: *** ERROR *** w32api-5.2.1-mingw32-dev.tar.xz
mingw-get: *** ERROR *** w32api-5.2-mingw32-dev.tar.xz
mingw-get: *** ERROR *** w32api-5.1.1-mingw32-dev.tar.xz
mingw-get: *** ERROR *** w32api-5.1-mingw32-dev.tar.xz
mingw-get: *** ERROR *** w32api-5.0.2-mingw32-dev.tar.xzA
- I will try it with v5.2.1, otherwise I have to install the non-mingw version of Qt.
- In the mean time, new Makefile.Release and Makefile.Debug were made (for Qt5.7, so had to repair them with Qt4.8). Still problems, so decided to make new makefiles with command qmake -spec win32-g++ qmake.pro. Worked out fine, only rcc.exe and moc.exe had problems with release/ instead of release\. Switching to Git-bash didn't help.
- Corrected manually Makefile.release. Problem with moc.exe was the quotes around the moc.exe. Still, linking goes wrong because the libraries in C:\MinGW\lib are seen as incompatible. Strange enough, the Makefile is based on the qt installation in C:\packages\Anaconda2\Library instead of C:\Qt.
- The Qt version of Anaconda looks quite old, so remove Anaconda2\, Anaconda\Scripts and Anaconda\Library\bin from my Path, and try to build a Makefile again.
- Now qmake is no longer known. Adding C:\Qt\4.8.0\bin to the path gave the warnings:
Qt: Untested Windows version 6.2 detected!
Project MESSAGE: Warning: unknown QT: widgets
Qt: Untested Windows version 6.2 detected!
- Tried it again with Qt5.7.0. First specified win32-g++, which gave path not found. Specified win32-msvc2015, which created Makefiles for msvc2017 without warnings.
- Works fine, except the build of EPuckMonitor.exe, which gave conflict:
Qt5OpenGL.lib(Qt5OpenGL.dll) : fatal error LNK1112: module machine type 'x64' conflicts with target machine type 'x86'
- If I specify /Machine:X64 I get
release\main.obj : fatal error LNK1112: module machine type 'x86' conflicts with target machine type 'x64'
- If I specify /Machine:X86 I get
Qt5OpenGL.lib(Qt5OpenGL.dll) : fatal error LNK1112: module machine type 'x64' conflicts with target machine type 'x86'
So I should rebuild the release\*.obj with the /Machine:X64 option.
March 25, 2019
- Received a response of Matlab support, they point to msys2.0.dll as origin of the crash.
- Should try to access Webots remotely.
- Webots nicely provides a client.c example, which should be compiled at Windows as gcc -Wall -mno-cygwin client.c -o client -lws2_32.
- Tried it with VS2017 compiler: cl -Wall -mno-cygwin webots_client.c -o webots_client -lws2_32, but _socket@12 referenced in function _main. Could try to get gcc working (maybe in the vcpkg/tools - checked: NO), but first I should find that ws2_32 library.
- Compiling goes fine, but I have some problems with getting the options of the LINK right. Should look at this Makefiles and Visual Studio tutorial.
- Most suggestions I already found myself. Suggestion is to use Cmake for Visual Studio.
- Cloned CMake example, and executed cmake .. -G "Visual Studio 15 2017" (found the correct option with cmake --help)
- Found 3 version of gcc on my XPS-dual: C:\Programs\Webots\msys64\mingw32\bin, C:\Programs\Ruby25-x64\msys64\mingw64\bin and C:\Programs\Octave-5.1.00\mingw64\bin.
- The gcc of Webots is able to create the client.exe, although I got the warning:
/usr/lib/gcc/x86_64-pc-msys/7.4.0/../../../../x86_64-pc-msys/bin/ld: skipping incompatible C:\Programs\Webots\msys64\mingw32\i686-w64-mingw32\lib/libws2_32.a when searching for -lws2_32
- Running webots_client.exe gives cannot create socket. The server seems still to be running, but should check the port.
- Server seems still to be running (although no output in console). Should accept connections on 127.0.0.1:10020.
- Made a connection from an Ubuntu prompt telnet 127.0.0.1 10020. Was able to make the LED red:

- Activated telnet in Windows with command dism /online /Enable-Feature /FeatureName:TelnetClient.
- Windows Telnet could connect to the socket, but every character is send (no wait on return).
- Looking for the tcp-ip program from Matlab. Found an example in Instrument Control Toolbox.
- I could easily adjust the example and control the LEDs from Matlab. Only downside, program works only once (even with an exit command and the end). That should be solvable with some TinyWebServer code added to tcpip.c server. This is the working matlab_tcpip_webots.m.
- Script works also fine in Matlab2018b.
- Creating a Matlab Live Script with the different commands. The distance sensor gives back zero when it is on maximum range.
- Continued with ePuck. The ePuck has already a world with a server, which is a bit more advanced compared to the Kephera server. It interprets byte-commands, instead of strings. The server is equivalent with the real ePuck, and can be controlled by the native ePuckMonitor, which can be downloaded from ePuck site. Also a MatLab package is available. Actually, the ePuckMonitor in downloads seems to be the Monitor for the old ePuck1 (via COM6), there is a February 2018 version available at the ePuck2 drive. That also doesn't seem to be the WIFI version.
- Found this internet archive, which points to git clone -b wifi --recursive https://github.com/e-puck2/monitor.git and a binary which is no longer available. There is a manual, but that seems to describe an older version. Looking at the code, in the connect window of the monitor an ip-string should be given, which is automatically coupled to port 1000. Unfortunatelly, the binary version complains about a Com port.
- At least the wifi communication protocol is described.
- Cloned the wifi-branch. Calling nmake -f Makefile gave the error:
don't know how to make 'c:/QtSDK/Desktop/Qt/4.8.0/mingw/mkspecs/win32-g++/qmake.conf'
I have installed Qt in C:\Qt\5.7.0\, but I will first try the Matlab package.
- The Matlab package is even older, the documentation is from 2008. The main calls a control-window, which doesn't completely fit on my computer (tried several resolutions). Yet, from the documentation and the code it is clear that it connects to a COM-port, not a WIFI port. Still, part of the code if interpreting the responses could be reusable.
- Looked at the CommThread.cpp, which has this connected() code:
qDebug() << "connected...";
emit updateUiState(UI_STATE_ROBOT_CONNECTED);
output_buffer[0] = 0x80;
output_buffer[1] = 0x02; // Bit0: start/stop image stream; bit1: start/stop sensors stream.
output_buffer[2] = 0x00; // Behavior / others
output_buffer[3] = 0x00; // Left speed LSB
output_buffer[4] = 0x00; // Left speed MSB
output_buffer[5] = 0x00; // Right speed LSB
output_buffer[6] = 0x00; // Right speed MSB
output_buffer[7] = 0x00; // LEDs
output_buffer[8] = 0x00; // LED2 red
output_buffer[9] = 0x00; // LED2 green
output_buffer[10] = 0x00; // LED2 blue
output_buffer[11] = 0x00; // LED4 red
output_buffer[12] = 0x00; // LED4 green
output_buffer[13] = 0x00; // LED4 blue
output_buffer[14] = 0x00; // LED6 red
output_buffer[15] = 0x00; // LED6 green
output_buffer[16] = 0x00; // LED6 blue
output_buffer[17] = 0x00; // LED8 red
output_buffer[18] = 0x00; // LED8 green
output_buffer[19] = 0x00; // LED8 blue
output_buffer[20] = 0x00; // sound
- The output_buffer is an unsigned char array, the equivalence in Matlab is an uint8.
- Made a buffer in the following way, and received 30000 as answer
buffer(1) = uint8(hex2dec('80'));
buffer(2) = uint8(hex2dec('02'));
buffer(3:21) = uint8(hex2dec('00'));
- The 30000 seems to be "0x03 = empty packet (only id is sent); this is used as an acknowledgment for the commands packet when no sensors and no image is requested".
- whos ans indicates a 8 byte double. Tried response = typecast(ans, 'uint8') which gave 0 0 0 0 0 76 221 64 ( 1×8 uint8 row vector).
- Reconnected. Got the first time another response ('26xx'), but after that response '30000', so maybe this was clearing a buffer.
- Added print statement to server, but now I get that it cannot longer open a socket. Also tried it with another port (1001), same effect. Should bring the code from the backup back.
March 24, 2019
- Continue with step 11 of Install Gazebo on Windows: make gazebo.
- Maybe I didn't have to do all the effort of pkg-config, if I directly installed Git bash shell (as suggested), which would have allowed me to let the cmake scripts together with pkg-config. Checked it, and the MINGW shell doesn't have pkg-config. Worse, I am missing some of the variables I added yesterday to my path.
- The trick is to set all directories in configure.bat, and than let SearchForStuff.cmake do the work.
- At the moment I am stuck that FreeImage.h can be found, but no FreeImage.lib (one of the first stuff searched for).
- Remaining issues, according to SearchForStuff:
- protobuf (move one directory up)
- No package 'libprofiler' found
- No package 'libtcmalloc' found
- not providing "FindSimbody.cmake" Simbody not found, for simbody physics engine option, please install libsimbody-dev.
- Could NOT find DART (missing: DART_DIR) DART 6.6 not found, for dart physics engine option, please install libdart6.6-dev.
- Using internal tinyxml.
- Using internal tinyxml2.
- Using internal copy of libccd
- libswscale not found. Audio-video capabilities will be disabled.
- libavformat not found. Audio-video capabilities will be disabled.
- libavcodec not found. Audio-video capabilities will be disabled.
- libavutil not found. Audio-video capabilities will be disabled.
- Player not found, gazebo plugin for player will not be built.
- GNU Triangulation Surface library not found - Gazebo will not have CSG support.
- Bullet > 2.82 not found, for bullet physics engine option, please install libbullet2.82-dev.
- libusb-1.0 not found. USB peripherals support will be disabled.
- Oculus Rift support will be disabled.
- Missing: SDF version >=6. Required for reading and writing SDF files.
- Imported targets and dependency information not available for Boost version. Boost not found. Please install thread system filesystem program_options regex iostreams date_time boost version 1.40.0 or higher.
- Missing libdl: Required for plugins.
- GDAL not found, Digital elevation terrains support will be disabled.
- ronn not found, manpages won't be generated
- gzip not found, manpages won't be generated
- xsltproc not found. The check_test_ran.py script will cause tests to fail.
- Graphviz not found, Model editor's schematic view will be disabled.
- Missing: Ignition msgs1 library (libignition-msgs-dev).
- Missing: Ignition math (libignition-math4-dev)
- Missing: Ignition Transport (libignition-transport4-dev)
- Ignition Fuel Tools not found, Fuel support will be disabled
- OpenSource Virtual Reality (OSVR) support will be disabled.
- Missing: libqwt-dev. Required for plotting.
- Looking for display capabilities ! valid dri display not found (no glxinfo or pyopengl)
- SSE4 disabled.
- Actually, SearchForStuff nicely categories it in BUILD WARNINGS and BUILD ERRORS. The things that still have to be resovled:
-- BUILD ERRORS: These must be resolved before compiling.
-- Missing: Unable to find libfreeimage
-- Missing: SDF version >=6. Required for reading and writing SDF files.
-- Boost not found. Please install thread system filesystem program_options regex iostreams date_time boost version 1.40.0 or higher.
-- Missing libdl: Required for plugins.
-- Missing libdl: Required for plugins.
-- Missing: Ignition msgs1 library (libignition-msgs-dev).
-- Missing: Ignition math (libignition-math4-dev)
-- Missing: Ignition Transport (libignition-transport4-dev)
-- Missing: libqwt-dev. Required for plotting.
-- END BUILD ERRORS
- Some of those missing packages are available from Install Gazebo on Windows: freeimage, boost, libdl, ign-math, sdfformat, QT. What is missing are libigntion-msgs-dev and ligbignition-transport4-dev.
- So, there was already C:/Programs/Microsoft/VisualStudio/2017/Enterprise/Common7/IDE/CommonExtensions/Microsoft/CMake/CMake/share/cmake-3.11/Modules/FindProtobuf.cmake, I didn't have to make it in gazebo/cmake. Yet, the include directory goes to deep, don't have to specify google/protobuf. Corrected that in CMakeList.txt, and received: Found Protobuf: C:/packages/gz-ws/protobuf-2.6.0-win64-vc12/vsprojects/x64/Release/libprotobuf.lib (found version "2.6.0")
- sdformat has a cmake/sdformat_pc.in. Not sure if I did a configure / build in this directory (yes I did, build existed). Configure under Git-bash gave:
-- BUILD WARNINGS
-- Couldn't find pkg-config for urdfdom, using internal copy
-- END BUILD WARNINGS
-- BUILD ERRORS: These must be resolved before compiling.
-- Boost not found. Please install system boost version or higher.
-- Missing: Ignition math (libignition-math4-dev or libignition-math5-dev)
-- END BUILD ERRORS
- Searched for FindBoost.cmake: there are several of them. Tried to specify which with @set CMAKE_MODULE_PATH=C:\Programs\Microsoft\VisualStudio\2017\Enterprise\Common7\IDE\CommonExtensions\Microsoft\CMake\CMake\share\cmake-3.11\Modules, but that seems to be overruled somewhere. At least it finds C:/packages/gz-ws/ign-tools/install/lib/cmake/ignition-tools/ignition-tools-config.cmake.
- Downloading the latest version of libboost (v1.67, which seems to ready to be used (no instruction on environment variables to be set). I could active this by adding a line set (ENV{Boost_DIR} $ENV{BOOST_ROOT}) to SearchForStuff.cmake. One BUILD ERROR left:
-- BUILD ERRORS: These must be resolved before compiling.
-- Missing: Ignition math (libignition-math4-dev or libignition-math5-dev)
-- END BUILD ERRORS
- Tried to download ign-math5-release, but that only contains Ubuntu and kinetic directories.
- Which worked, was to perform hg up math5 in the ign-math directory. Still, should follow the instructions from gazebosim and install ign-cmake.
- Called cmake .. -DCMAKE_INSTALL_PREFIX=../install , followed by msbuild INSTALL.vcxproj, which seems to work.
- Strange enough the executable is not in ../install/bin. More important, there are several FindPackages.cmake in C:\packages\gz-ws\ign-cmake\install\share\cmake\ignition-cmake3\cmake3. Trying ALL_BUILD.vcxproj. Still no executable.
- Yet, by upgrading the CMakelist from cmake1 to cmake3 and providing -Dignition-cmake3_DIR=C:\packages\gz-ws\ign-cmake\install\share\cmake\ignition-cmake3 to cmake in configure.bat, I got further with ign-math (only BUILD WARNINGS left):
-- BUILD WARNINGS
-- Cannot build component [eigen3] - Missing: eigen3 - Provide conversions to eigen3 types
-- Swig is missing: Language interfaces are disabled.
-- END BUILD WARNINGS
- Actually, building ign-math also goes well with command: >nmake -f Makefile.
- According to install from source, the next step is to build ign-common (which has the dependencies install on windows was refering to).
- Cloned ign-common (ignition-common4). First step is to upgrade to ign-cmake3. That helps. One remaining error:
-- BUILD WARNINGS
-- Cannot build component [graphics] - Missing: ignition-math6
-- Cannot build component [events] - Missing: ignition-math6
-- Cannot build component [graphics] - Missing: FreeImage
-- Cannot build component [graphics] - Missing: gts - GNU Triangulation Surface library
-- Cannot build component [av] - Missing: libswscale
-- Cannot build component [av] - Missing: libavdevice
-- Cannot build component [av] - Missing: libavformat
-- Cannot build component [av] - Missing: libavcodec
-- Cannot build component [av] - Missing: libavutil
-- END BUILD WARNINGS
-- BUILD ERRORS: These must be resolved before compiling.
-- Missing: libdl - Required for plugins
-- END BUILD ERRORS
- Created a dlfcn-win32-config.cmake with
# Compatibility
set(DLFCN-WIN32_LIBRARIES dlfcn-win32)
set(DLFCN-WIN32_INCLUDE_DIRS "${PACKAGE_PREFIX_DIR}/include/")
set(DLFCN-WIN32_LIBRARY_DIRS "${PACKAGE_PREFIX_DIR}/lib")
set(DLFCN-WIN32_LDFLAGS "-L${PACKAGE_PREFIX_DIR}/lib")
- A Makefile is build, which can be called with nmake -f Makefile. Yet, dlfcn.h is not found, so the INCLUDE directory is not correctly loaded. Check CMakeFiles\Makefile2. Couldn't repair that (maybe missing target-release file?)
- sdformat needed ignition-math5-config.cmake, so made it from ignition-math3-config.cmake. Makefile is created, but nmake -f Makefile fails on don't know how to make 'ignition-math5-NOTFOUND'.
-
- Continue with Matlab - Webots interface. Provided is a "WEBOTS_HOME/projects/languages/matlab/worlds/e-puck_matlab.wbt" example which works with a "my_controller/my_controller.m". Didn't see direct support for Live scripts.
- Example worked directly out of the box:
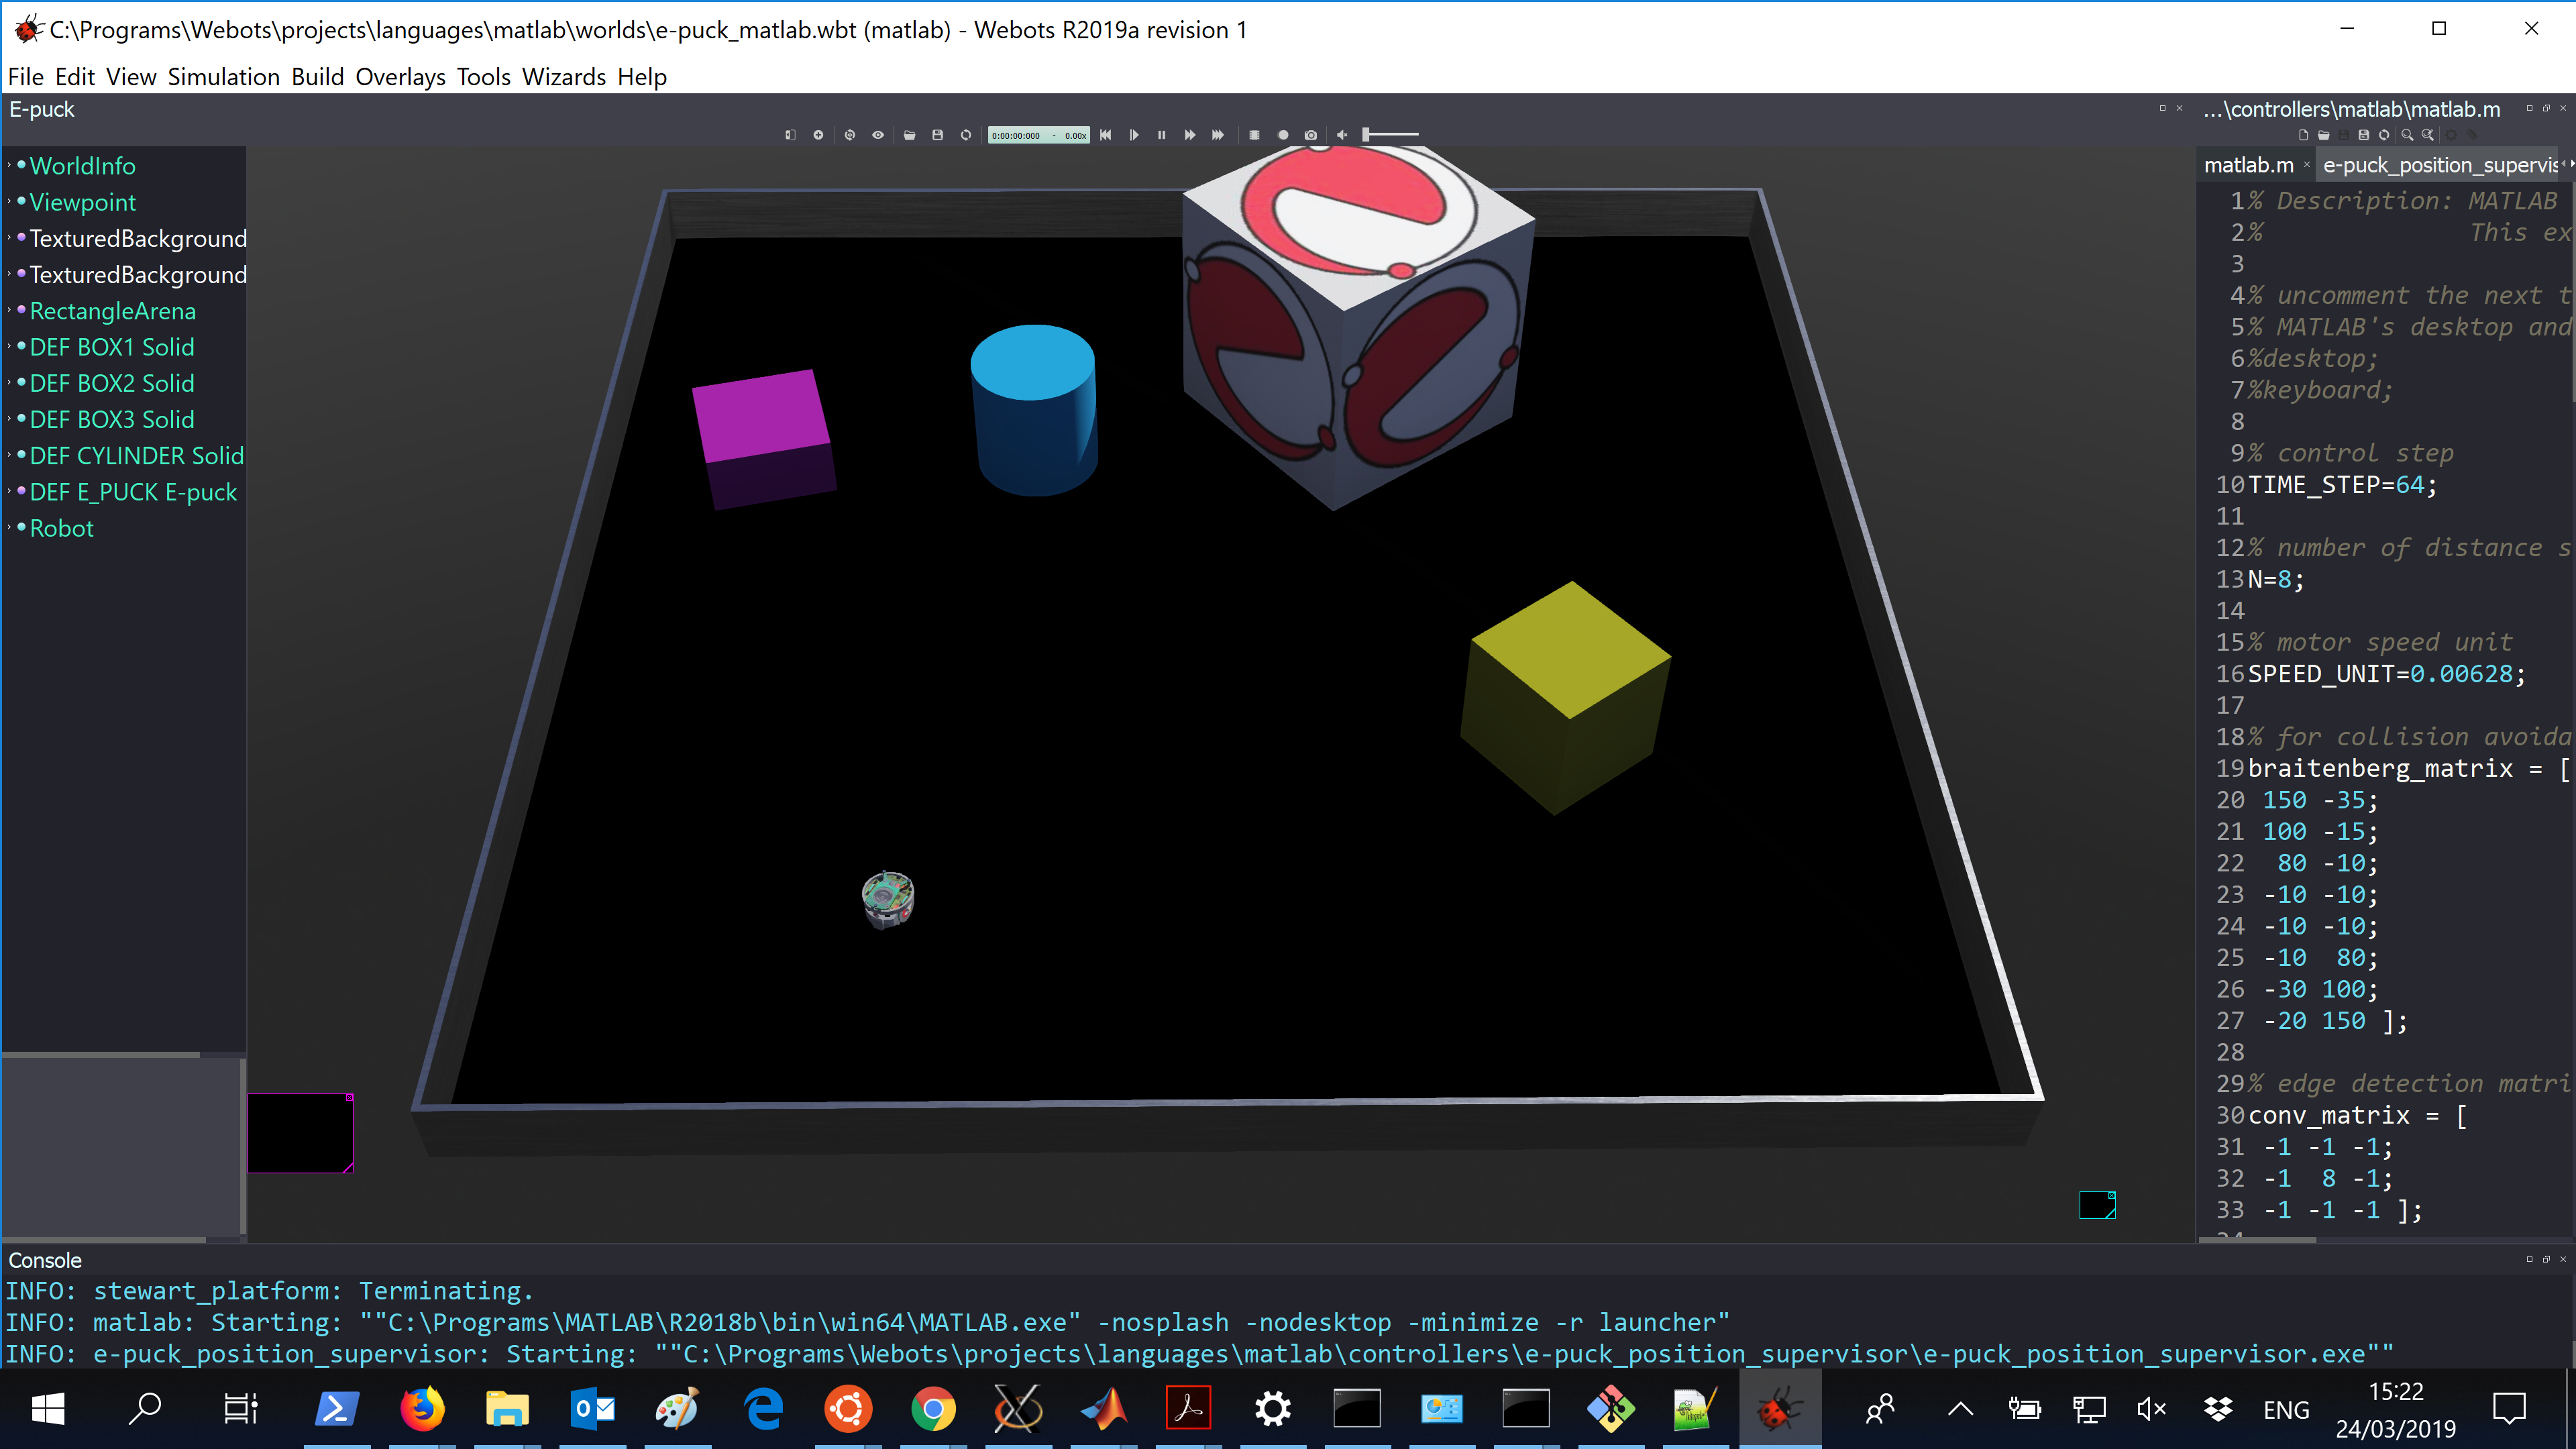
- Not completely true, the robot is not moving. Initialisation failed on loading e-puck_bluettoth.dll.
- The error seems to be in a Java, and due to my too new version (R2018b), while Webots requires R2018b.
Java Crash Report : C:\Users\arnoud\AppData\Local\Temp\hs_error_pid21228.log
Assertion in void __cdecl `anonymous-namespace'::mwJavaAbort(void) at b:\matlab\src\jmi\jmi\javainit.cpp line 1366
- Downloading Matlab 2015.
- Still a Java-crash on loading the e-puck_position_supervisor.exe. Correct version of Matlab called, but should check JDK environment variables.
- Had C:\Program Files (x86)\Common Files\Oracle\Java\javapath in my path. Moved it down.
- Deleting all directories under Matlab2015b (Matlab2018b and javapath) helped. Still the e-puch.dll couldn't be loaded, but no java crashes.
- You cannot call Webots from Matlab, but you can get a Matlab console and a keyboard when requested from Webots. The version is 2015, so no Live Scripts (yet), as indicated in post. Yet, Webots supports Matlab from v2015b, and uses as example v2018b, so scripts should in pirnciple be possible.
- Run the bluetooth.exe directly. First failed on missing Controller.dll in C:\Programs\Webots\msys64\bin. With this library, the program starts but directly quits. Moved the Matlab2015 to the top of the path. ePuck drives around for a while, but matlab crashes anyway:
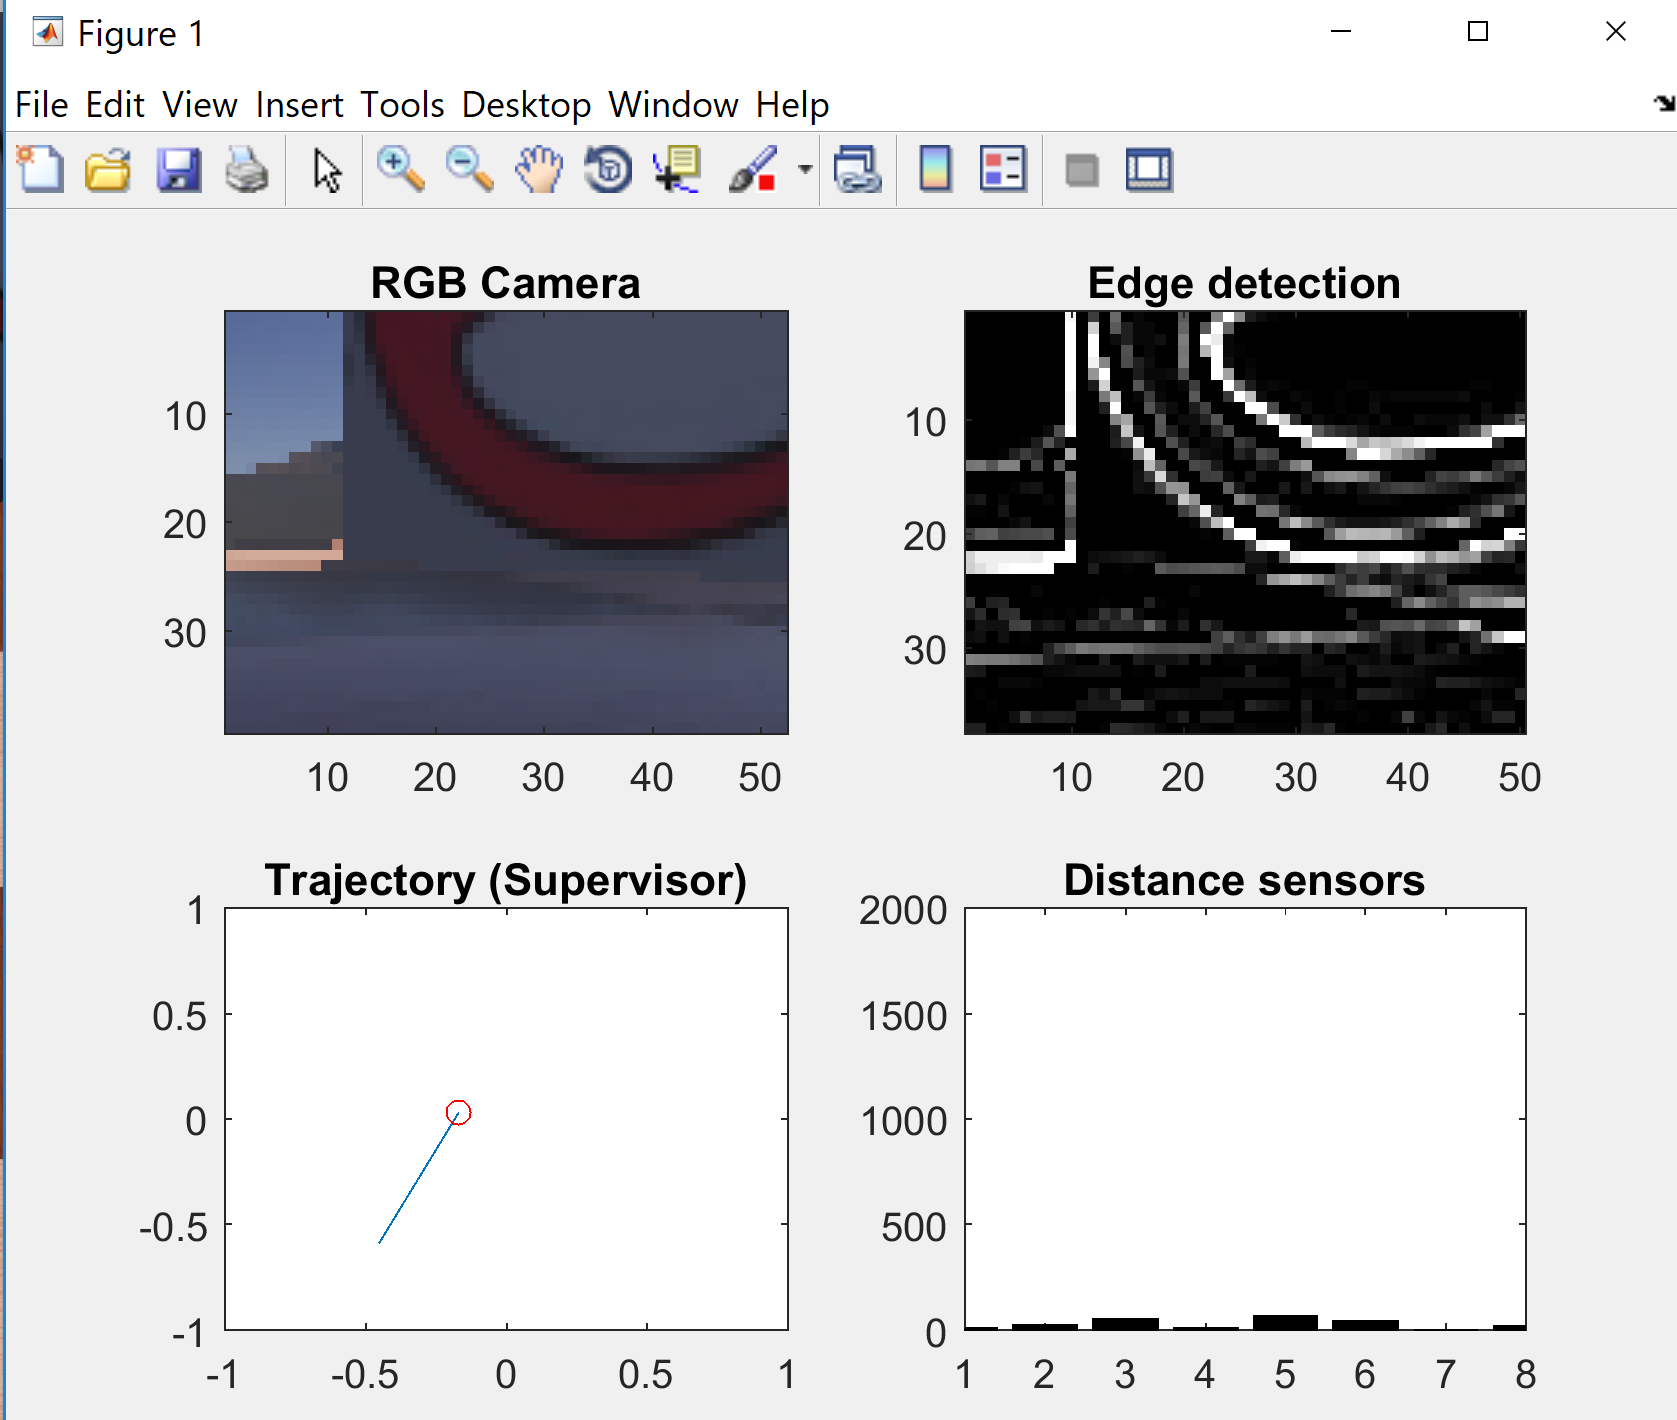
- Same crash when I load nao_matlab.wbt:
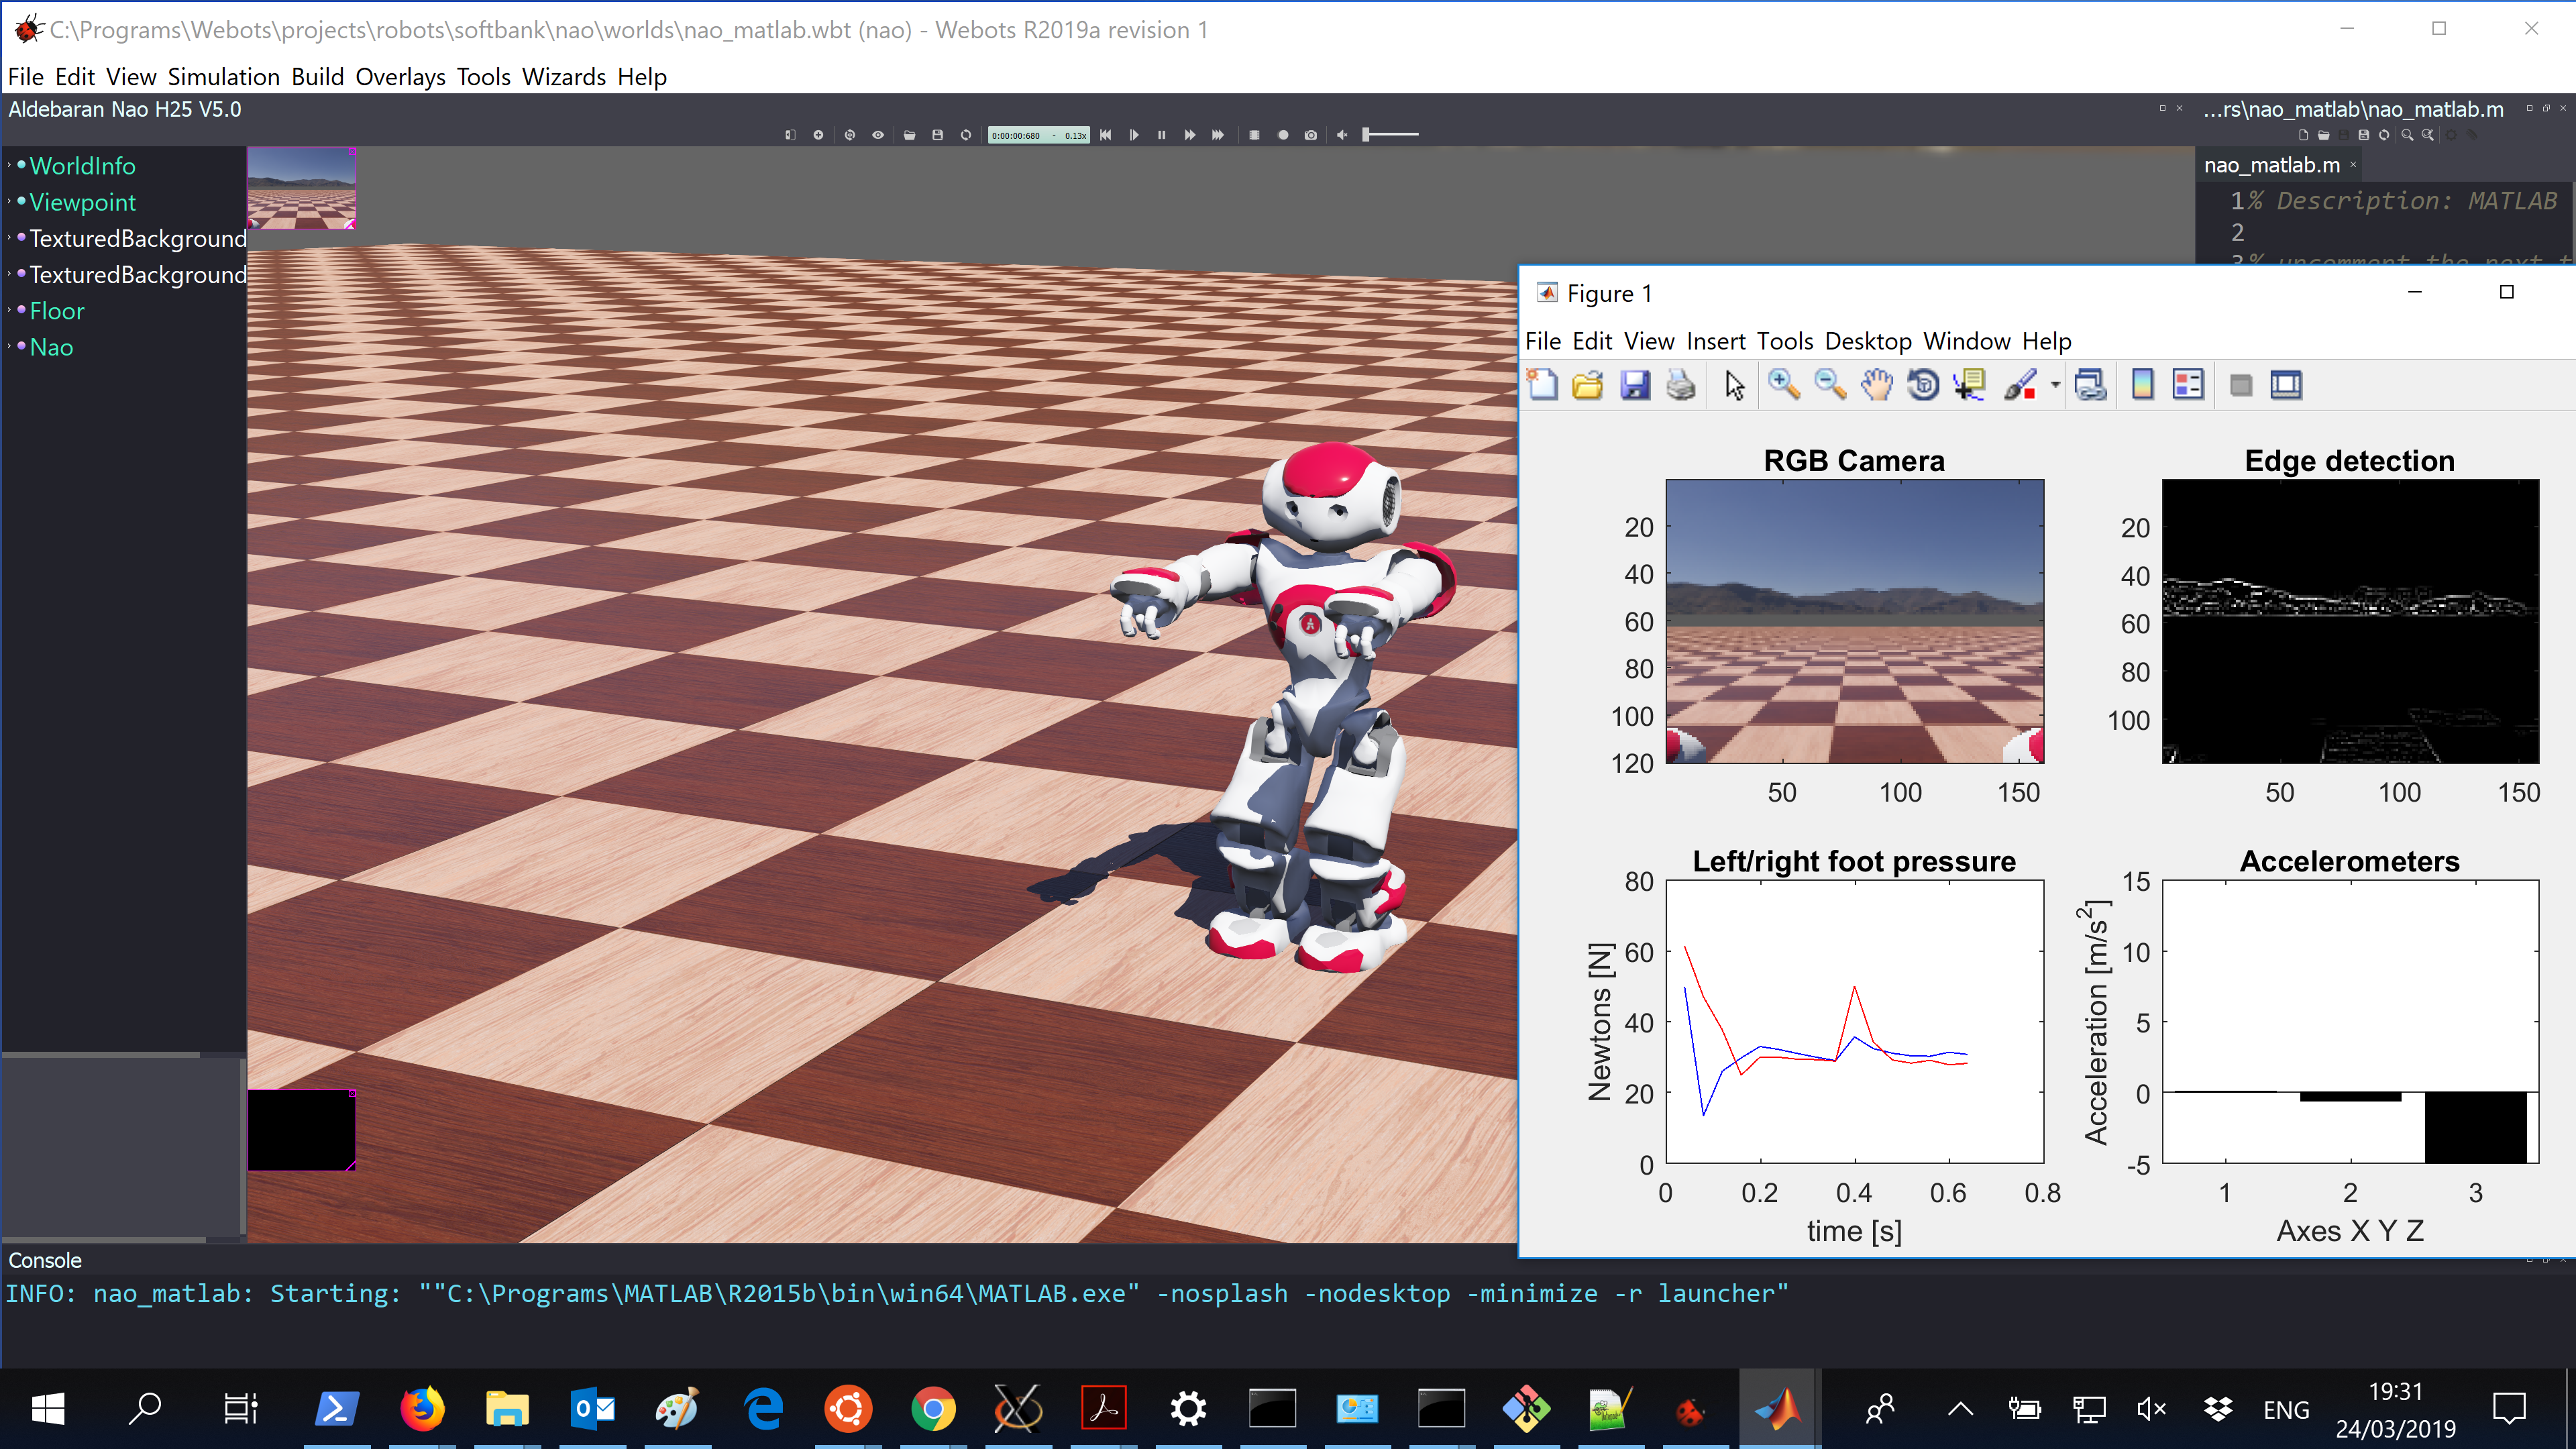
-
- Interesting for the workshop is the wikibook Robot Curriculum.
- Is starts getting interesting with Finate State Machine. The state machines are created in a graphical interface called BotStudio.
- The assignment equivalent with the Junior Rescue A is Line Following exercise.
- The assigment equivalent with the Junior Rescue B is Wall Following exercise.
- Once they introduced C and cross-compilation, they have the exercise to follow a coloured line
- At Intermediate level, they have Wall Following with inhibition, inspired by Brook's subsumption architecture.
- The advanced level is quite advanced, introducing many state-of-the-art concepts in a single section. Interesting for rescue is the potential field and the recognition of landmarks (with backpropagation).
March 23, 2019
- Found out that #include cmath have to be done first in VS2017.
- Finally, I compiled urdfdom:
-- Installing: C:/packages/gz-ws/urdfdom/install/CMake/urdfdom-config.cmake
-- Installing: C:/packages/gz-ws/urdfdom/install/lib/urdfdom_modeld.lib
-- Installing: C:/packages/gz-ws/urdfdom/install/lib/urdfdom_modeld.dll
-- Installing: C:/packages/gz-ws/urdfdom/install/lib/urdfdom_worldd.lib
-- Installing: C:/packages/gz-ws/urdfdom/install/lib/urdfdom_worldd.dll
-- Installing: C:/packages/gz-ws/urdfdom/install/bin/check_urdf.exe
-- Installing: C:/packages/gz-ws/urdfdom/install/bin/urdf_to_graphiz.exe
-- Installing: C:/packages/gz-ws/urdfdom/install/bin/urdf_mem_test.exe
-- Installing: C:/packages/gz-ws/urdfdom/install/lib/urdfdom_sensord.dll
-- Installing: C:/packages/gz-ws/urdfdom/install/lib/urdfdom_model_stated.dll
-- Installing: C:/packages/gz-ws/urdfdom/install/include/urdf_parser
-- Installing: C:/packages/gz-ws/urdfdom/install/include/urdf_parser/exportdecl.h
-- Installing: C:/packages/gz-ws/urdfdom/install/include/urdf_parser/urdf_parser.h
- Continue with step 11 of Install Gazebo on Windows: make gazebo.
- configure fails on cmake/SearchForStuff.cmake, on freeimage, protobuf and PkgConfig.
- Starting with pkg-config (should have done that earlier)!
- Yet, pgk-config depends on glib, which is slightly more difficult to cross-compile (and depends on many other packages). Yet, glib is intended to hide differences between different systems.
- glib is part of GTK, so I could try vcpkg approach.
- That works quite well, the result is quite impressive:
vcpkg install gtk:x64-windows
The following packages will be built and installed:
* atk[core]:x64-windows
* bzip2[core]:x64-windows
* cairo[core]:x64-windows
* dirent[core]:x64-windows
* expat[core]:x64-windows
* fontconfig[core]:x64-windows
* freetype[core]:x64-windows
* gdk-pixbuf[core]:x64-windows
* gettext[core]:x64-windows
* glib[core]:x64-windows
gtk[core]:x64-windows
* harfbuzz[core,glib,ucdn]:x64-windows
* libepoxy[core]:x64-windows
* libffi[core]:x64-windows
* libiconv[core]:x64-windows
* libpng[core]:x64-windows
* pango[core]:x64-windows
* pcre[core]:x64-windows
* pixman[core]:x64-windows
* ragel[core]:x64-windows
* zlib[core]:x64-windows
- As bonus, vcpkg installed several tools in C:\git\vcpkg\downloads\tools, such as cmake.
- vcpkg installed glib in C:\git\vcpkg\packages\glib_x64-windows. Cmake should be able to find it by the additional -DCMAKE_TOOLCHAIN_FILE=C:\git\vcpkg\scripts\buildsystems\vcpkg.cmake
- Still, the msvc_recommended_pragmas.h where missing, so cloned this version of glib, which had this file.
- Made pkg-config and put that in my environment environment. That works! Two libraries left to be found: freeimage and probuf.
- Added all the bin directories of the packages installed by vcpkg to my environment (personal, because system was full (max 2047 characters)).
- Could run pkg-config --modversion protobuf, but no protobuf.pc found. There is a protobuf.pc.ini in the downloaded protobuf-2.6.0-win64-vc12.
- The readme says that the protobuf contains everything needed when you give the command cmake -DPROTOBUF_SRC_ROOT_FOLDER=..\protobuf-2.6.0-win64-vc12, but in gazebo the FindProtobuf.cmake complains that it doesn't match v2.6.0.
- Went to the vcprojects directory and run command msbuild protobuf.sln /t:Rebuild /p:Configuration=Release /p:Platform="x64". That works mostly, only 4 errors (and 79 warnings).
- Main problem is that the solution expects a gtest directory next the vsprojects directory.
- At least x64\Release\protoc.exe is succesfull made.
- The directory already contained a working x64\Debug directory (and I just overwrote the Release). Yet, all important things (according to the readme.txt) are there: protoc.exe, libprotobuf.lib and libprotoc.lib.
- The ..\configure.bat complained about missing Protobuf_INCLUDE_DIR. Tried to repair that with a FindProtobuf.cmake, but to no avail. Instead explicitly defined set(Protobuf_INCLUDE_DIR ${gazebo_cmake_dir}/../../protobuf-2.6.0-win64-vc12/vsprojects/include/google/protobuf) in CMakelist.txt.
- The configure now continues much further, but still many errors left.
- Could have better have defined this in ..\configure.bat itself. Strange enough, this doesn't work.
- Updated ../configure.bat to point to the correct freeimage. The include file is found, but there are only obj, no libfreeimage.lib.
- FindProtobuf is finaly called, although there is an error at line 425 (searching for stub.h)
March 22, 2019
- Continued with Install Gazebo on Windows.
- The installation guide asked to use hg, but is not specific from which shell (mingw? - no, the installation starts with the recommendation to use Git bash).
- Installed Turtoise Hg 4.9.0.
- Found vcvarsall at C:\Programs\Microsoft\VisualStudio\2017\Enterprise\VC\Auxiliary\Build and C:\Programs\Microsoft\VisualStudio\2013\VC.
- Instead just used VS 2017 x64 Native Tools Command Prompt, which seems to work fine.
- Making ign-math goes well, configuring sdformat fails because it cannot find boost, etc.
- cmake in sdformat fails because it couldn't find ign-tools. Checked out ign-tools. Cmake creates an ALL_BUILD.vcxproj. Opened that project with VS2017, license is no longer valid, so called msbuild INSTALL.vcxproj from commandline. An install directory is made, with a bin\ign and a lib\cmake\ignition-tools\ignition-tools-config.cmake.
- Did my best to specify where the ignition-tools-config.cmake could be found, but on the end I had to specify the ign-tools\install\bin in my Environment variables, and the ignition-tools-config.cmake was found.
- Boost seems only a library and include files, adding BOOST_ROOT to the environment variables didn't help. No boost-config.cmake as far as I see.
- Downloaded urdfdom. cmake fails on missing TinyXML.
- Was able to make TinyXML from the version with CMakelists.txt.
- In urdfdom I had to specify manually >cmake .. -DCMAKE_INSTALL_PREFIX=..\install -DTinyXML_LIBRARY=..\..\tinyxml\install\lib -DTinyXML_INCLUDE_DIR=..\..\tinyxml\install\include. Still, urdfdom-headers are missing.
- Should also look at this discussion.
- Cloned urdfdom-headers.
- Created a Findurdfdom_headers.cmake from FindTinyXML.cmake. This works with command cmake .. -DCMAKE_INSTALL_PREFIX=..\install -DTinyXML_LIBRARY=..\..\tinyxml\install\lib -DTinyXML_INCLUDE_DIR=..\..\tinyxml\install\include -Durdfdom_headers_DIR=..\..\urdfdom_headers\install.
- Yet, urdfdom has another dependency: console_bridge. Downloaded in from console_bridge. Directly compiles, and creates bin, lib, include and CMake files. Adding this bin-path to environment variables finishes the cmake. Unfortunatelly, msbuild INSTALL.vcxproj fails because the urfdom_headers are not defined.
March 21, 2019
- The Turtlebot gave now the correct topics when queried by rostopic list.
- Continued with next Matlab tutorial. Did a >> rosinit(ipaddress). Received the correct response: Initializing global node /matlab_global_node_35420 with NodeURI http://localhost:9423/. Also saw the same topics with >> rostopic list.
- The tutorial could also be run from a Live script by the command >> openExample('robotics/TurtleBotCommunicationExample').
- Because I was already connected, I had to do rosshutdown first.
- All commands seem to work, yet the robot doesn't move.
- When I check >> /topic info /mobile_base/commands/velocity, I am missing the mobile_base_nodelet_manager as publisher.
- My Gazebo had already aborted a module (OgreRenderSystem), because a new DepthBuffer was not compatible with that RT.
- Fresh start, no core-dump, and when I keep on running the section with line 7: >> send(robot,velmsg); the robot actually moves.
- The ros-code of Matlab robotics toolbox can be found at C:\Programs\MATLAB\R2018b\toolbox\robotics\ros.
- Octave had a package based on Peter Corke's Robotics toolbox, which is not the same as Matlab's Robotics toolbox. Checked Peter's manual, and there is no ros interface in his toolbox.
- Packages in Octave seem to be installed in share\octave\packages\. Packages are managed from the Octave command line with command pkg install image-1.0.0.tar.gz. One of the default packages is control, another relevant one is quaternion. Copied ros-directory to packages directory. THat doesn't work, it is not visible in the package list.
- To Create a package, the directory should have at least a description and a copying file.
- Created a Octave-package, only received a warning: "doc_cache_create: unusable help text found in file 'rostype'". Yet, it failed directly on call >> rosinit(ipaddress) with "error: 'rosinit' undefined near line 1 column 1". Doing >> pkg load ros helps. Yet, calling rosinit gave the error "warning: the 'convertStringsToChars' function is not yet implemented"
- The command which convertStringsToChars shows that this file is located in toolbox\matlab\strfun.
- Made a strfun packages, but still the package is pointing to error: invalid call to script C:\Programs\Octave-5.1.0.0\mingw64\share\octave\packages\strfun-2.1.0\convertStringsToChars.m. So loading is OK, variable argument seems to be the problem.
- Octave can handle variable arguments, the problem was that convertStringsToChars.m only contained the help-information. Could find the compiled code. Created a function that the conversion. Results were Exception on calling into the ros.robotics namespace (something Octave doesn't have).
-
- Continue with the Live Script of Test Robot Autonomy in Simulation.
-
- First trying Install Gazebo on Windows.
- I have already cmake version 3.11, so I didn't download version 3.14.
- Ruby wasn't installed yet, so I am downloading Ruby+Devkit 2.5.3-1 (x64).
- There are also a number of more recent libraries available under gazebo windows dependencies.
- That was needed, because qt and protobuf were no longer available. Downloaded instead protobuf-2.6.0-cmake3.5-win64-vc12 and qt-opensource-windows-x86-msvc2015.
- Extracted Qt to C:\Qt\5.7.0\x64\msvc2015\.
March 20, 2019
- Masuru gave a demonstration of Scratch 3.0 to ROS demonstration of the turtlebot. The code is tested under ROS Kinetic. My Ubuntu for Windows is still Xenial (16.04), so would work with ROS Kinetic. My Linux workstation is still Trusty (14.04). Installed sudo apt-get install ros-kinetic-ros-base at my UfW. Continued with sudo apt install ros-kinetic-rosbridge-server and sudo apt install ros-kinetic-turtlesim ros-kinetic-actionlib-tutorials.
- Couldn't use roslaunch, because there was a conflict between catkin and ros-kinetic-catkin. Removed the ros-base and installed sudo apt-get install ros-kinetic-desktop.
- Also looked at ROS for Windows instructions (which installed ros-melodic-desktop-full). In addition Jan Bernlöhr used the -y option for apt install, and did a sudo rosdep init, followed by a rosdep update. Problem was not the installation, but that I didn't call source /opt/ros/kinetic/setup.bash.
- Finally could do roslaunch rosbridge_server rosbridge_websocket.launch.
- Next in the ROS for Windows the launch of turle_sim.
That works (do not forget the trick to switch off the OpenGL option).
- Moving the robot around with rosrun turtlesim turtle_teleop_key, but when I use the keyboard in scratch-gui (didn't work in Mozilla, worked in Chrome) I get a lost connection warning:


-
- Continued with Matlab interface to a Simulated TurtleBot.
- When I checked the command rostopic list, I received other topics than listed on the Matlab page:
/turtle1/cmd_vel
/turtle1/color_sensor
/turtle1/pose
/turtle2/cmd_vel
/turtle2/color_sensor
/turtle2/pose
- Yet, I had to follow the instructions from Gazebo bringup Guide and install sudo apt-get install ros-kinetic-turtlebot-gazebo to do roslaunch turtlebot_gazebo turtlebot_world.launch
- Launch failed on missing variable, but export TURTLEBOT_GAZEBO_WORLD_FILE=/opt/ros/kinetic/share/turtlebot_gazebo/worlds/playground.world solved this. Gazebo started the simulation, but the world stayed black. Maybe waiting on building the model database, but it takes really a long time. I should have been patient, after a few minutes the playground appears:
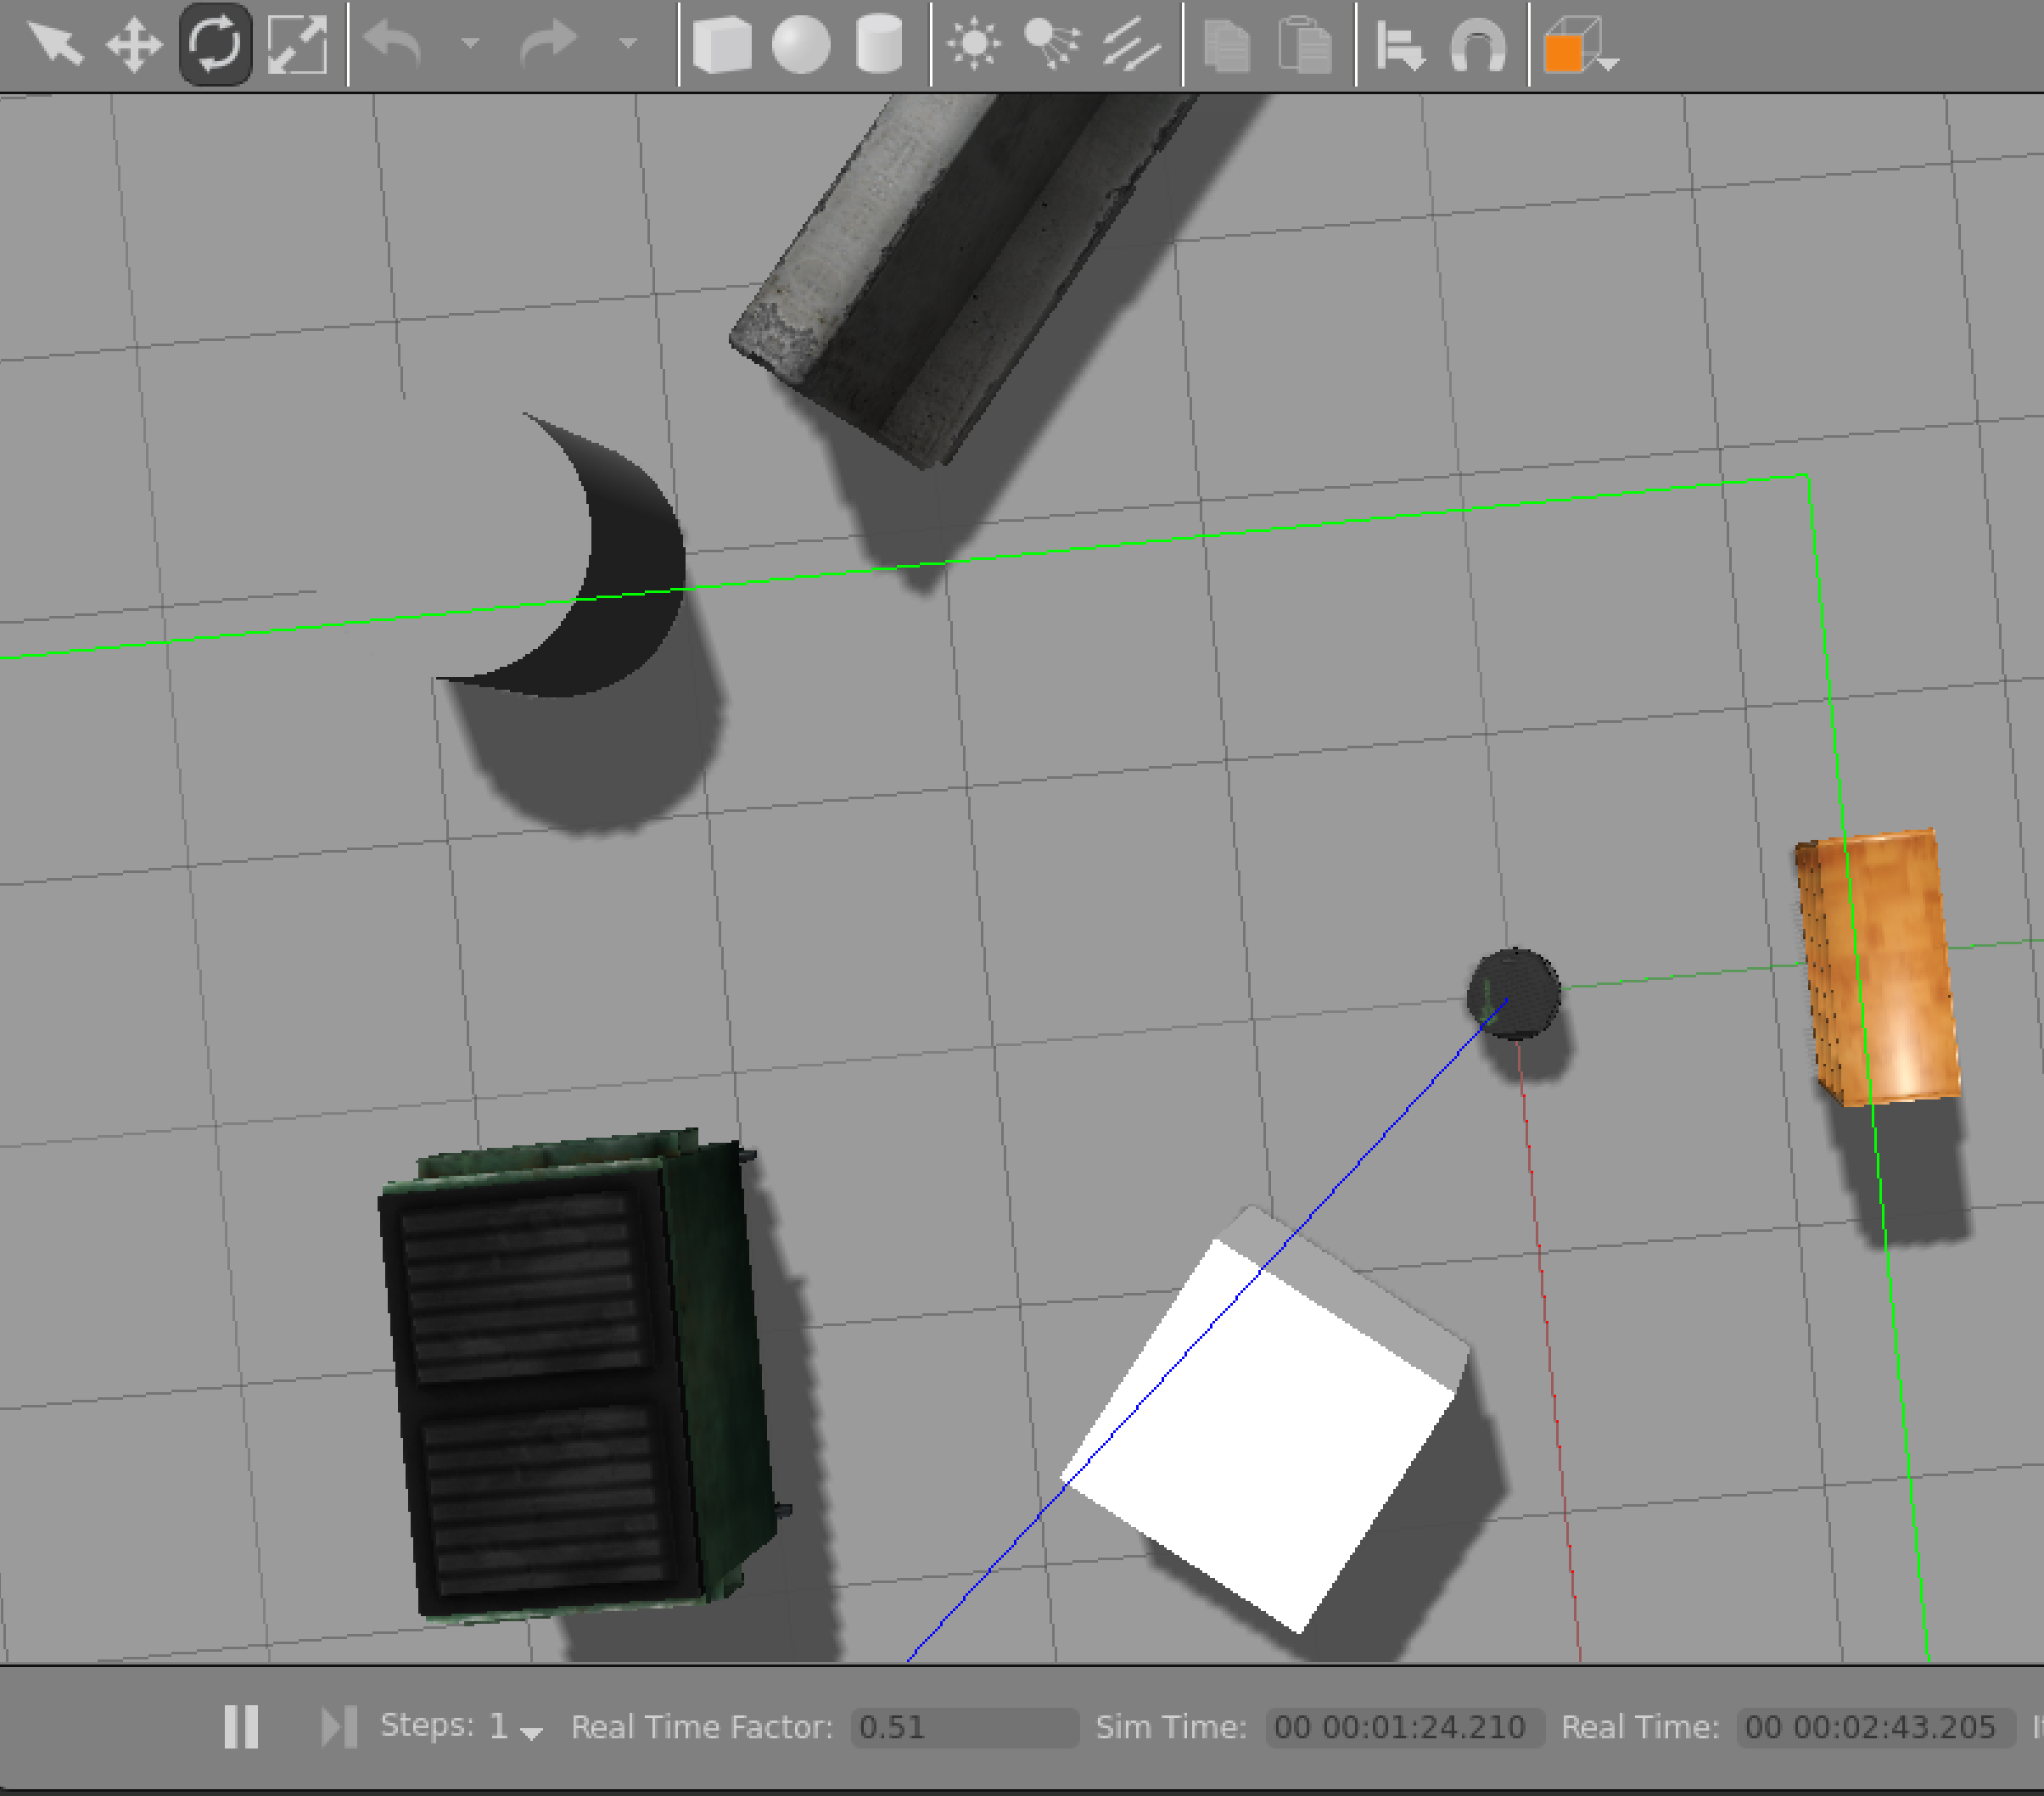
- Continue with Explore the Gazebo world, although probably better under native Linux.
February 4, 2019
- It is correct that sudo apt-get install ros-kinetic-smach doesn't work, for Kinetic (and newer) installation is via git clone.
January 16, 2019
- Activated my RoboCup 2019 license from Matlab. Version R2018b works again (on nb-real ubuntu).
Labbook 2018
Labbook 2017
Labbook 2016
Labbook 2015
Labbook 2014
Labbook 2013
Labbook 2012
Labbook 2011
Labbook 2010
Labbook 2009
Labbook 2008
Labbook 2007
Labbook 2006
Labbook 2005
Labbook 2004


 .
.


 Sensors that return dynamic results are:


 .
.


