Introduction
The following tutorial will show how LabWindows/CVI
can be used to build Windows applications. CVI is specially designed to
direct equipment (e.g. in your lab) with a computer.
The different windows of CVI will be introduced
Project
Window
The first window that appears after launching CVI,
is the project window. If this is the first time CVI
was launched it will open a blank screen, otherwise it will open the last
edited project.

The project window
In the project window you can find all relevant
files for your project. For your C-code en headers
there are ordinary .c
en .h
files. There are also new types of files, among them there's the .uir
file. This is a user interface resource file. This file contains
the information about the appearance of your programs windows, the so-called graphical
user interface (GUI). You can create new files
via the File New
menu. After you've created them you have to add them to your project. This
can be done via the Edit
Add files to project menu.
User
Interface Editor
When you create a new UIR file,
CVI automatically opens the user interface editor.
In this window you can create your own user interface. The first thing
to do is to create a panel (a basic window), by clicking on Create
Panel.
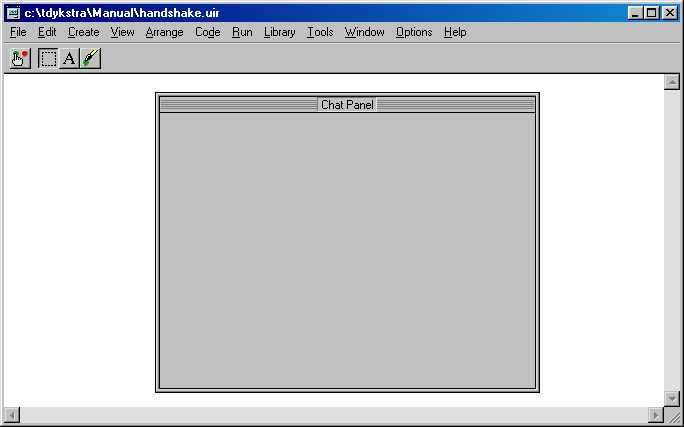
And there was a panel...
In this panel we can create objects called controls.
With these controls the user can feed information into the program (e.g.
change parameter values) or the program can display output (e.g. graphs).
You can find these controls in the Create
menu. There is also the possibility of making a menu bar for your application,
but we will not explore this option in more detail now.
We first have to give our panel a name for the obvious
reason that we want to be able to identify it in C-code.
By double-clicking on the panel, the window Edit
Panel appears.
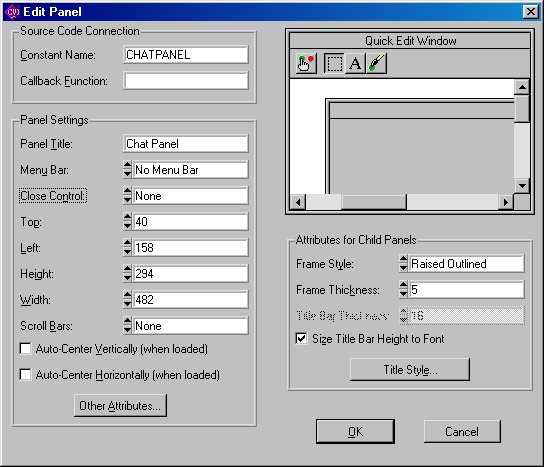
And he named it CHATPANEL...
As you can see we gave it the elegant name CHATPANEL,
this is the so called constant name used in the source code. In
the field Panel title
you can give you're panel a sensible title that will appear to future users.
There are numerous other things that can be edited but these are not important
(for now).
Adding Controls
After pressing OK
we're ready to add some controls to our panel. We will add two textbooks.
One for transmitting and one for receiving text. By double-clicking on
the control or selecting EditControl
(or double-clicking) we can alter the settings for the text box.
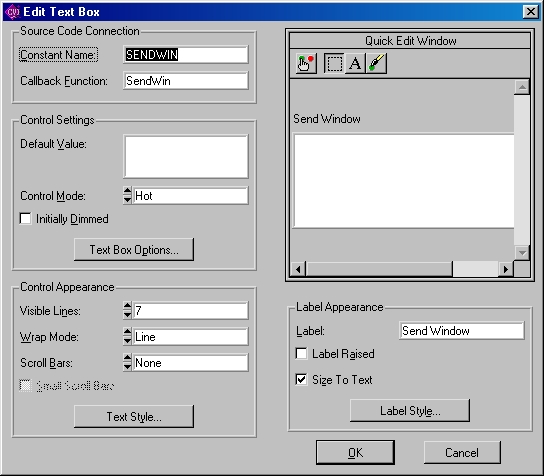
Adding controls
You can see that we've done three things; we have
given the window a label, a constant name and a callback
function. This callback function is very
important. It will be executed every time something happens to the window
(e.g. is clicked upon). We call this an Event.
To an event corresponds a constant of the form EVENT_XXX,
these are defined in
userint.h. So in the callback function
(we will write it in a moment) one can describe how the program must respond
when an event takes place. The receive
window will be a passive control (the
user can only view it) so it only needs a label and a constant name. For
making clear to CVI that the user can't do anything
but watch, we need to set the Control
Mode to Indicator.
Generating
callback functions
We will let CVI make a start with writing the callback
function by selecting the control and then Code
Generate Control Callbacks.
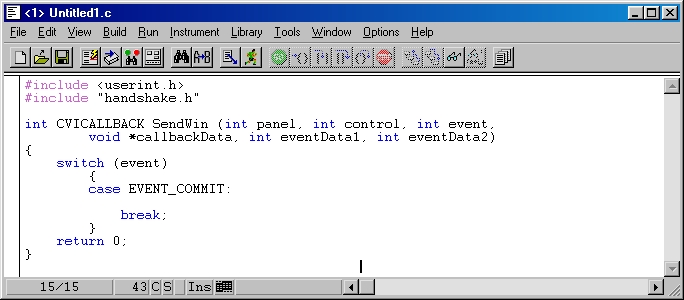
Code generated by CVI
We first save the file as handshake.c.
As you can see CVI has done a few things. Included
are userint.h
and handshake.h,
the first is a standard header file for CVI, the second
is the header file for your program and will be generated automatically
also when you save the .uir-file. The thing we wanted CVI
to do was, to generate the basis of the callback function SendWin.
The keyword CVICALLBACK
tells us, it is indeed a callback function. You can see CVI
has already made a choice for the arguments. Via the argument Event
one can tell which event took place at the control. So when, for example,
the user clicked the left mouse button on the Send window, the callback
function SendWin is called with the constant EVENT_LEFT_CLICK
as the event argument. We can now describe how our program has to respond
on different events using the switch
construction. The arguments panel
and control
contain the constant name of the active panel and control. The other arguments
contain more precise data on the event, which differs for different events.
Adding more
controls
We now add the remaining controls we want to use.
We need a timer, there exists a control that behaves as a timer.
This is a so-called multimedia timer. It is related to the system clock
of the computer, so it is not related to the UIB.
We need a control called a vertical pointer slide it enables us
to change a parameter in the program. Because it will stand for a delay
in seconds, we label it such. Also we give it a minimal and maximal value
and a smallest interval. Evidently it also needs a constant name and callback
function. Last but not unimportant we need a quit button. This is just
a command button with callback function Quit
and a label Quit.
A nice detail is the Close
Control option in the Edit
panel window. If we choose Quit,
the standard X button in the right corner of our window will call the same
function as our quit button. We will now generate the callback functions
for these controls also. Before we can do so, we have to set the target
file. So select Code
Set Target File and click on Handshake.c
after that select Code
Generate All Callbacks. We now have all
of the functions we need but one, the main function. In the main function
we will have to initialise and start the program, that means loading the
Panel and Controls. By selecting Code
Generate Main Function CVI
will generate the main function too.
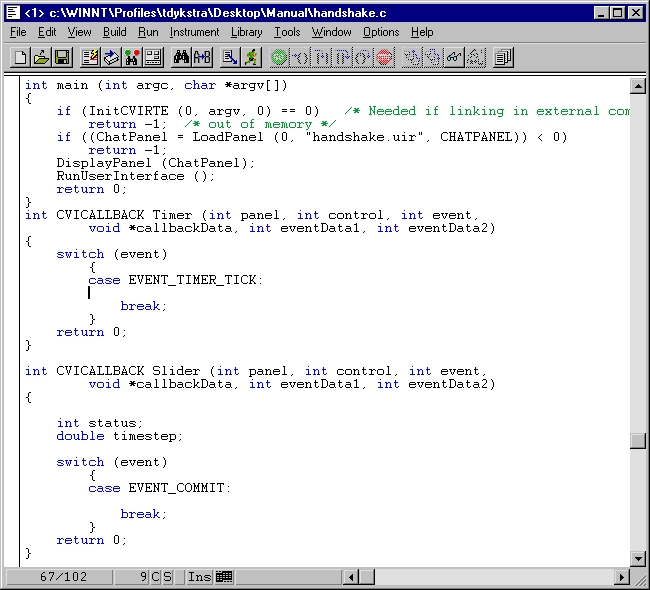
The skeleton of our program
We now have the skeleton of our program. We have
all the controls, a main function and callback functions all doing nothing.
We will now have to write the callback functions such, that the program
does what it has to do.
Designing the Chat program
Let us now think about what exactly we want our program to do. We want to communicate to another person on another computer via the ports of the PPI. We have no mutual clock to synchronise our communication, so we will us a so called handshake protocol. This means that the communication does not consist of steps with a fixed duration, but the process will only continue to the next step if both parties agree on the validity of the step. At first we will construct a program were the two parties have a fixed roll, we have a transmitter and a receiver. One can implement such a scheme by using two bits and a data bus (8 bits). The transmitter has a DATA bit and the receiver a BUSY bit. The bits are connected to a port (set for input) of the other party. At the beginning we have a neutral position, DATA and BUSY have value 0 (no data, not busy). If the transmitter wants to transmit something it will put the data on the bus and give his DATA bit value 1. Every once and a while the receiver party checks the status of the DATA bit of the transmitter. If the receiver detects DATA==1 it will read the bus and give his BUSY bit value 1, as a sign he got the data but isn't ready yet to get new data. Now the transmitter reacts to this by setting DATA to 0 and removing the data from the bus. If the receiver party is ready for new input it will set BUSY to 0. Now the cycle is complete and can begin again.
Implementing Ideas
How do we implement this in our program? We will first start to make things simpler by splitting the job in two. At first we will make two programs a receiving and a transmitting one. The receiver can forget about the SendWin control, and the transmitter about the slider, timer and receive window. (You can copy your .uir file, give it another name, and then remove (select &delete) all the controls you don't need for receive/transmitter).
The receiver side has to check at regular intervals
if our colleague on the other computer is sending something. That's where
we have the timer for. Its callback function is called at regular intervals,
so in that function we can implement our check. Also we want to (for didactical
reasons) have the ability to change the interval between two timer ticks.
That's where we have our slider for. Every time the value of the slider
is changed (the EVENT_COMMIT
happens) we want to adjust the tick time of timer. We can get the
value of a control with the function GetCtrlVal(panel,control,*value)
the value is stored in the address pointed to by *value.
Another thing we want to do is change certain attributes of controls (options
in the edit control window). This can be done with the function SetCtrlAttribute(panel,control,attrbt,attrbtvalue).
For example the timestep of the timer is an attribute of the timer with
the constant name ATTR_INTERVAL.
Now we can write our first complete callback function.
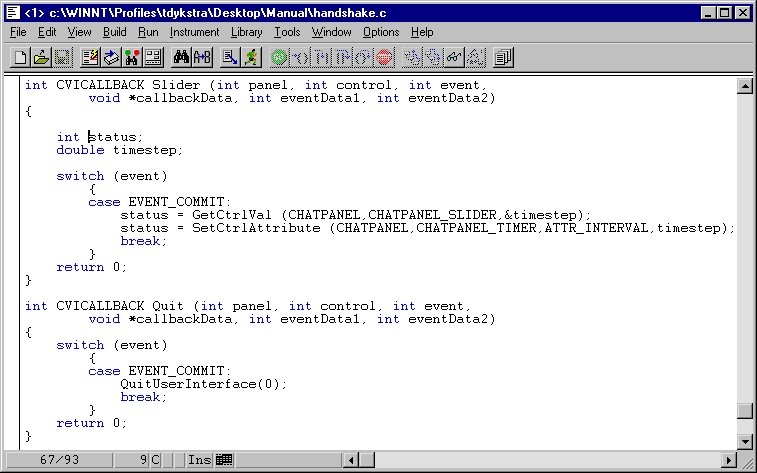
The callback function of the Slider
and Quit button
As you can see I've also finished the Quit callback function for you. All it does is that at EVENT_COMMIT (enter is pressed or the left mouse button is clicked) it will terminate the user interface. Now only two call back functions and the main function remain. The receiver has to write the timer callback function and the transmitter the one for SendWin. A few thing you'll have to know before you can start finishing the program. With the function SetCtrlVal(Panel,Control,String), where Control is the constant name for the textbox and Panel for our panel, you can write a String to the textbox. Getting text from a textbox is a little bit more complicated. The function GetTextBoxLineLength(Panel,Control,LineIndex,*length) will let you get the line length of line number LineIndex, GetTextBoxLine(Panel,Control,LineIndex,*DestinationBuffer) is used to get the line with LineIndex and put it in the buffer pointed to by *DestinationBuffer. A way to keep track of which line is already send is by declaring a static variable in the SendWin function that counts the number of lines that has been send.
If you're finished with this assignment, you may integrate the programs in to one that can work two ways. A few problems will arise. For example; what happens when both parties try to write at the same time?
The
Code Builder
When designing the callback functions you're using
the Code Builder. Under Build
you'll find the compile and build options. In the Run
menu you'll find means to add breakpoints, trace into, step over, etc.
Another way of adding and removing breakpoints is by clicking in the border
of the window on the line you want the program to break at. Just like in
most environments there are some handy tools. By selecting Window
Variables, Window Watch
you can access the variables and watch windows.
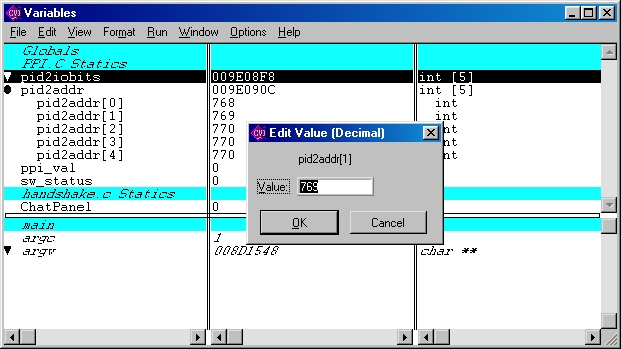
The variables window shows all the currently declared
variables, but the neat thing is that you can alter the contents of the
variables while the program is running by clicking on the variable name.
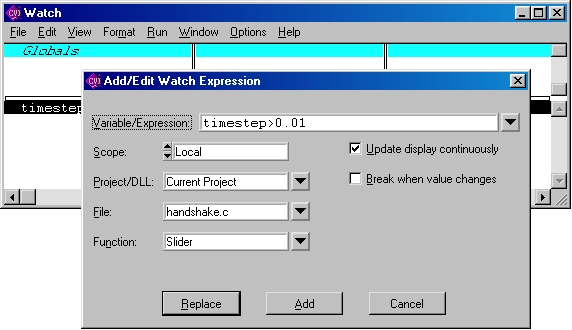
The watch window gives you the opportunity to monitor
the change of variables or expressions while stepping through the program.
Also you can add breakpoint depending on the value of an expression. For
the really lazy people among us (and the ones with bad memory) you can
insert a C construction (like switch, if, for, while, etc.) by clicking
on edit insert construct
and there's of course a help where you for example can find which arguments
a certain function has.
For suggestions contact: Tim Dijkstra, Last edited 6 march 2000.